What’s Inside
- The Kitchen Counter Push-Up (Beginner Workout At Home Essential)
- Couch Squats with a Heavy Backpack
- The Towel Row on a Sturdy Doorknob
- Water Jug Deadlifts for Glutes and Hamstrings
- Living Room Floor Planks (The Real Beginner Workout At Home Core Builder)
- Wall Sits While Waiting for Your Morning Coffee
- Staircase Calf Raises for Ankle Stability
- Soup Can Shoulder Presses for Deltoid Health
- Glute Bridges on the Living Room Rug
- Step-Ups on a Sturdy Dining Room Chair
- The Broomstick Torso Twist for Spinal Mobility
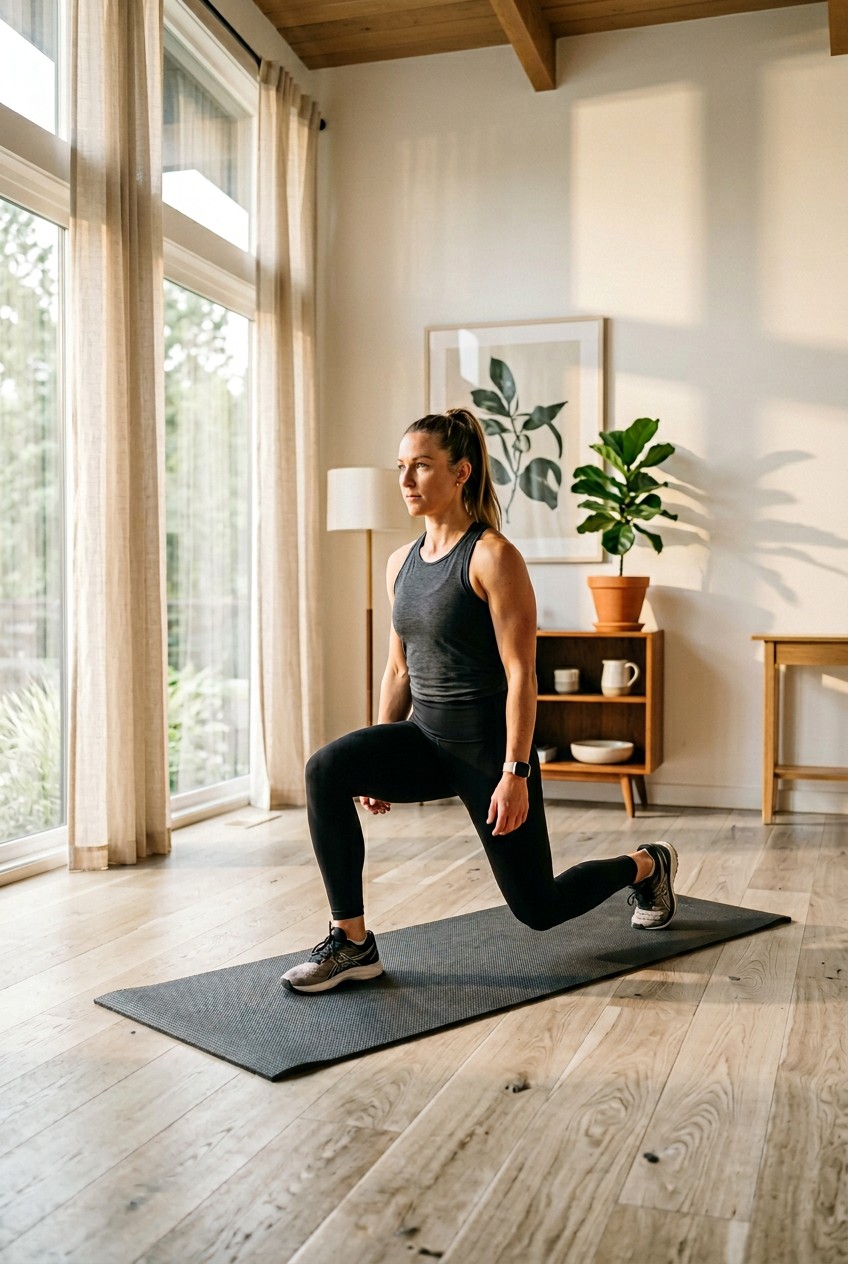
Last Tuesday at Walmart, I tripped over a $14.99 generic yoga mat that smelled like burnt tires and cheap plastic. It immediately brought back memories of my first home workout. I didn’t have a clue what I was doing. I spent hours staring at my living room floor, convinced I needed a fancy gym membership to get fit. I was dead wrong. You don’t need shiny machines or expensive subscriptions. You just need a plan and a few household items. I’m going to show you how I build routines for clients who refuse to step foot in a commercial gym. Let’s get one thing straight. These movements aren’t complicated, but they take effort. You’ll sweat. You’ll probably be sore tomorrow. But you won’t have to leave your house to get a fantastic pump. I’ve designed this beginner workout to hit every major muscle group using things you already own. Grab some water, clear a spot on your rug, and let’s get to work.
1. The Kitchen Counter Push-Up (Beginner Workout At Home Essential)

I swear by the kitchen counter for upper body strength. Most people get this wrong. They drop to the floor for standard push-ups, then fail after two reps. Their lower back sags like a wet noodle. I did this for months before figuring it out. The angle of a counter takes a massive amount of gravity out of the equation. Before you start, grab a bottle of Target’s Up&Up All-Purpose Cleaner ($2.69 for 32 oz) and wipe down the edge. You don’t want your hands slipping on leftover breakfast grease. I learned that the hard way when my hand slid on some butter and I face-planted into a cabinet door. Stand about three feet back. Place your hands slightly wider than your shoulders. Lower your chest until it touches the cold, hard bullnose edge. You’ll feel the stretch across your pectorals. Push back up forcefully. Keep your elbows tucked in at a 45-degree angle. Don’t let them flare like chicken wings. That’s a fast track to shoulder pain. Aim for 3 sets of 10 reps. If it’s too easy, take half a step backward. This adjustment shifts more weight onto your chest and triceps. It’s an effective way to build baseline strength without getting discouraged on day one.
2. Couch Squats with a Heavy Backpack

Squats are non-negotiable for leg development. But free-standing squats terrify new trainees. They worry about falling backward and cracking their head on a coffee table. That’s why the couch squat is perfect. You have a safety net catching your glutes. I use my beat-up navy blue Jansport SuperBreak backpack ($35.00) for this. Empty out the old receipts and laptops. Head to your pantry and grab 4 cans of Trader Joe’s Organic Black Beans (15 oz each, $1.29 per can). Drop them into the main compartment. Zip it up tight. Put the backpack on your chest, not your back. Wearing it on the front forces your torso to stay upright. If you lean too far forward, the weight pulls you off balance. Stand about six inches in front of your couch. Push your hips back like you’re trying to close a car door with your butt. Lower yourself slowly until your glutes touch the fabric. Don’t plop down and relax. I made this mistake early on. I’d sit down, lose all my core tension, and struggle to stand back up. The couch is just a tactile cue. The second you feel the upholstery, drive through your heels and stand tall. Squeeze your quads. Perform 3 sets of 12 reps. Your thighs will burn by the eighth rep. Front-loading the weight is the real secret.
3. The Towel Row on a Sturdy Doorknob

Pulling exercises are tough to replicate outside a gym. You can’t just wish for a cable machine to appear. I solved this using a thick bath towel and a solid wood door. Go to Costco and pick up a 6-pack of their Grandeur Hospitality Bath Towels for $22.99. They’re thick and won’t rip. Open your bedroom door. Wrap the towel around the exterior doorknob so you have two equal ends. Close the door completely. Make sure it clicks shut. Give it a hard yank to test it. I forgot to check the latch once. The door flew open, and I tumbled into a laundry basket. Not my proudest moment. Grab one end of the towel in each hand. Plant your feet near the base of the door and lean back until your arms are extended. The rough terry cloth gives you a great grip. Pull your chest toward the doorknob by driving your elbows back. Squeeze your shoulder blades together. Imagine trying to crush a walnut between them. Slowly extend your arms. Don’t just let gravity drop you. The negative portion builds serious muscle. Do 3 sets of 15 reps. Your lats will feel incredible. You might also like: 15 Brilliant Dark Basements Home Gym Setup Ideas Worth Trying This Year

NICEPEOPLE Adjustable Weight Bench for Home Gym
Honestly, NICEPEOPLE Adjustable Weight Bench for Home Gym surprised me — sturdier than it looks in the photos, and over 32 buyers gave it 4.5 stars.
4. Water Jug Deadlifts for Glutes and Hamstrings

The hip hinge is a fundamental movement. It’s also the one exercise my clients butcher the most. They try to squat the weight instead of pushing their hips backward. To learn the form, you need a visual aid and some cheap resistance. Drive over to Sprouts and buy two Crystal Geyser 1-gallon water jugs. They cost $1.49 each. A gallon of water weighs exactly 8.34 lbs. Holding one in each hand gives you nearly 17 lbs of resistance. That’s plenty for a beginner. Stand with your feet hip-width apart. Hold the jugs in front of your thighs. Keep your knees slightly bent but locked. Push your hips straight back toward the wall behind you. Keep the jugs sliding down your legs. They should brush against your shins. If they drift out over your toes, your lower back takes the load. I did this for a month and woke up with a stiff back every day. Stop lowering when you feel a deep stretch in your hamstrings. Usually, this happens at mid-shin level. Drive your hips forward to stand back up. Squeeze your glutes at the top. Shoot for 3 sets of 12 reps. Make sure the caps are screwed on tight. I spilled a gallon of spring water on my hardwood floor because I grabbed a loose cap. You might also like: 20 Inspiring Outfit Home Workout Ideas That Changed Everything
5. Living Room Floor Planks (The Real Beginner Workout At Home Core Builder)

Skip the hundreds of daily crunches. They just wreck your neck and give you terrible posture. The forearm plank is infinitely better for building a functional core. You’ll need a decent surface. Doing planks on bare hardwood is torture for your elbows. I use a Gaiam 6mm Premium Yoga Mat. I bought it at Whole Foods for $29.99. It has a textured surface that prevents your forearms from sliding when you start sweating. And you will sweat. Get down on the floor. Place your elbows underneath your shoulders. Extend your legs. Rest your weight on your forearms and toes. Here’s the secret sauce. Don’t just hang out. Actively pull your elbows toward your toes using the friction of the mat. You won’t move, but this isometric contraction lights your abs on fire. I used to just sag my hips and stare at my phone. It did nothing. Once I started creating full-body tension, a 30-second plank felt like an eternity. Keep your neck neutral by staring at a spot on the mat. Squeeze your quads and glutes. Breathe in through your nose and aggressively exhale through your mouth. Hold this for 3 sets of 30 seconds. You might also like: 15 Creative Workout Motivation Tips You Haven’t Thought Of
6. Wall Sits While Waiting for Your Morning Coffee

I’m a big fan of habit stacking. If you attach an exercise to a daily routine, you’re more likely to do it. Every morning, I wait four minutes for my coffee to brew. I use a 12 oz bag of Kroger brand Private Selection Ground Coffee ($7.49). It smells like dark chocolate and roasted nuts. While that aroma fills the kitchen, I find an empty stretch of drywall and do a wall sit. It requires zero equipment and destroys your quads. Lean your back against the wall. Walk your feet out about two feet. Slide down until your knees are at a 90-degree angle. Your thighs should be parallel to the floor. Most people cheat here. They stop a few inches high. Don’t cheat yourself. Sink down into the pocket. Keep your hands off your thighs. Crossing your arms is the best placement. I used to wear thick wool socks while doing these. My feet slid across the linoleum, and I ended up on my back. Now I do them barefoot. Press your lower back into the drywall. Hold for 45 seconds. By the time your coffee is ready, your legs will feel like lead.
Adjustable Weight Bench for Home Gym
Adjustable Weight Bench for Home Gym punches above its price — 517 buyers rated it 4.5 stars. I would buy it again.
7. Staircase Calf Raises for Ankle Stability

Calves are stubborn. They carry your weight all day, so they require high reps and deep stretches. The bottom step of your staircase is the ultimate calf machine. You don’t need special gear, but wear a decent pair of shoes. I usually wear my Nike Air Zoom Pegasus running shoes ($130.00). Doing these barefoot on a wooden step is a bad idea. The sharp edge of the stair tread will dig into the soft arch of your foot. I bruised my right arch once and walked with a limp for three days. Stand on the edge of the bottom step. Place only the balls of your feet on the wood. Let your heels hang off the back. Hold onto the banister for balance. Lower your heels toward the floor as far as they go. You want to feel a massive stretch up the back of your leg. Pause at the bottom for one second. Drive up onto your tiptoes as high as possible. Flex your calves hard. Don’t bounce. Bouncing relies on your Achilles tendon instead of the muscle fibers. Perform 3 sets of 20 slow, controlled reps. Your lower legs will feel tight and pumped.
8. Soup Can Shoulder Presses for Deltoid Health

Heavy overhead pressing isn’t necessary when you’re starting out. Focus on joint mobility and stability first. Grab two cans of Campbell’s Chunky Classic Chicken Noodle Soup (18.8 oz, $2.48 each) from Walmart. They weigh just over a pound each. It sounds light, but wait until you hit rep fifteen. Stand tall with your feet shoulder-width apart. Squeeze your glutes to lock your pelvis. Hold a soup can in each hand at shoulder height. Palms should face forward. Press the cans toward the ceiling. Fully extend your arms until your biceps are by your ears. Lower the cans slowly. Take three full seconds on the way down. The slow eccentric phase forces your shoulder stabilizers to work overtime. I used to rush overhead presses. I’d thrust the weight up and let it crash down. My rotator cuffs constantly ached. Slowing the tempo fixed the pain. Concentrate on the cold metal of the cans. Keep your wrists straight. Don’t let them bend back. Aim for 3 sets of 15 reps. If you don’t feel a deep burn in your shoulders by the final set, you’re moving too fast.
9. Glute Bridges on the Living Room Rug

If you sit at a desk all day, your glutes are asleep. They forget how to contract. The glute bridge wakes them up and counteracts the damage of a sedentary lifestyle. You’ll want a comfortable surface for your back. I do these on my Ruggable Kamran Rug ($199.00 for the 5×7 size). It provides just enough padding so my spine doesn’t grind against the floor. Lie flat on your back. Bend your knees and plant your feet on the rug. Bring your heels close to your glutes. Your fingertips should graze the back of your shoes. Push your lower back into the floor to neutralize your pelvis. Drive through your heels and lift your hips toward the ceiling. Squeeze your glutes violently at the top. Your body should form a straight line from your knees to your shoulders. I used to hyperextend my back on these. I’d push my hips ridiculously high, trying to increase the range of motion. It just caused spinal compression. Stop when your hips are fully extended. Hold the top for two seconds. Lower your hips slowly. Don’t let your knees cave inward. Push them slightly outward. Complete 3 sets of 15 reps.

FitinOne Adjustable Folding Weight Bench for Home Gym
FitinOne Adjustable Folding Weight Bench for Home Gym has been one of the most consistently praised picks in this category. 744 reviewers averaged 4.5/5.
10. Step-Ups on a Sturdy Dining Room Chair

Unilateral leg training is crucial. It fixes strength imbalances between your left and right sides. The step-up is my favorite way to train one leg at a time. You need a rock-solid piece of furniture. I use an IKEA Stefan solid wood chair ($35.00). Do not use a folding chair or a cheap plastic patio chair. I tried stepping up onto a weathered plastic chair at a barbecue years ago. The plastic cracked, the leg buckled, and I scraped my shin from knee to ankle. Embarrassing and painful. Place the chair against a wall so it can’t slide. Stand facing the seat. Place your right foot on the chair. Your entire heel must be on the wood. Drive through that right heel and stand up. Bring your left foot up to tap the seat, but don’t rest your weight on it. Slowly lower your left foot back to the floor. The descent should take three seconds. Keep your chest up and shoulders pulled back. If you lean forward, your lower back takes over. Perform 10 controlled reps on your right leg, then switch. That’s one set. Do 3 sets total. This will spike your heart rate and build functional leg strength quickly.
11. The Broomstick Torso Twist for Spinal Mobility

We spend too much time moving forward and backward. We walk forward. We sit facing forward. We rarely rotate our spines. This leads to stiff mid-backs and tight obliques. You can fix this with a simple cleaning tool. Go to your utility closet and grab an O-Cedar Heavy Duty Corn Broom. You can buy one at Target for $15.98. The rough wooden handle is perfect for this. Sit on the edge of a chair with your feet planted. Place the broomstick across the back of your shoulders. Don’t rest it on your neck. It should sit on your upper trapezius. Drape your arms over the stick. Keep your hips locked facing forward. Slowly twist your torso to the right as far as you can. You’ll feel a deep stretch in your ribcage and obliques. Pause for a second, then rotate to the left. I used to do these standing up and twisting violently. It felt like I was swinging a baseball bat. That’s a terrible idea. It puts dangerous shearing forces on your lumbar spine. Sitting down locks your pelvis and isolates the rotation to your thoracic spine. Perform 20 slow, controlled twists. It’s the perfect cool-down.
Honestly, you don’t need a gym to get in the best shape of your life. Stick to these basics, focus on your form, and stay consistent. Pin this guide so you can pull it up during your next workout. I’m telling you, this routine works. No exaggeration. Now go clear some space in your living room and get moving!
Frequently Asked Questions
How often should I do a beginner workout at home?
I recommend doing this routine three times a week. Your muscles need time to recover and rebuild. Rest days are when the actual muscle growth happens, so don’t skip them.
Do I need to buy dumbbells for a beginner workout at home?
You don’t need dumbbells right away. Household items like water jugs, heavy backpacks, and soup cans provide plenty of resistance to build baseline strength during your first few months.
How long should a beginner workout at home take?
A solid beginner routine should take about 30 to 45 minutes. This gives you enough time to warm up, complete three sets of each exercise, and cool down without feeling rushed.
Can I lose weight with a beginner workout at home?
Absolutely. Building muscle increases your daily calorie burn. Combine these home exercises with a protein-rich diet and consistent hydration, and you’ll definitely see changes in your body composition.