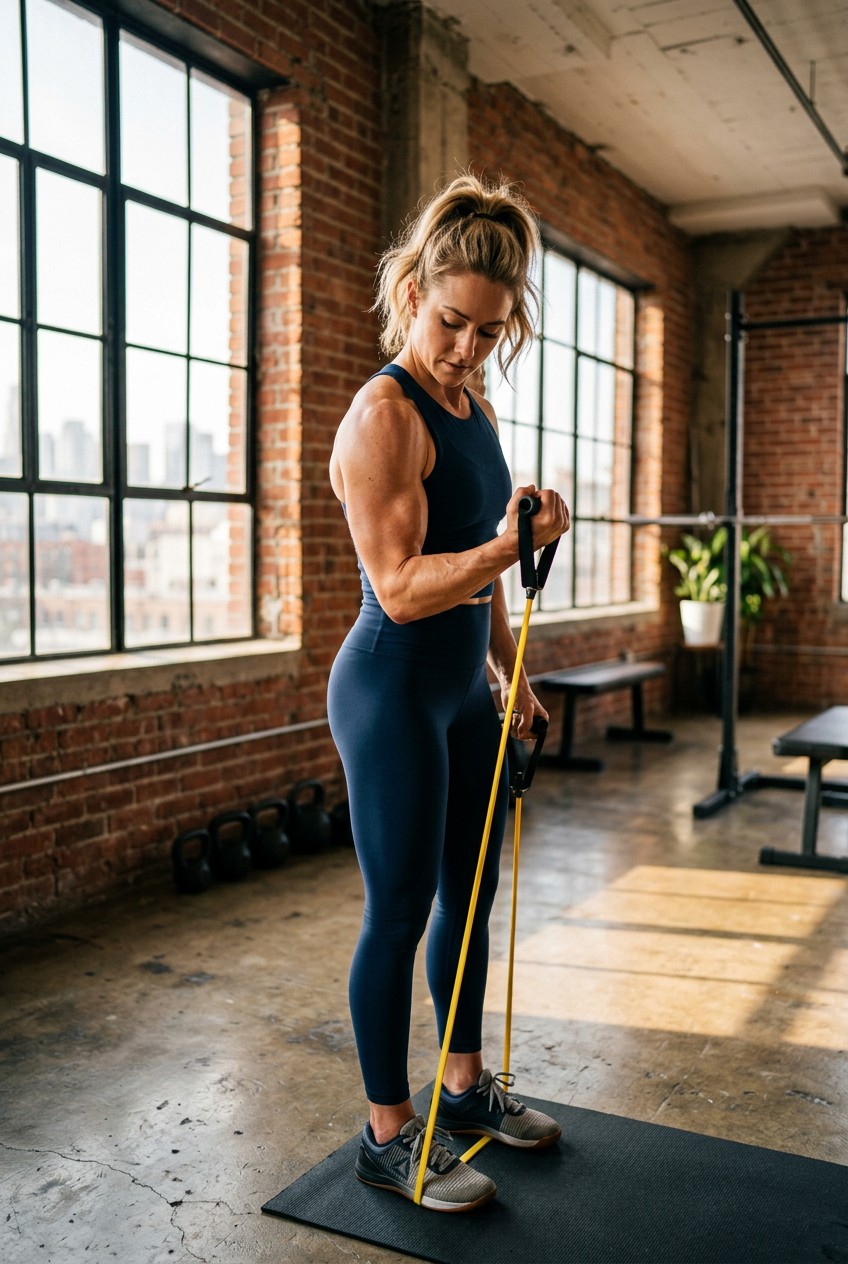
What’s Inside
- Invest in a Quality Set for Your Resistance Band Workout
- Understand Band Types: Loops vs. Tubes
- Master Progressive Overload with Bands
- Avoid Choosing the Wrong Resistance
- Prioritize Constant Tension for Maximum Engagement
- Don’t Overstretch Your Bands
- Use Bands for Injury Prevention
- Incorporate Eccentric Control in Your Resistance Band Workout
- Boost Core Strength with Targeted Exercises
- Consider Fabric Bands for Comfort and Durability
I was standing in a cramped hotel room in Chicago last November, trying to finish my usual resistance band workout. The air conditioner rattled loudly in the corner. I hooked a cheap, thin rubber band around the bathroom doorknob for a chest press. I took two steps forward, leaned in, and pushed. The band snapped with a loud crack, whipped across my collarbone, and left a raised red welt that stung for three days. It looked like I’d been hit with a tiny whip. That was my wake-up call. I realized I was treating band training like a joke instead of actual resistance training. I threw that flimsy piece of garbage in the trash right there. Over the past few years, I’ve overhauled how I use these things. I’ve learned that a proper routine can wreck your muscles if you stop treating it like a warm-up afterthought. Here are the methods I use to build real strength without stepping foot in a commercial gym.
1. Invest in a Quality Set for Your Resistance Band Workout

I used to buy those generic, unbranded plastic tubes from Target. They always smelled like cheap tires and felt sticky after two weeks. If you want a resistance band workout that actually builds muscle, you need a proper set. I swear by the Fit Simplify Resistance Loop Bands. You get a set of 5, ranging from extra light to extra heavy, for exactly $12.95 on Amazon. They’re flat, continuous loops made of natural latex. The 12-inch by 2-inch loops fit perfectly in my gym bag. The extra heavy black band actually provides enough tension to make my glutes burn during squats. I also keep a Bodylastics Resistance Bands Set at home. It costs $49.95 and comes with handles, ankle straps, and a door anchor. The beginner set offers up to 96 lbs of tension. The nylon handles on the Bodylastics set have a rough, textured grip that doesn’t slip when your palms get sweaty. I made the mistake of trying to save a few bucks at Walmart once and bought a single 15 lb tube band. It didn’t provide enough tension for rows and was too heavy for lateral raises. Having a full set means you can actually apply progressive overload. You wouldn’t go to the gym and only use 10-pound dumbbells for every exercise. Treat your bands the same way.
2. Understand Band Types: Loops vs. Tubes

Most people get this wrong. They buy one type of band and try to force it to do everything. Loop bands are flat, continuous circles. Tube bands are cylindrical rubber cords with handles attached to the ends. I bought a set of Spri tube bands for $24.99 at Sprouts last year thinking they’d replace my loops. Nope. Tube bands are great for upper body isolation. The plastic handles let you grip hard for bicep curls and shoulder presses without the rubber digging into your skin. But try doing a heavy squat with a tube band. The handles awkwardly dig into your shoulders, and the cylinder shape rolls under your sneakers. It feels terrible. Loop bands are much better for full-body movements and mobility. I use a heavy green Rogue Monster Band ($19.50) for assisted pull-ups. The flat surface distributes the pressure across my shoe sole perfectly. If you can only afford one, get loop bands. They’re infinitely more versatile. You can wrap them around a pole, step on them, or loop them around your knees. Just don’t expect them to feel as comfortable in your bare hands during a heavy chest press. The raw rubber edges will bite into your palms. Trust me.
3. Master Progressive Overload with Bands

You won’t build muscle if you just do 10 reps of everything forever. A 2019 meta-analysis showed that band training promotes similar strength gains to free weights, but only if you actually force the muscles to adapt. I learned this the hard way. I spent three months doing 15 squats with a blue heavy Theraband ($14.99 at Kroger) and wondered why my legs looked exactly the same. I wasn’t challenging myself. To build strength, you must increase the tension. You can do this by standing further away from the anchor point. Just taking one step back adds significant resistance. You can also add more reps. If you hit 10 squats with a medium band, push it to 12 or 15 reps next time. Once you hit 20 reps and it feels easy, grab a heavier band. I recently upgraded my glute bridges. I lay on the floor, wrapped the bands just above my knees, and pushed my hips up for 15 reps. I was using a 20 lb resistance band. It got too easy. I didn’t own a heavier one, so I just stacked a 10 lb band and the 20 lb band together. Boom. Instant 30 lbs of tension. Your muscles don’t know if you’re holding a dumbbell or stretching rubber. They only know tension. Make sure that tension keeps going up over time. You might also like: 15 Beautiful Photoshoot Home Workout Ideas to Steal Right Now
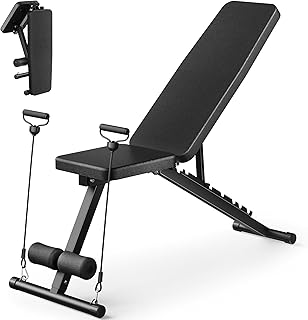
Adjustable Weight Bench for Home Gym
A dependable everyday pick — Adjustable Weight Bench for Home Gym pulls in 517 ratings at 4.5 stars. Not flashy, just solid.
4. Avoid Choosing the Wrong Resistance

Ego lifting with bands is a real thing. I see guys at the park trying to do lateral raises with a thick, 50 lb black loop band. They end up shrugging their shoulders up to their ears and violently jerking their torsos backward. It looks ridiculous. A band that’s too heavy destroys your form and wrecks your rotator cuffs. On the flip side, a band that’s too light won’t do anything but give you a mild pump. I bought a cheap pack of mini bands at Whole Foods once for $9.99. The heavy band was so flimsy I could stretch it a full three feet with two fingers. I tried to use the medium band for clamshells, and it just folded over itself. It was completely useless for squats. Start with a moderate resistance. You want a band that lets you complete 8 to 12 controlled repetitions with perfect form. The last three reps should feel like your muscles are burning, but your posture shouldn’t break. If you start shaking uncontrollably on rep four, drop the ego and grab a lighter band. I keep a light red Gymreapers loop band ($14.99) specifically for warm-ups and small shoulder movements. It provides just enough bite without forcing me to break form. You might also like: 20 Beautiful Home Gym Setup Ideas That Changed Everything
5. Prioritize Constant Tension for Maximum Engagement

Free weights have a flaw. Gravity only pulls straight down. When you do a dumbbell bicep curl, there’s zero tension at the very top of the movement. The dumbbell is just resting on your joints. Resistance bands fix this. They provide continuous tension throughout the entire range of motion. But you must use them right. If the band goes slack at the bottom of your bicep curl, you’re resting. You aren’t challenging the muscle. I used to let my bands go completely limp between reps. I’d hear that distinct snap sound as the rubber caught tension again on the way up. That snap means you lost the muscle engagement. I fixed this by stepping slightly wider on the band to shorten it. Now, even at the bottom of the curl, the band is pulled tight. The rubber feels taut and vibrates slightly. My biceps are screaming by rep eight. I use a purple 35 lb TRX Bandit band ($29.95) for these. The Bandit has these ergonomic plastic handles that slide into the loop bands, preventing the rubber from digging into my hands. I step on the middle with feet shoulder-width apart. I keep my elbows glued to my ribs. The constant pulling sensation forces blood into the muscle faster than any dumbbell I’ve ever used. Keep the band tight. Never let it sag. You might also like: 15 Creative Workout Motivation Tips You Haven’t Thought Of
6. Don’t Overstretch Your Bands

I mentioned snapping a band in my face earlier. That wasn’t just because it was cheap. It was because I overstretched it. Rubber has limits. As a general rule, you shouldn’t stretch a standard 41-inch loop band past 1.5 to 2 yards. Mini bands shouldn’t stretch past 2 to 3 feet. If you’ve got to stretch the band that far to get a good workout, you don’t need to stand further back. You need a heavier band. I ruined a perfectly good set of $35 Undersun Fitness bands because I was trying to do overhead presses by standing on the band and pressing it straight up. I’m 6’2″. Stretching a band from the floor to above my head was pushing it way past its structural limit. The rubber turned white in the middle, got thin, and developed tiny micro-tears that looked like dry rot. It looked like stretched-out bubblegum. Once a band gets those white stress marks, it’s done. Throw it away before it snaps and takes out an eye. No exaggeration. Now, I use a door anchor for overhead presses. I attach my GoFit resistance tube ($19.99 at Target) to the bottom of the door. This cuts the stretch distance in half and saves my equipment.

Pull Up Bands, Resistance Bands
Pull Up Bands punches above its price — 6 buyers rated it 4.5 stars. I would buy it again.
7. Use Bands for Injury Prevention

I tweaked my right shoulder doing heavy bench presses a few years ago. I couldn’t press a 20 lb dumbbell without a sharp, stabbing pain in my front delt. My physical therapist didn’t give me painkillers. She handed me a flimsy yellow resistance band that smelled strongly of baby powder. Physical therapists love these things because they provide gentle, adjustable tension that doesn’t crush your joints. I started doing daily external rotations and face pulls with a Theraband CLX ($18.50). The CLX has built-in loops so you don’t even have to grip it. I’d loop it around my wrists and pull my hands apart. The tension is smooth. It doesn’t jerk your joints around like a cable machine can. It targets those tiny, stabilizing rotator cuff muscles that big heavy lifts completely ignore. Within four weeks, the stabbing pain was gone. I still use that yellow band every single upper body day. I tie it to the squat rack and do 15 reps of face pulls before I even touch a barbell. It warms up the synovial fluid in the joints. If your knees are cranky or your shoulders are clicking, stop ignoring them. Grab a light band and do some high-rep stability work.
8. Incorporate Eccentric Control in Your Resistance Band Workout

The most important part of a resistance band workout isn’t the pulling. It’s the letting go. The eccentric phase is when the muscle lengthens under tension. This is where most muscle damage—the good kind that leads to growth—happens. When you stretch a band, it desperately wants to snap back to its original shape. If you just let it pull your arm back down, you’re wasting 50% of the exercise. I catch my clients doing this all the time. They yank the band up for a row, then let their arms fly forward with a loud thwack. I force them to count to three on the way down. Try this with a heavy back row. Wrap a 50 lb SPRI Superband ($24.98) around a sturdy post. Pull it to your chest hard. Now, slowly let your arms straighten out over three full seconds. You’ll feel the rubber fighting you. The band will physically shake as your lats struggle to control the retraction, vibrating all the way down to the anchor point. It hurts, but it works. Eccentric control builds dense, thick muscle and creates incredible joint stability. Don’t just pull the band. Fight it on the way back down. Every single rep.
9. Boost Core Strength with Targeted Exercises

Crunches are garbage. They wreck your lower back and barely engage your deep core muscles. If you want a strong core, you need to resist rotation. This is where bands shine. My absolute favorite core exercise is the Pallof press. You anchor a long band at chest height, grab it with both hands, step away until there’s tension, and then press your hands straight out in front of you. The band wants to twist your torso back toward the anchor. Your core has to fight like hell to keep you facing forward. I use a 15 lb orange WOD Nation band ($12.99) for this. I do 12 slow reps per side. My obliques feel like they’re clamped in a vise. You can also do banded mountain climbers. I bought a set of fabric mini bands from Costco for $14.99 last month. I loop the medium resistance band around my toes and get into a plank position. Driving my knees to my chest against that resistance lights my abs on fire in less than thirty seconds. The constant horizontal pull forces your transverse abdominis to work overtime, making your whole midsection quiver. Skip the sit-ups and start doing banded anti-rotation work.

Pull Up Assistance Bands
Pull Up Assistance Bands has been one of the most consistently praised picks in this category. 424 reviewers averaged 4.5/5.
12. Consider Fabric Bands for Comfort and Durability

Latex mini-bands are great, but there’s a massive flaw. If your legs are hairy, or if you’re wearing shorts, they roll up into a tight little tube and aggressively pinch your skin. It feels like a dozen tiny tweezers ripping your leg hair out during side steps. I hated doing glute activation work because of this. I learned that the hard way. Then I discovered fabric resistance bands. This changed my entire lower body routine. Fabric bands are wider, thicker, and woven with elastic fibers. They don’t roll. They don’t pinch. They stay perfectly flat against your thighs. I picked up a La Pochette resistance band for £15 (about $19) recently. The fabric is soft but incredibly dense, feeling more like a heavy canvas strap than a workout tool. It has thin rubber grips on the inside so it won’t slide down your leggings or bare skin. I use it for lateral band walks and clamshells. The tension curve is slightly different than pure latex. It feels stiffer right from the start of the stretch. It forces my glute medius to fire immediately. If you’re sick of cheap rubber bands snapping or rolling up into a painful tourniquet on your thighs, spend a few extra bucks on the fabric ones. You won’t regret it.
Look, you don’t need a $2,000 squat rack to get strong. You just need to stop treating bands like toy accessories. Grab a good set of loops, focus on that slow eccentric control, and watch your muscles respond. I highly recommend picking up that Fit Simplify set if you’re just starting out. It’s cheap and gets the job done. Pin this article to your fitness board for the next time you’re stuck in a hotel room or just can’t face the crowded gym. Grab your bands, get sweaty, and I’ll see you in the next one.

Resistance Bands for Working Out
Resistance Bands for Working Out punches above its price — 278 buyers rated it 4.5 stars. I would buy it again.
Frequently Asked Questions
Can a resistance band workout actually build muscle?
Yes, absolutely. Studies show that resistance bands can promote similar strength gains to free weights. The key is applying progressive overload and maintaining constant tension throughout the entire movement.
Should I buy loop bands or tube bands?
Loop bands are generally more versatile for full-body workouts and mobility exercises. Tube bands with handles are better suited for upper body isolation movements like bicep curls and shoulder presses.
How do I know if my resistance band is too heavy?
If you can’t complete 8 to 12 controlled reps without breaking your posture or violently jerking your body, the band is too heavy. Drop to a lighter band to prevent injury and maintain proper form.
Why do my mini bands keep rolling up on my legs?
Latex mini bands tend to roll up and pinch skin during lower body movements. Switching to fabric resistance bands solves this issue, as they are wider, thicker, and feature inner grips to stay flat.
