What’s Inside
- Master the Foundational Foot Placement for Your Glute Bridge Workout
- Initiate with a Pelvic Tilt to Protect Your Lower Back
- Drive Through Your Heels, Not Your Toes
- Hit the Brakes at the Top to Avoid Overextension
- The 2-Second Squeeze That Makes a Glute Bridge Workout Actually Work
- Add a Mini Band for Serious Glute Medius Burn
- Load It Up With Weights (But Save Your Hip Bones)
- Expose Your Weaknesses with Single-Leg Variations
- Try the Frog Pump for Deep Activation
- Keep Your Ribs Down and Abs Engaged
- Slow Down the Lowering Phase (Eccentric Control)
- Why a Glute Bridge Workout Beats Hip Thrusts for Beginners
Last Tuesday at Whole Foods, I physically couldn’t bend over to grab a $4.99 jar of almond butter off the bottom shelf because my lower back was screaming in agony. I’d totally botched my glute bridge workout the day before by arching my spine like a cheap aluminum lawn chair. Most guys think they can just lie on the gym floor and thrust their hips into the air to build strength. I certainly did. But if you’re waking up with a stiff lower back instead of sore leg muscles, your form is broken. It’s frustrating to put in the effort and only get pain in return. Let’s fix it right now. Here’s the exact, step-by-step blueprint I use to make this movement work without destroying my lumbar spine. We’re going to cover everything from foot placement to advanced variations.
1. Master the Foundational Foot Placement for Your Glute Bridge Workout

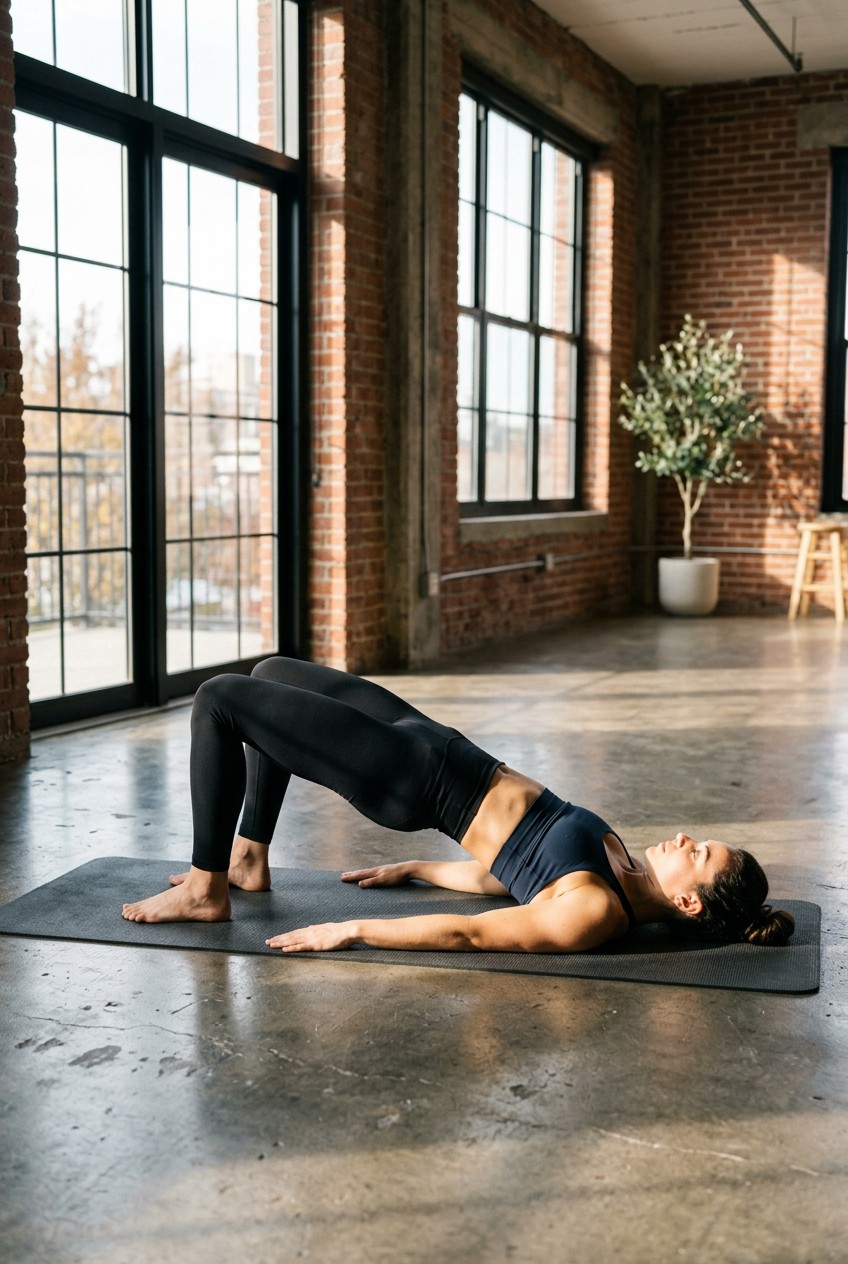
For maximum muscle engagement, you’ve got to position your feet perfectly flat on the ground. Keep them exactly hip-width apart. Your heels should be about 6 to 8 inches away from your glutes. This isn’t a guess. If you sit up and reach your arms forward, your fingertips should just barely graze the back of your heels. I spent months doing this wrong on a slick hardwood floor in my living room. I’d slide backward with every single rep, leaving sweaty footprints everywhere. I finally bought a Target All in Motion yoga mat for $15.99 just to get some traction. The sticky texture of the foam keeps your heels locked firmly in place. If you feel the burn mostly in your hamstrings, your feet are way too far away. If you feel it burning your quads, you’ve brought them too close. You want your shins to be almost perfectly vertical at the top of the bridge. Adjust your footing millimeter by millimeter until you find that sweet spot where the glutes take over. Don’t rush this setup phase. It dictates the success of your entire set. I’ve seen guys waste half their workout just adjusting their feet mid-set. Nail the stance before you even lift your hips.
2. Initiate with a Pelvic Tilt to Protect Your Lower Back

This is the exact mistake that left me stranded in the grocery store aisle. You can’t just lift your hips off the floor. You need to gently tuck your pelvis first. It’s called a posterior pelvic tilt. Imagine pulling your belly button straight down into the floorboards. Before you even lift a single inch, flatten your lower back completely against the ground. I usually practice this on my $9.98 Athletic Works mat from Walmart because it has just enough squishy cushion to let me feel my spine pressing hard into the foam. If you skip this step, your lower back takes over the entire movement. You’re essentially hyperextending your lumbar spine under heavy tension. Engage your abdominal muscles hard and maintain that core engagement throughout the exercise. Think of your pelvis as a heavy bucket of water. You want to tilt the bucket backward so the water spills out the back, right onto your stomach. Hold that tight tilt. Then, and only then, do you start to drive your hips upward. I’ve watched countless gym bros ignore this step because they just want to move heavy weight. Don’t be that guy.
3. Drive Through Your Heels, Not Your Toes

Consciously press through your heels as you lift your hips. Pushing through your toes is a terrible habit that shifts all the activation straight into your hamstrings and calves, killing the glute involvement. I see people at the gym doing this wrong all the time. They wear thick, squishy running shoes and end up balancing on their tiptoes. I personally swear by lifting completely barefoot or wearing flat, hard-soled shoes like my $65 Converse Chuck Taylors. You need a rock-hard, flat surface to press against. Think about pulling the rubber floor toward your shoulders with your heels. It creates immediate tension in your gluteus maximus. I used to wear heavily cushioned running shoes for my leg days. The soft foam absorbed all the force I was generating. I couldn’t feel my target muscles working at all. Ditch the running shoes. Feel the cold, hard floor under your bare heels. Dig them in like you’re trying to leave a permanent dent in the concrete. This single mental cue changes the entire effectiveness of the exercise. I’ve thrown out three pairs of expensive running shoes because they were ruining my lifting mechanics. Stick to the basics.

OLIXIS Adjustable Weight Bench for Full Body Strength
OLIXIS Adjustable Weight Bench for Full Body Strength Training punches above its price — 31 buyers rated it 4.5 stars. I would buy it again.
4. Hit the Brakes at the Top to Avoid Overextension

Lift your hips until your body forms a straight, clean diagonal line from your knees through your hips to your shoulders. Don’t push your hips excessively high toward the ceiling. Over-arching your lower back disengages the target muscles and leads to serious discomfort. I learned this the hard way. I used to thrust my hips as high as physically possible, thinking a larger range of motion automatically meant more muscle growth. I ended up making a desperate, painful run to Costco for a bulk 2-pack of Dr. Teal’s Epsom Salt ($12.99) just to soak my aching spine in a hot bath. The lavender smell couldn’t fix my terrible lifting form. Your knees, hips, and shoulders should line up perfectly. If your chest is coming off the floor, you’ve gone too far. Have a friend take a quick video of you from the side. You’ll be shocked at how much you’re probably overextending without realizing it. Stop at a neutral spine. Lock it in. I’ve seen guys arch their backs so hard they look like a gymnast. Keep it strict and controlled. You might also like: 20 Beautiful Home Gym Setup Ideas That Changed Everything
5. The 2-Second Squeeze That Makes a Glute Bridge Workout Actually Work

You can’t just bounce up and down rapidly. Momentum is the enemy of muscle growth. At the peak of the bridge, you need to pause and hold that static position for one to two full seconds. Squeeze your muscles as tightly as you physically can. This isometric contraction maximizes muscle activation and helps build real strength. I use the digital timer on my $399 Apple Watch Series 9 to force myself to hold the position. When I first started doing this, a two-second hold felt like a miserable eternity. My legs would shake violently. But that shaking means it’s working. I remember stopping at Sprouts after a brutal morning session of paused bridges. I was grabbing a cold $3.49 can of Zevia soda from the fridge section, and my legs were so fried I could barely stand in the checkout line. That is the level of fatigue you want. Don’t rush the reps. Count “one, two” in your head at the top of every repetition. I’ve had clients collapse on the mat after just ten reps because they finally held the squeeze properly. You might also like: 20 Inspiring Journal Home Workout Ideas You Haven’t Thought Of
6. Add a Mini Band for Serious Glute Medius Burn

If you want to target the side of your hips and improve your stability, loop a mini resistance band just above your knees. Don’t put it directly on your kneecaps. As you bridge up, actively press your knees outward against the band, maintaining heavy tension the entire time. I highly recommend the Fit Simplify Resistance Loop Exercise Bands. You can usually snag a set of five for around $11.95. If you want something that won’t roll up and rip your leg hair out, upgrade to the BC Strength Glute Loops. They cost between $25 and $40, but the thick, durable fabric texture is worth the extra cash. The cheap rubber bands always snap or roll up into a painful, thin line. I’ve had rubber bands snap mid-set and leave a stinging red welt on my thigh. The fabric bands stay flat against your skin. Pushing out against the band fires up your gluteus medius. It burns like crazy, but it’s effective. I’ve tried at least a dozen different brands over the years, and the thick fabric ones win every time. You might also like: 15 Beautiful Photoshoot Home Workout Ideas to Steal Right Now
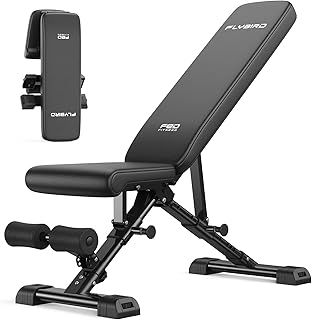
FLYBIRD WB5 Weight Bench
If you want something that just works, FLYBIRD WB5 Weight Bench is a safe bet (259 reviews, 4.5 stars).
7. Load It Up With Weights (But Save Your Hip Bones)

Once you master bodyweight movements—like hitting 3 sets of 15 to 20 reps with perfect form—you must add external resistance. Start with a single heavy dumbbell, maybe 15 to 20 pounds, placed horizontally across your hips. But don’t just rest raw, cold metal on your bare bones. It hurts. I tried balancing a heavy cast iron dumbbell on my hips once without padding. I ended up with massive purple bruises and had to buy a $2.99 bag of frozen peas from Kroger just to ice my pelvis that night. Always use proper padding. A folded yoga mat works in a pinch, but a dedicated barbell pad is far superior. I use a Rogue Fitness Barbell Pad that costs about $25. Gaiam makes a decent foam one for $20 too. The thick, high-density foam protects your hip bones so you can focus on the muscle contraction instead of the crushing pain in your pelvis. Hold the weight securely with both hands. I’ve seen people try to use rolled-up towels, but they always slip off and cause a distraction.
8. Expose Your Weaknesses with Single-Leg Variations

Nobody has perfectly symmetrical body strength. My right leg is significantly stronger than my left leg. Single-leg variations will expose your hidden strength discrepancies instantly. Lift one foot completely off the floor. You can extend that leg straight out or keep the knee bent, and perform the entire bridge using only the grounded leg. The first time I tried this, my left hip dropped toward the floor like a heavy rock. My core couldn’t stabilize the offset weight at all. I had to drop my $429 Bowflex SelectTech 552 dumbbells on the floor and go back to bodyweight reps. It takes a massive amount of core control to keep your pelvis level when you only have one foot on the ground. Watch your hips closely in the mirror. Don’t let the unsupported side sag. If it drops, you aren’t keeping your core tight enough. This variation is humbling. It forces the working side to handle 100 percent of the load. I’ve spent the last six months working exclusively on my left side just to catch it up to my right leg’s strength level.
9. Try the Frog Pump for Deep Activation

This specific variation is a massive trend for 2026, and honestly, it works wonders for isolation. It’s called the Frog Pump. Lie flat on your back, press the rubber soles of your shoes completely together, and let your knees splay outward toward the floor. Scoot your heels as close to your body as physically possible. Then, push your heels together hard as you lift your pelvis into the air. I do these on my $129 Manduka PRO mat because the dense rubber provides firm support for the sides of my feet. This externally rotated position encourages much greater activation from a different angle. It feels awkward at first. You might feel a deep, uncomfortable stretch in your inner thighs. But the contraction is intense. I did 3 sets of 30 reps of these last week. Afterward, I walked into Trader Joe’s to buy a $0.99 dark chocolate peanut butter cup as a reward, and I was literally waddling down the frozen food aisle. I’ve incorporated these into my warm-up routine permanently because nothing else fires up the muscles quite like this awkward stance.
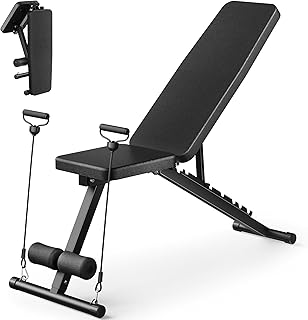
Adjustable Weight Bench for Home Gym
Adjustable Weight Bench for Home Gym has been one of the most consistently praised picks in this category. 517 reviewers averaged 4.5/5.
10. Keep Your Ribs Down and Abs Engaged

Rib cage flare is a common mistake that ruins the entire movement. When you lift your hips, your lower ribs shouldn’t pop up toward the ceiling. If they do, it indicates a complete disengagement of your core and an excessive reliance on your lower back. I used to do this while wearing my tight $25 Gymshark Arrival t-shirt, and you could clearly see my ribs sticking out like a skeleton at the top of every rep. You must actively keep your ribs pulled down and stacked directly over your pelvis. Take a deep breath into your stomach, brace your core like someone is about to punch you, and hold that stiffness. As you bridge up, your torso should move as one solid, unbreakable block. If your chest rises higher than your abs, your ribs are flaring. This mistake shifts the tension away from your lower body and dumps it straight into your fragile lumbar spine. Keep your chin slightly tucked to help fix this. I’ve had to completely retrain my breathing patterns just to keep my ribs locked down during heavy lifting sessions.
11. Slow Down the Lowering Phase (Eccentric Control)

Dropping your hips back to the floor like a heavy sack of potatoes is a waste of your time. Instead of rushing, you need to perform each repetition slowly and with absolute control, especially during the lowering phase. This increases the time under tension, which is crucial for muscle hypertrophy and strength. I time my reps using the stopwatch on my cheap $19.99 Casio F91W digital watch. I push up explosively, hold for two seconds, and then take three full seconds to lower my hips back to the rubber mat. Three seconds feels incredibly slow when your muscles are burning and you’re dripping sweat. You’ll feel every single muscle fiber fighting gravity. Most people just let gravity do all the work. They crash down, bounce off the floor, and throw their hips back up. By slowing down the eccentric phase, you drastically increase the difficulty. Don’t rest at the bottom, either. As soon as you touch the floor, drive right back up. I’ve found that slowing down the eccentric phase makes a 20-pound dumbbell feel like 100 pounds. It’s wildly effective.
12. Why a Glute Bridge Workout Beats Hip Thrusts for Beginners

Everyone wants to jump straight into heavy barbell hip thrusts. But if you’re a beginner, bridges are vastly superior. A 2022 EMG study actually found that a barbell glute bridge produced greater activation of the gluteus maximus and medius than a hip thrust at matched loads. Experts at ISSA highly recommend starting with bridges because your shoulders are flat on the stable floor, which drastically lowers your risk of spinal injury. You don’t have to balance your upper back on a wobbly gym bench. I used to stubbornly load up 135 pounds of $160 REP Fitness bumper plates for hip thrusts before I even knew how to squeeze my muscles properly. My neck hurt, my back hurt, and the bench kept sliding backward on the slick floor. I was an absolute mess. I swallowed my pride, stripped the heavy weight, and went back to the floor. The floor provides a massive, stable base. Master the floor first before you ever touch a bench. I’ve completely ditched the bench for my warm-ups. The floor is your best friend when you’re trying to isolate these muscles.
I’ve completely rebuilt my lower body routine around these exact principles. If you implement even half of these specific cues, I promise you’ll feel a massive, undeniable difference tomorrow morning. Stop rushing the reps, buy a decent foam mat, and focus entirely on that two-second squeeze at the top. It’s not about how much weight you can move; it’s about how well you can move it. Pin this guide to your fitness board right now so you can pull it up during your next gym session. Your lower back will thank you, and you’ll finally start seeing the results you’ve been working so hard for.

FLYBIRD WB2 Weight Bench
FLYBIRD WB2 Weight Bench has been one of the most consistently praised picks in this category. 215 reviewers averaged 4.5/5.
Frequently Asked Questions
What is the correct foot placement for a glute bridge workout?
Keep your feet flat on the floor, hip-width apart, and about 6 to 8 inches away from your glutes. Your shins should be nearly vertical at the top of the movement to maximize glute activation.
Why does my lower back hurt during glute bridges?
Lower back pain usually happens because you aren’t tucking your pelvis before lifting, or you’re pushing your hips too high. Always engage your core and stop when your body forms a straight diagonal line.
Should I push through my toes or heels?
Always drive through your heels. Pushing through your toes shifts the tension away from your glutes and into your calves and hamstrings. Lifting barefoot or in flat shoes helps reinforce this habit.
Are glute bridges better than hip thrusts?
For beginners, yes. Glute bridges keep your shoulders flat on the floor, providing a much more stable base than a bench. This lowers the risk of spinal injury while still delivering massive muscle activation.
