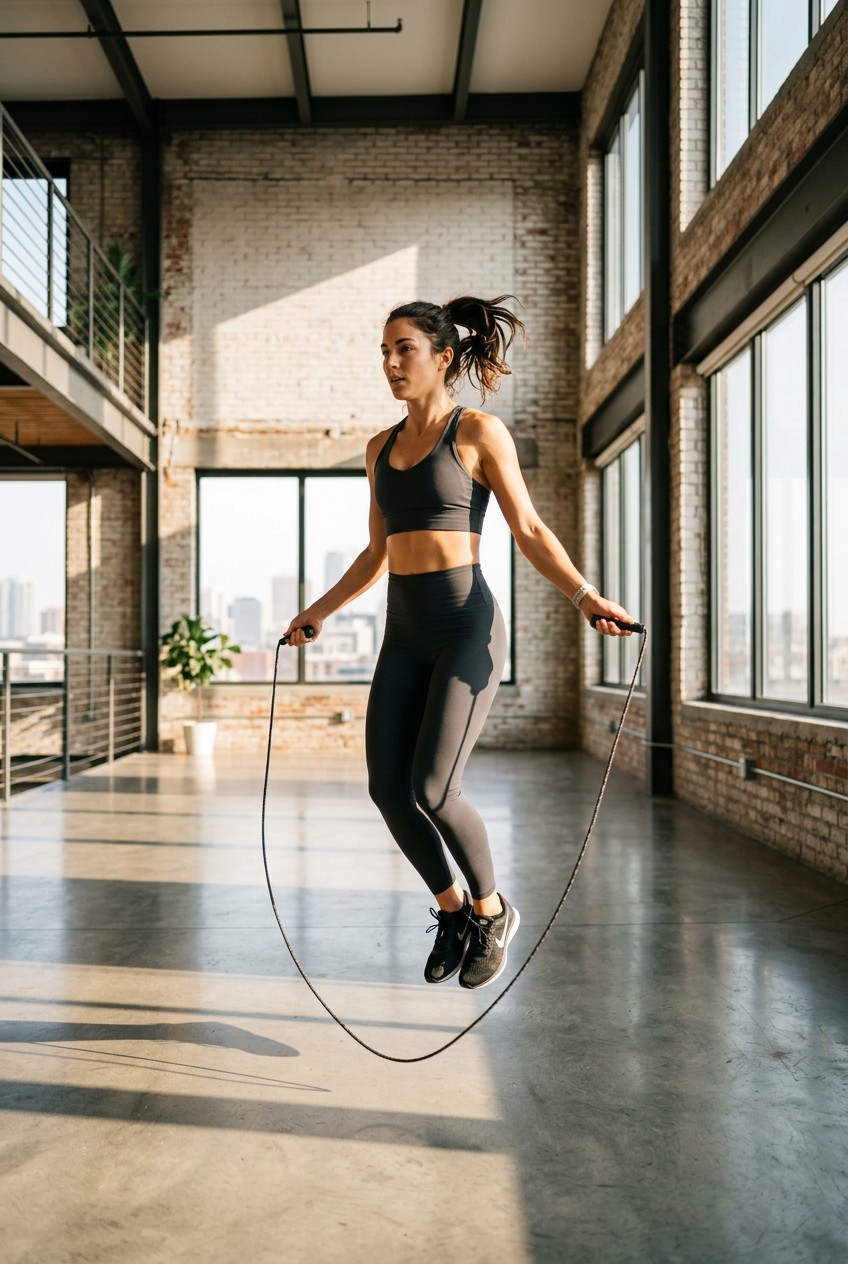
What’s Inside
- Nail Your Rope Length Before Doing Anything Else
- Ditch the Thin Speed Rope (For Now)
- It’s All in the Wrists, Not the Arms
- Keep Your Jumps Low for a Better Jump Rope Workout
- Add Weighted Ropes to Build Real Muscle
- Track Your Sweaty Data with Smart Ropes
- Burn Fat Fast with a HIIT Jump Rope Workout
- Protect Your Joints with Proper Shoes and Mats
- Start Slow to Avoid Shin Splints and Burnout
- Use Jumping to Boost Bone Density and Focus
Last Tuesday, I stood in the middle of a crowded gym and whipped my own calves so hard with a cheap plastic cord that it left a bright red, stinging welt. I was trying to show off a new jump rope workout, and instead, I ended up limping to the water fountain in shame. A good jump rope workout is brutal if you do it wrong. I spent months buying the wrong gear, swinging my arms like a broken windmill, and getting terrible shin splints before I finally figured out the mechanics. Most beginners think they can just grab any random string and start bouncing like a professional boxer. I want to save you that physical pain and frustration. Let’s talk about the exact gear, techniques, and pacing you actually need to build strength and stop tripping over your own feet.
1. Nail Your Rope Length Before Doing Anything Else

Most people buy a rope, rip open the packaging, and just start jumping. I did exactly this with a $9.99 thin plastic rope I bought from Target back in 2019. I didn’t adjust it. I just swung it wildly, tripped immediately, and whacked my shins repeatedly. The hard plastic stung like crazy, and the loud whipping sound made everyone in the gym turn and stare. To stop tripping and develop a proper rhythm, you’ve got to measure your gear perfectly. Step on the dead center of the cable with both feet flat on the floor. Pull the handles straight up along the sides of your body. The base of the handles should reach your armpits or sit just below your shoulders. If it goes higher, the rope is too long. A rope that drags heavily on the ground slows you down and ruins your timing. An improperly sized rope is a massive beginner mistake that’ll hinder your progress. It ruined my first few weeks of training. I spent hours getting frustrated before a local trainer finally showed me how to size it. Learned that the hard way. Now, I use the Elite Jumps Beaded Jump Rope, which costs $24.99. It comes at a standard 10-foot length, and you just untie the hidden knot inside the handle to remove beads and shorten it. I usually take off about five beads, roughly 5 inches, for my height. Take the five minutes to measure your rope. It makes a massive difference in how the cable clears your feet.
2. Ditch the Thin Speed Rope (For Now)

Speed ropes look cool in videos. The thin, coated steel wires slice through the air with a satisfying high-pitched swoosh. I bought a 2.5-millimeter wire speed rope for $15.99 at Walmart thinking I’d immediately start doing double-unders like a CrossFit champion. That was a stupid mistake. Thin speed ropes offer zero physical feedback. You can’t feel where the lightweight cable is in space as it travels over your head. As a beginner, you need to feel the weight of the rope pulling around your body so you can time your jumps. Instead of a wire rope, get a beaded one. I’m a huge fan of the Elite Jumps Beaded Jump Rope for anyone just starting out. The thick plastic beads add enough weight to naturally slow down the rotation. You can hear the heavy click-clack sound as the beads hit the wooden floor. That sound gives you a perfect cue for exactly when to jump. I tried learning on a speed wire for a month and made zero progress. I switched to a beaded rope and found my rhythm in two days. Save the thin wire ropes for when you know what you’re doing. Right now, you just need a heavy, slow rope that talks to you. The thick beads also don’t sting nearly as bad when you inevitably whip your own toes. Trust me on this.
3. It’s All in the Wrists, Not the Arms

A common mistake is using excessive arm movement to turn the rope. I used to swing my entire arms from the shoulders. I looked like I was trying to manually signal an airplane on a busy runway. My shoulders would burn out after sixty seconds, and my form would fall apart. The rotation should come from your wrists and forearms. Keep your elbows tucked close to your sides. We’re talking 4 to 5 inches away from your ribs at most. Your hands should be positioned near your hips. When you turn the rope, just make small, tight circles with your wrists. It feels awkward at first. You’ll probably try to use your shoulders anyway out of habit. I had to practice in front of a mirror at my gym for weeks to force my elbows down. Using your wrists prevents rapid fatigue and keeps the rope arc tight. If your hands float away from your hips, the rope gets shorter, and you trip instantly. I personally use the Crossrope Get Lean Set, which runs $119.00 and comes with 1/4-pound and 1/2-pound ropes. The heavier weight forces you to use your wrists because you can’t muscle it with your shoulders without getting exhausted. I keep this set in my trunk right next to my 3-pound bulk bags of raw almonds from Costco.

Jump Rope, Tangle-Free Rapid Speed Jumping Rope Cable with
Honestly, Jump Rope surprised me — sturdier than it looks in the photos, and over 24 buyers gave it 4.5 stars.
4. Keep Your Jumps Low for a Better Jump Rope Workout

You aren’t trying to touch the ceiling. When I first started a dedicated jump rope workout, I was jumping a solid six inches off the floor with every rotation. I wore out my calves in three minutes flat. I was breathing heavy, sweating through my shirt, and my feet felt like lead. Avoid jumping too high. It wastes energy and disrupts your rhythm. Aim for a consistent, moderate jump height of just 1 to 2 inches off the ground. That’s just enough space to clear the cable. You want to land softly on the balls of your feet with your knees slightly bent. Never land flat-footed. I did that once on a hard concrete patio and felt the shockwave travel straight up my spine. It was awful. Landing softly is crucial for efficiency and injury prevention. I recommend practicing your jumps without the rope first. Just bounce lightly on your toes while looking straight ahead. I like to do this warm-up on a soft yoga mat I grabbed for $19.99 at Sprouts. Focus on keeping your feet close to the floor. The moment you start pulling your knees up to your chest, you’ve lost the rhythm. Keep it low, keep it soft, and keep your core tight. You might also like: 20 Gorgeous Garage Home Gym Setup Ideas to Steal Right Now
5. Add Weighted Ropes to Build Real Muscle

If you want to build muscle and increase your calorie burn, you’ve got to integrate weighted jump ropes. A standard plastic rope won’t build your upper body at all. I personally swear by the Crossrope AMP Jump Rope Set. It costs $199.00 and includes Bluetooth-enabled handles with interchangeable cables ranging from 0.25 to 1 pound. Swinging a 1-pound thick rubber cable around your body is a different beast than skipping with a light plastic cord. Your forearms, shoulders, and core have to work overtime to stabilize the heavy rotation. Expert personal trainers Nico Gonzalez and Megan Hely note that weighted ropes improve endurance and coordination while engaging more muscles. This leads to higher calorie expenditure. I also keep the EliteSRS Muay Thai Rope in my gym bag. It costs $34.99 and weighs 1.5 pounds. The thick PVC cord smells strongly of fresh rubber when you take it out of the box. I use it for three-minute boxing rounds, and my forearms are usually screaming by the end of the second round. I follow up these heavy rope sessions with a protein shake made with organic whole milk I buy for $4.49 a gallon at Whole Foods. The heavy rope changes the physical stimulus of the workout. You might also like: 15 Cozy Aesthetic Morning Workout Routine That Are Totally Worth It
6. Track Your Sweaty Data with Smart Ropes

Trending right now are smart jump ropes. I used to count my jumps in my head. I’d lose track around 130, get frustrated, and just guess my total for the day. Smart ropes fix this. They connect to apps on your smartphone, tracking metrics like jump count, calories burned, and total duration. This provides valuable insights to optimize your training. I tested the Tangram Smart Jump Rope Rookie last month. It costs $39.99 and connects to my iPhone via Bluetooth. The handles have internal magnetic sensors that count every rotation perfectly. You can feel a slight mechanical click inside the handle as it spins. I also tried the Renpho Smart Jump Rope, which is a cheaper alternative at $19.99. It works well, but the hard plastic handles feel cheap and get slippery when my hands get sweaty. Another premium option is the Everjump system. It offers versatile app features and weighted rope options, with sets ranging from CHF 129.00 to CHF 249.00, roughly $145 to $280 USD. Having the data right in front of me pushes me to jump just a little bit longer. I love seeing the jump count hit 1,000 before I stop. It turns a boring cardio session into a fun numbers game. You might also like: 15 Beautiful Photoshoot Home Workout Ideas to Steal Right Now

Jump Rope, Tangle-Free Rapid Speed Jumping Rope Cable with
Jump Rope punches above its price — 24 buyers rated it 4.5 stars. I would buy it again.
7. Burn Fat Fast with a HIIT Jump Rope Workout

Jump rope HIIT workouts are efficient for fat loss and boosting your resting metabolism. You don’t need to jump at a slow, moderate pace for forty-five minutes to see results. A common structure involves short bursts of intense jumping followed by brief rest periods. I usually do 60 seconds of all-out jumping, followed by 30 seconds of total rest. I repeat that cycle for 15 to 20 minutes for a complete jump rope workout. This approach can burn more calories in a shorter time compared to a steady-state jog on a treadmill. I use a heavy 1/2-pound rope for these intense intervals. By round five, my lungs are burning, and sweat is dripping off my nose onto the rubber floor. It’s brutal but effective. I set up my interval timer app on my phone and blast loud rock music to get through it. After a nasty HIIT session, I always chug a cold 20-ounce bottle of electrolyte water I grab for $1.59 from Kroger. The key here is maximum intensity. During that 60-second work period, you’ve got to push the pace. If you’re casually skipping, you aren’t doing HIIT. You want your heart rate spiked. This is also a great time to practice double-unders if you have the basic bounce down.
8. Protect Your Joints with Proper Shoes and Mats

Always wear athletic shoes with excellent cushioning to absorb impact. I spent my first two months jumping in flat, thin-soled canvas sneakers. My shins hurt so bad I couldn’t walk down my apartment stairs without wincing. You need proper shock absorption. I currently wear the Nike Air Zoom Pegasus running shoes, which run about $130.00. The thick foam sole takes the harsh bite out of the landing. You also need to pay close attention to your jumping surface. Avoid jumping on hard surfaces like concrete or asphalt at all costs. Concrete is unforgiving on your joints and will rapidly chew up the plastic coating on your jump rope. I ruined a nice $30 rope in one week by jumping on my rough concrete driveway. Opt for softer surfaces such as thick rubber gym mats, short grass, or a specialized jump rope mat. This reduces joint strain and helps prevent injuries like severe shin splints. I bought a 1/4-inch thick rubber jump rope mat from Crossrope for $99.00. It absorbs the impact beautifully and gives the rope a nice smooth surface to slide across. If you’re on a budget, you can grab a cheap interlocking foam mat from Walmart for about $22.99. Just make sure you aren’t jumping on bare concrete.
9. Start Slow to Avoid Shin Splints and Burnout

Doing too much too soon is a massive beginner mistake. When I first discovered the physical benefits of jumping rope, I tried to do 30 minutes straight on my very first day. My calves cramped up so violently I had to sit on the gym floor and massage them for ten minutes. I couldn’t jump again for a week. It took me years to figure out that rest is as important as the work. Begin with short sessions. I recommend 5 to 10 minutes every other day. You need to gradually increase the duration and intensity as your stamina and coordination improve. Rest days are crucial for muscle recovery and growth. According to exercise physiologist Mathew Welch, an easy way to start is to perform three to five rounds of 20 to 30 seconds. That’s manageable for any fitness level. You can use the Jump Rope Training App on iOS, which costs $9.99 a month, to set up these beginner intervals. The app gives you loud audio cues so you don’t have to stare at a clock. Even short, consistent sessions of 10 minutes daily can yield significant cardiovascular benefits comparable to 30 minutes of jogging. I take an ibuprofen I bought in a 1000-count bottle from Costco for $12.99 if my calves get too sore. Take your time. The rope isn’t going anywhere.

Redify Weighted Jump Rope for Workout Fitness(1LB)
If you want something that just works, Redify Weighted Jump Rope for Workout Fitness(1LB) is a safe bet (34 reviews, 4.5 stars).
10. Use Jumping to Boost Bone Density and Focus

Jumping rope is a surprising and effective load-bearing activity. The repetitive physical impact stimulates bone remodeling, helping to maintain and even increase bone mineral density. This is particularly beneficial as bone density naturally decreases with age. Regular jump training can actively reduce the risk of osteoporosis later in life. Just 5 to 10 minutes daily can support your bone health. But it’s not just physical. The rhythmic nature of jumping rope requires intense timing, concentration, and coordination between your eyes, feet, and hands. The Jump Rope Institute notes that this repetitive motion can act as a form of moving meditation. It enhances spatial awareness, memory, and overall mental alertness. I agree with this. When I’m jumping, I can’t think about my grocery list or stressful work emails. If my mind wanders for even a second, I trip and whip my toes. It forces me to be present. I also incorporate jump rope during my winter bulking phases. Short, high-intensity sessions maintain my cardiovascular fitness and help control excess fat gain without hindering my muscle growth. After a heavy lifting session, I’ll do five minutes of jumping, then head home to eat a bowl of organic rolled oats I buy for $4.99 at Trader Joe’s. It keeps me lean while I build mass.
Honestly, learning to jump rope correctly was one of the best things I’ve ever done for my conditioning. It takes a little patience, and you’re definitely going to whip your shins a few times, but the results are worth it. Grab a heavy beaded rope, keep your jumps low, and protect your joints. If you found these tips helpful, make sure to pin this article or save it for your next gym session so you don’t forget the proper form!
Frequently Asked Questions
How long should a beginner jump rope workout last?
Beginners should aim for short sessions of 5 to 10 minutes every other day. You’re better off doing three to five rounds of 20 to 30 seconds of jumping with rest in between. This prevents severe calf soreness and shin splints.
What is the best jump rope for learning?
I highly recommend a beaded jump rope for beginners. The plastic beads add a slight weight, which slows down the rotation and provides a loud clicking sound when it hits the ground. This auditory cue helps you learn proper timing.
Can jumping rope build upper body muscle?
Yes, especially if you use a weighted rope. Swinging a 1-pound or 2-pound heavy cable forces your forearms, shoulders, and core to work incredibly hard to stabilize the rotation. It’s a fantastic way to build strength while doing cardio.
Do I need special shoes for jumping rope?
You absolutely need athletic shoes with thick, supportive cushioning to absorb the repetitive impact. Avoid flat canvas sneakers or running barefoot. Proper footwear, combined with a soft rubber mat, protects your joints and prevents injuries like stress fractures.
