What’s Inside
- Master Your Foot Placement for Your Hip Thrust Workout
- Stop Bruising Your Hips and Buy a Real Pad
- Keep Your Ribs Down to Save Your Lower Back
- Find the Exact Bench Height for Your Hip Thrust Workout
- Add Mini Bands to Force Your Glutes Awake
- Lock in the Forward Eye Gaze Technique
- Stop Doing the Exact Same Reps Every Single Week
- Use a Strict Tempo to Maximize Time Under Tension
- Upgrade to a Dedicated Machine for Better Stability
- Ditch the Spongy Running Shoes and Go Barefoot
- Torch Your Muscles with the 2-1 Eccentric Method
- Drop the Ego and Focus on Full Hip Extension
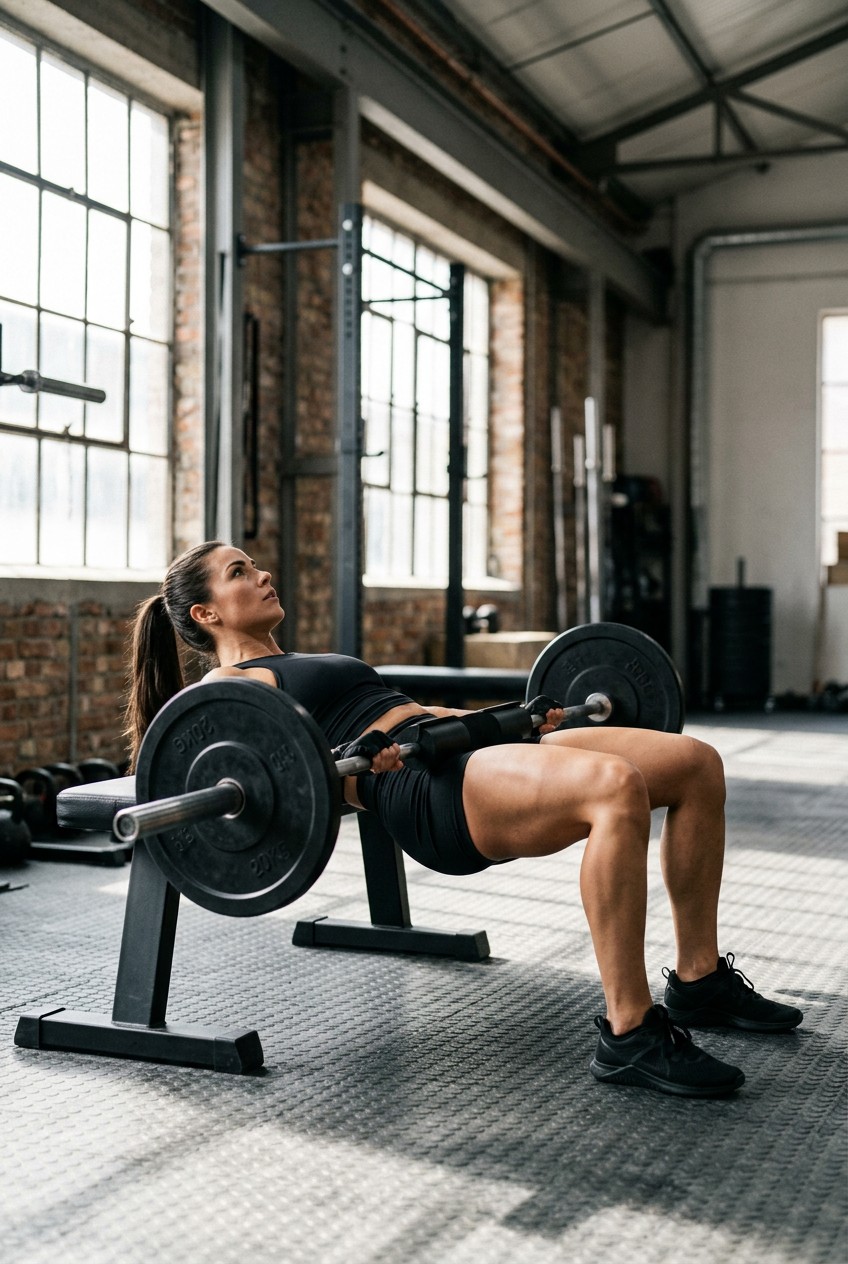
Last Tuesday at the local Crunch Fitness, I watched a guy load 315 pounds onto a barbell, thrust his hips halfway up, and immediately collapse while grabbing his lower back. It sounded like a wet towel snapping. That’s exactly why your hip thrust workout needs a reality check. I’m Ryan Brooks. I’ve spent six years as a trainer fixing broken glute routines. Honestly, I used to be that guy. I spent months doing these wrong, bruising my hip bones and wondering why my quads were burning instead of my glutes. You don’t need to learn the hard way. Let’s break down how to build a routine that works, whether you’re lifting an empty bar or stacking heavy plates.
1. Master Your Foot Placement for Your Hip Thrust Workout

I can’t tell you how many times I see people setting up their feet blind. Last month at Target, I was buying a $14.99 pack of Hanes ankle socks, and I overheard two guys arguing in the checkout line about foot stance. Here’s the truth. You need your feet shoulder-width apart. When you push up, your shins must be vertical. We’re talking a strict 90-degree angle to the floor. If your feet are too far forward, you’ll feel a deep, uncomfortable stretch in your hamstrings. Pull your heels too close to your butt, and your quads take over. I tried this wrong for months. I kept my feet tightly together, and my knees ached for days. Now, I turn my toes out maybe 15 degrees. It forces the glutes to fire. Next time you set up, look down. I wear Nike Metcon 8s (about $130) because the flat sole helps me gauge exactly where my heel hits the floor. Don’t guess. Measure it every single time.
2. Stop Bruising Your Hips and Buy a Real Pad

Let’s get one thing straight. Using a bare barbell across your pelvis is a terrible idea. I remember doing a heavy session in 2019 without a pad. I woke up with deep, purple bruises across my hip bones that felt like I got hit by a truck. It hurt just to put on my jeans. Skip the cheap, thin foam noodles your gym leaves lying around. They smell like stale sweat and compress to nothing under a 45-pound plate. You need a dedicated pad. I swear by the Iron Bull Strength Advanced Squat Pad. It costs $39.95 on Amazon. It has thick, high-density foam that doesn’t collapse, plus a cutout for your neck. Another great option is the ABMAT Hip Thrust Pad. It runs around $65.00 and is engineered for this lift with anti-slip layers. I bought mine after seeing it at a local Rogue Fitness showroom. The dense foam kills the sharp pain of the metal knurling digging into your skin. You can’t focus on squeezing your glutes if you’re wincing. Spend the money. It’s non-negotiable. I learned that the hard way.
3. Keep Your Ribs Down to Save Your Lower Back

Most people get this wrong. They think a bridge is a back-bending competition. I used to throw my head back and arch my spine like a gymnast, thinking I was getting better range of motion. All I got was a sharp, pinching sensation in my lumbar spine that required a $120 visit to the chiropractor. You have to maintain a neutral spine. Keep your ribs glued down toward your belly button. Before I lift the bar, I take a massive breath, brace my core like someone’s about to punch me, and lock my ribcage in place. At the top, your body should form a straight line from your shoulders to your knees. If your stomach points at the ceiling higher than your hips, you’re hyperextending. I bought a $15.99 mirror from Walmart for my garage gym just to watch my spine angle. It was humbling. When you keep your ribs down, the tension shifts away from your lower back and into the gluteus maximus. It burns, but it’s what you want.
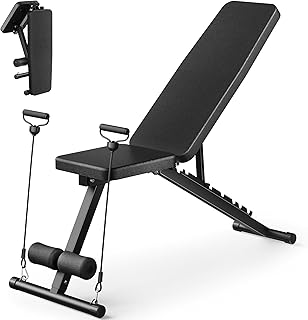
Adjustable Weight Bench for Home Gym
A dependable everyday pick — Adjustable Weight Bench for Home Gym pulls in 517 ratings at 4.5 stars. Not flashy, just solid.
4. Find the Exact Bench Height for Your Hip Thrust Workout

Using a random bench is a rookie mistake. Last winter, at a hotel gym in Chicago, I used a flat bench that was way too tall. I couldn’t get my hips extended, and the edge of the vinyl dug into my back. The ideal height is exactly 16 inches (about 40 centimeters) off the floor. This fits 99 percent of lifters. If you’re short or tall, aim for 13 to 19 inches. The edge of the pad needs to hit you right below your shoulder blades. If it’s too high, you’ll slide off. If it’s too low, you’ll scrape your back. I bought a REP Fitness FB-5000 flat bench for $239.99 specifically because it sits at 17 inches, which is perfect for my 6-foot frame. I measured it with a Stanley tape measure. If your gym benches are too high, grab aerobic step risers. They cost about $25 a pair at Play It Again Sports. Don’t compromise on your pivot point. You might also like: 20 Gorgeous Garage Home Gym Setup Ideas to Steal Right Now
5. Add Mini Bands to Force Your Glutes Awake

Sometimes your glutes are just asleep, especially if you sit at a desk all day. I work at my laptop for six hours straight, and my glutes feel like dead weight. To fix this, use a resistance band. Loop a heavy band above your knees. I use Booty Builder Mini Bands. A pack of three costs $19.90 on their site. They’re made of thick, woven fabric that doesn’t roll up or snap your leg hair like the rubber ones. When you perform your reps, maintain a constant outward press against the band. You only need to push out about 2 inches past your normal stance. This pressure forces the gluteus medius to fire. It also stops your knees from caving in, which is a hazard when you’re moving weight. I tried this last Thursday after grabbing a 12-pack of Premier Protein shakes at Costco for $29.99. The burn was so intense I had to drop the barbell weight by 20 pounds. The fabric band reminds you to keep pushing out. It builds a crazy mind-muscle connection. Trust me. You might also like: 15 Brilliant Man Shed Home Gym Setup Ideas to Transform Your Space
6. Lock in the Forward Eye Gaze Technique

If you want to grow your glutes, listen to Bret Contreras. He’s the glute guy for a reason. I used to stare at the ceiling, admiring the ductwork. That was a huge mistake. Looking up causes your neck to extend, which pulls your lower back into an arch. Contreras preaches a forward eye gaze. Tuck your chin to your chest and look straight ahead at the wall. When I started doing this, I felt my pelvis tuck under at the top. This is a posterior pelvic tilt. You’re trying to bring your belt buckle up to your chin. Push through your heels. I lift my toes inside my shoes to ensure my heels bear 100 percent of the load. I was using a pair of Rogue 45-pound bumper plates (about $190 a pair) last week, and focusing on this chin-tuck made the weight feel twice as heavy on my glutes. It feels awkward at first. Your neck might get tired. But the contraction is better. You might also like: 20 Inspiring Outfit Home Workout Ideas That Changed Everything

NICEPEOPLE Adjustable Weight Bench for Home Gym
If you want something that just works, NICEPEOPLE Adjustable Weight Bench for Home Gym is a safe bet (32 reviews, 4.5 stars).
7. Stop Doing the Exact Same Reps Every Single Week

I see regulars doing 3 sets of 10 every Monday. It’s boring, and your muscles adapt too fast. You have to mix up rep ranges for real growth. For strength, load the bar and aim for 3 to 6 reps. I’m talking heavy weight where that sixth rep feels like moving a parked car. For muscle growth, hit that sweet spot of 8 to 12 reps. Don’t ignore endurance. Doing 15 to 20 reps with lighter weight sets your backside on fire. I track this in an $8.99 Moleskine notebook from Barnes & Noble. Last month, after grabbing a $4.99 green juice at Whole Foods, I dedicated my Tuesday to heavy 5-rep sets using 225 pounds. Then I used Fridays for brutal 20-rep sets with 135 pounds. The high-rep days leave me exhausted. The lactic acid is intense. Bret Contreras suggests 5 to 12 reps for barbell work and up to 20 for bands. Stop treating every workout like a carbon copy.
8. Use a Strict Tempo to Maximize Time Under Tension

Stop bouncing the bar off your hips like a trampoline. Rushing through reps is the fastest way to cheat your growth. Momentum is the enemy. I used to bang out 15 reps in 20 seconds, wondering why my glutes weren’t growing. You need to control the tempo. I recommend the 3-1-2 method. Take 3 seconds to push the weight up, hold a brutal 1-second pause at the top, and take 2 seconds to lower it. I count out loud. One, two, three, squeeze, down, down. I bought a $12.99 Casio watch at Kohl’s to time my sets. I grab a $1.99 alkaline water at Trader Joe’s before these sessions because the slow pace makes me sweat. When you force muscles to work slowly, you increase time under tension. The bar feels heavier. Your muscles tremble. During that 1-second pause, squeeze your glutes so hard you almost cramp. If you can’t hold the top for a second, you’re using too much weight. Strip 10 pounds off each side and try again.
9. Upgrade to a Dedicated Machine for Better Stability

Setting up a heavy barbell is annoying. You have to drag a bench over, find a pad, roll the bar over your legs, and hope the bench doesn’t slide. I used to hate the setup so much I’d skip the exercise. If your gym has a dedicated machine, use it. The Booty Builder Hip Thrust Machine is a beast. These models cost $1,500 to $3,000, and they’re worth every penny. My local EOS Fitness just installed two. You buckle in with a seatbelt, load the plates, and push. The machine provides perfect stability. No balancing a rolling barbell or sliding bench. The padded belt distributes weight evenly. I loaded four 45-pound plates on the Booty Builder last Sunday, and the movement felt smooth. Because you aren’t wasting energy balancing, you focus 100 percent on pushing weight and progressive overload. If you’re building a home gym, Nautilus makes a plate-loaded version called the Glute Drive for about $1,800.

FitinOne Adjustable Folding Weight Bench for Home Gym
FitinOne Adjustable Folding Weight Bench for Home Gym has been one of the most consistently praised picks in this category. 744 reviewers averaged 4.5/5.
10. Ditch the Spongy Running Shoes and Go Barefoot

I see people lifting in squishy running shoes. Hoka One Ones or Brooks are great for a 5K, but terrible for heavy lifting. When you press into foam, it compresses. You lose power, and your foot wobbles. You need to go barefoot or wear minimalist shoes. There are thousands of sensory nerves in your feet. When your bare heel touches the hard floor, those sensors send feedback to your brain, enhancing your mind-muscle connection. I usually take my shoes off and lift in my socks. The cold, textured grip of the gym mat feels grounding. If your gym is strict, buy Xero Shoes HFS. They cost $119.99 online. I bought mine after a grocery run at Sprouts, where I picked up a $6.99 bag of almonds. They have a zero-drop, thin rubber sole that feels like you’re barefoot. The first time I tried lifting without thick sneakers, I felt an immediate difference in how hard I could drive through my heels. It eliminated the weird knee wobble I used to get.
11. Torch Your Muscles with the 2-1 Eccentric Method

If you’ve hit a plateau, shock your system with eccentric overload. The eccentric phase is the lowering part, and it causes the most muscle damage for growth. Enter the 2-1 variation. You press the weight up using both legs. At the top, lift one foot and slowly lower the weight using only one leg. I tried this last Tuesday using a 60-pound straight bar from the rack. Pushing up with two legs was easy. Lowering that 60 pounds on my left leg alone was agonizing. My glute was shaking, and I felt a tearing sensation in the muscle fibers. I woke up so sore I had to hold the handrail to walk down the stairs. It’s effective. If balancing on one leg is too hard, use a B-stance. Slide one foot forward and rest it on its heel so your working leg takes 90 percent of the load. I recommend picking up a 40-pound CAP Barbell fixed straight bar from Walmart for $45 to practice at home.
12. Drop the Ego and Focus on Full Hip Extension

We need to talk about ego lifting. I see guys at LA Fitness loading four plates on each side, grunting, and moving the bar two inches. It’s useless. If you can’t achieve full hip extension, the weight is too heavy. Full extension means your body forms a straight, flat line from your shoulders to your knees. Your hips should be locked out. If there’s a crease at your waist, you aren’t finishing the movement. I was guilty of this. I wanted to tell my buddies I could thrust 405 pounds. But my form was garbage. I finally swallowed my pride, stripped the bar to 225 pounds, and focused on squeezing my glutes at the top. The lighter weight yielded better results. I was picking up a $3.49 carton of eggs at Kroger later that week, and my glutes were still cramping. I bought a $10 tripod from Amazon to film my sets on my iPhone. Watching the playback was a reality check. I wasn’t extending as high as I thought. Bret Contreras advises against going so heavy that it ruins your range of motion. Drop the weight. Master the lockout. No exaggeration.
There you have it. Building a proper routine isn’t about throwing plates on a bar and hoping for the best. It’s about precision, tempo, and leaving your ego at the door. I guarantee that if you apply half of these techniques (especially fixing your foot placement and locking in that forward eye gaze) you’ll feel a massive difference by your next leg day. Save this guide. Pin it on Pinterest. Read it before you head to the gym. Stop wasting your time with sloppy reps and start building the strength you deserve.
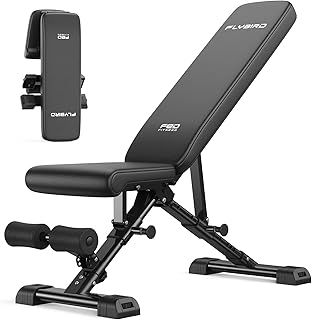
FLYBIRD WB5 Weight Bench
FLYBIRD WB5 Weight Bench punches above its price — 259 buyers rated it 4.5 stars. I would buy it again.
Frequently Asked Questions
How often should I do a hip thrust workout?
For optimal muscle growth, I’d recommend hitting your hip thrust workout two to three times a week. Make sure you’re resting at least 48 hours between sessions to let your glutes recover completely.
What’s the best bench height for a hip thrust workout?
The ideal bench height is exactly 16 inches off the floor. This allows your shoulder blades to pivot perfectly. If it’s too high, you’ll slide off; if it’s too low, you won’t reach full extension.
Why do I feel my hip thrust workout in my lower back?
You’re likely hyperextending your lumbar spine at the top of the movement. Keep your ribs glued down, brace your core, and tuck your chin to your chest to shift the tension back to your glutes.
Can I do a hip thrust workout without a barbell?
Absolutely. You can use heavy dumbbells, resistance bands, or even just your body weight for high-rep burnout sets. A 2-1 eccentric variation with just a 40-pound dumbbell will completely torch your glutes.