What’s Inside
- Master The Bulgarian Split Squat For Your Toned Legs Home Workout
- Integrate Incline Walking For Targeted Toning
- Utilize Fabric Resistance Bands For Glute Activation
- Incorporate Adjustable Ankle Weights For Progressive Overload
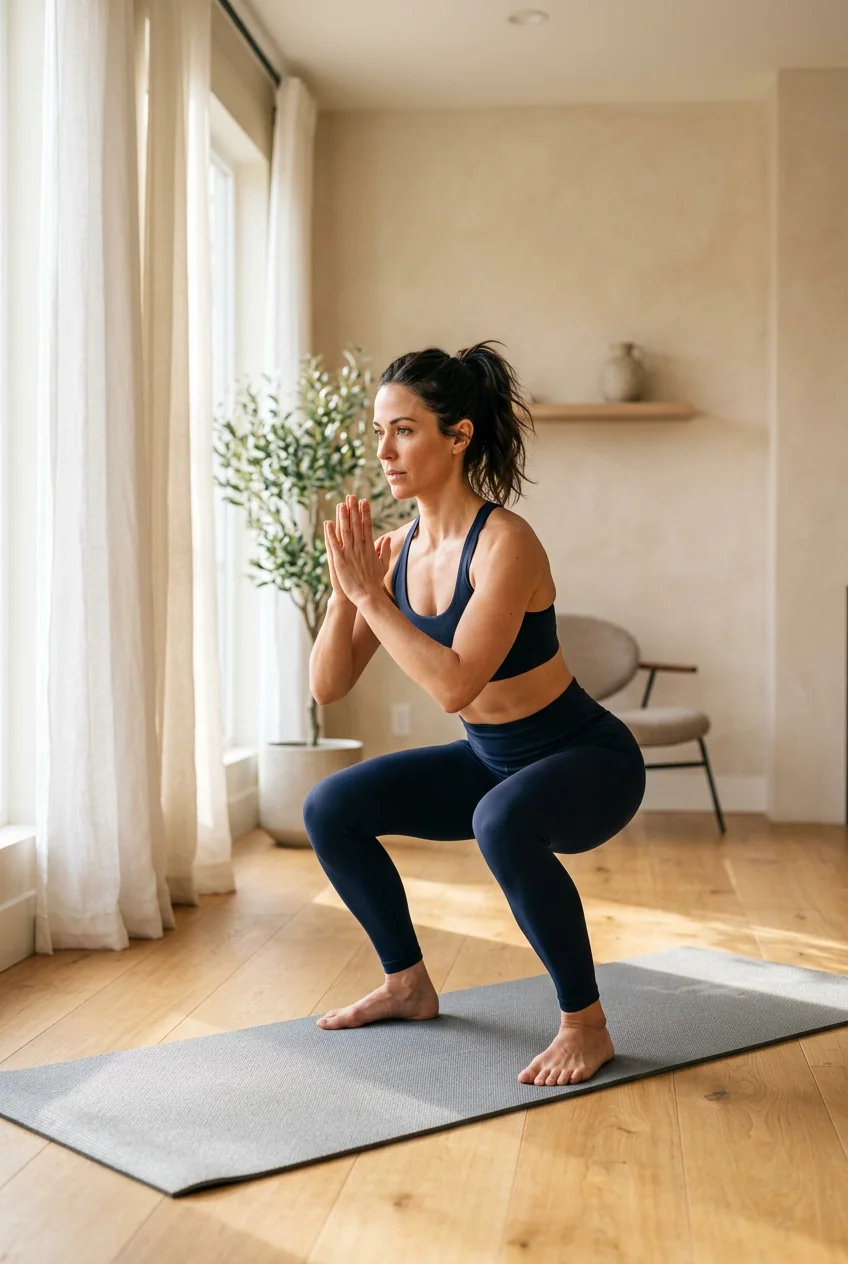
- Prioritize Full Range Of Motion In Your Squats
- Add Deficit Reverse Lunges To Your Routine
- Perfect The Unilateral Glute Bridge
- Execute Step-Ups On A Sturdy Box
- Incorporate Tempo Goblet Squats In Your Toned Legs Home Workout
- Finish With Paused Calf Raises
Last Tuesday, I tried filming a quick 15-minute routine in my living room, only to lose my balance on a slippery Target yoga mat and crash into my coffee table. That moment made me realize most people are doing their toned legs home workout completely wrong. I ended up with a massive purple bruise on my shin, twenty minutes of icing, and a total reevaluation of my training philosophy. People slip around on cheap mats, use zero resistance, and wonder why their quads feel like mush. If you want a lower body routine that actually builds muscle without a gym membership, you have to stop doing endless bouncy air squats. Here’s how I program lower body days for clients when they only have a living room and a few pieces of gear.
1. Master The Bulgarian Split Squat For Your Toned Legs Home Workout

I avoided Bulgarian split squats for years. I tried them once in 2018, lost my balance, and decided they were stupid. I was wrong. According to Men’s Health, this is one of the most efficient bodyweight exercises for lower body development. You need a sturdy chair or a low bench. I use the $45 folding bench I grabbed at Walmart last winter. Place your back foot flat on the bench. Keep your front knee aligned with your toes. Drop your back knee until it almost touches the floor. The carpet in my apartment always leaves a slight rug burn on my knee cap, so I throw down a folded towel. Perform 12 to 15 reps per leg for 4 full sets. Don’t rush the eccentric lowering phase. Most people drop like a rock. Take a full three seconds to go down. The burn in your quads and glutes is immediate. The first time I programmed these for a client, she texted me the next morning saying she couldn’t walk down her stairs. Common mistake: placing your front foot too close to the bench. If your heel lifts when you drop down, hop forward two inches. Your front foot needs to stay glued to the floor. The balance is tricky at first. Focus your eyes on a fixed spot on the floor about three feet in front of you.
2. Integrate Incline Walking For Targeted Toning

Flat walking is fine for clearing your head, but it won’t build much muscle. If you’ve got a treadmill in your garage or apartment gym, crank up the incline. Peloton instructor Rebecca Kennedy calls incline walking the biggest bang for your buck for lower-body toning. She’s right. Set the gradient between 5 and 12 percent. Walk at a moderate pace for 20 to 30 minutes. I usually set mine to 10 percent at 3.2 miles per hour while watching YouTube reviews. I throw on a heavy sweatshirt to get a good sweat going. The slight incline makes a 30-minute session fly by. This angle targets your glutes, quads, hamstrings, and calves far more effectively than flat walking. It forces your slow-twitch muscle fibers to fire constantly. I bought a basic folding treadmill from Costco last November for $399 specifically for this. The belt squeaks a little, but the motor works perfectly. Pro tip: don’t hold the handrails. I see people at the gym gripping the console like their life depends on it while leaning backward. That defeats the purpose. Let your arms swing. If you feel like you’re going to fall off, your speed is too high. Drop the speed by 0.5 miles per hour and keep your hands off the plastic.
3. Utilize Fabric Resistance Bands For Glute Activation

Throw your cheap rubber latex bands in the trash. I bought a pack of those thin rubber bands at Kroger three years ago for $8.99, and they rolled up my thighs like a tourniquet during my first set of squats. It pinched my skin and left red welts. You need fabric resistance bands. I use Tribe Lifting Fabric Resistance Bands. You can also find Renoj Non Slip Hip Exercise Bands online. They usually cost between $20 and $40 for a set of three. Place the medium-resistance band two inches above your kneecaps. Use them for glute bridges, squats, and lateral walks. The thick fabric prevents them from rolling or slipping. Plus, they don’t snap. I had a latex band snap against my bare leg once and it stung for three days. This ensures consistent tension across your abductors, which is a major issue with traditional latex. I keep a grey medium-resistance band in my gym bag at all times. The fabric is slightly rough, so I recommend wearing leggings or joggers instead of short shorts to prevent chafing. The added tension forces your glutes to activate before your lower back takes over. It’s a mandatory swap if you’re serious about leg day. Trust me.
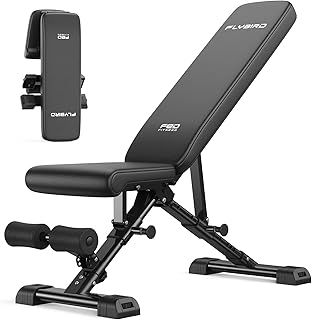
FLYBIRD WB5 Weight Bench
If you want something that just works, FLYBIRD WB5 Weight Bench is a safe bet (259 reviews, 4.5 stars).
4. Incorporate Adjustable Ankle Weights For Progressive Overload

Bodyweight donkey kicks stop being effective after three weeks. Your muscles adapt quickly, and doing 50 reps is just a waste of time. You need progressive overload. I highly recommend adjustable ankle weights. I picked up a set of Sportneer adjustable weights that go from 2 to 10 pounds per ankle. They cost $35. If you want something less bulky, the Bala Bangles are $55 and look like thick silicone bracelets. They only weigh 1 to 3 pounds each, but that’s plenty for high-rep accessory work. Strap them on for standing leg lifts, kneeling donkey kicks, and hip extensions. The velcro on the Sportneer set is stiff and scratches my ankles if I don’t wear long socks, so pull your socks up high. I keep my weights in a small basket next to my TV stand so I don’t forget them. Tom’s Guide recently advised using ankle weights primarily for gentle movement. They’re spot on. Don’t strap 5-pound weights to your ankles and try to do jumping jacks. The force will wreck your knees, hips, and lower back. Keep the movements slow and controlled. I use the 3-pound inserts for my hip extensions, taking two seconds to lift my leg and two seconds to lower it.
5. Prioritize Full Range Of Motion In Your Squats

Half-squats build half-legs. I constantly see people doing rapid-fire squats where they barely bend their knees. They drop maybe four inches, bounce back up, and count it as a rep. That does nothing for your glutes or hamstrings. You’ve got to prioritize a full range of motion. Aim to lower your hips like you’re sitting into a low chair. Your hip crease needs to drop below the top of your kneecap. I struggled with this for a long time because my ankle mobility was terrible. I’d try to squat deep, my heels would lift, and I’d fall backward. I finally bought a $15 slanted foam wedge block from Target to raise my heels. That simple fix allowed my knees to track forward properly so my hips could drop deep. If you don’t have a wedge, slide a hardback book under your heels. Mobility takes time. Don’t force your body into a deep squat if your lower back starts rounding aggressively. When you hit the bottom, pause for one full second. Feel the stretch in your glutes. Then drive hard through your heels to stand back up. If your knees cave inward on the way up, your stance is too wide or your glutes are weak. Bring your feet in slightly and push your knees out against imaginary resistance. You might also like: 12 Flat Tummy Workout for Every Budget
6. Add Deficit Reverse Lunges To Your Routine

Standard reverse lunges are fine, but deficit reverse lunges force your muscles to work harder. By raising your front foot, you increase the distance your back knee has to travel. This creates a massive stretch in the glute of your front leg. I use a thick wooden cutting board I bought at Trader Joe’s for $19.99 as my platform. It’s two inches thick and stable on my carpet. If you don’t have a thick cutting board, a hardback textbook works. Just make sure it doesn’t slide. Stand with both feet on your raised surface. Step your right foot backward and lower your hips until your right knee gently taps the ground. Your left foot stays planted on the board. The extra two inches of depth makes a shocking difference. My left glute is on fire by the eighth rep. Keep your chest up and don’t let your torso collapse forward over your front thigh. I did these wrong for months by stepping too far backward. When you step too far back, your front shin angle changes, shifting the tension away from your glutes and into your hip flexors. Keep the backward step relatively short. Your front knee should stay stacked over your front ankle at the bottom. Do 3 sets of 12 reps per side. You might also like: 20 Inspiring Journal Home Workout Ideas You Haven’t Thought Of

FLYBIRD WB3 Weight Bench Fits up to 6’5”
A dependable everyday pick — FLYBIRD WB3 Weight Bench Fits up to 6’5” pulls in 16 ratings at 4.5 stars. Not flashy, just solid.
7. Perfect The Unilateral Glute Bridge

Two-legged glute bridges are too easy for most adults. Unless you’re resting a 50-pound dumbbell on your hips, you aren’t getting much out of them. The unilateral, or single-leg, glute bridge solves this. Lie flat on your back. I use a 6-millimeter thick Manduka PROlite mat I got at Sprouts for $79. It provides enough cushioning for my spine without feeling squishy. I prefer doing these barefoot. It helps me grip the mat with my toes and keep my foot flat during the lift. Plant your left foot flat on the floor, about six inches from your glutes. Extend your right leg straight toward the ceiling. Drive your left heel into the mat and squeeze your left glute to lift your hips. Your body should form a straight line from your left shoulder to your left knee. Pause at the top for two seconds. The cramp in your hamstring might be intense the first few times. If your hamstring cramps, your foot is too far away. Drag your heel an inch closer to your glutes and try again. Lower your hips back to the floor with control. Don’t let gravity slam your tailbone into the mat. Perform 15 reps on the left leg, then immediately switch to the right. You might also like: 20 Creative Men Home Workout Ideas You’ll Want to Bookmark
8. Execute Step-Ups On A Sturdy Box

Step-ups are effective, but only if you use the right equipment and form. Don’t use a flimsy dining chair. I tried stepping up onto a cheap plastic patio chair once, the leg buckled, and I scraped my entire shin. I learned that the hard way. You need a solid wooden plyo box or a concrete step. I use a 16-inch wooden box I built from plywood I bought at Home Depot for $45. If you don’t have the tools to build a box, buy a pre-made one. It’s a solid investment that will last a decade. Place your right foot entirely on the box. Your heel can’t hang off the edge. Lean your torso slightly forward. Now, push through your right heel to stand up. Don’t jump off your bottom foot. That’s the biggest mistake I see. People use their back leg to launch themselves upward, turning it into a cardio move instead of a strength exercise. Your bottom foot should be dead. Imagine it’s glued to the floor until your top leg does all the pulling. Slowly lower yourself back down, taking three seconds to touch your bottom toe to the floor. The eccentric lowering phase is where the actual muscle rebuilding happens. If you drop fast, you miss half the benefit. 3 sets of 10 reps per leg is plenty.
9. Incorporate Tempo Goblet Squats In Your Toned Legs Home Workout

You don’t need a barbell to build strong legs. A single heavy dumbbell or kettlebell works if you manipulate the tempo. I keep a 35-pound cast iron kettlebell in my living room. I bought it at Whole Foods on clearance for $30. Hold your weight vertically against your chest, keeping your elbows tucked tight against your ribs. The kettlebell handle also forces you to keep your posture upright. If you lean forward, the bell swings away. Now, we change the tempo. Lower your body into a squat while counting to four. One, two, three, four. You should reach the bottom of your squat on the count of four. Hold that bottom position in silence for two full seconds. Don’t bounce. Don’t relax your core. Finally, drive up aggressively in one second. This 4-2-1 tempo drastically increases the time your muscles spend under tension. A 35-pound weight feels like 100 pounds by the sixth rep. I usually start sweating profusely around rep eight. Keep your chest tall. If the weight pulls your shoulders forward so you’re staring at the floor, the weight is too heavy. Drop down to a 20-pound dumbbell or just use your body weight with the same slow tempo. 4 sets of 10 reps will fry your quads.
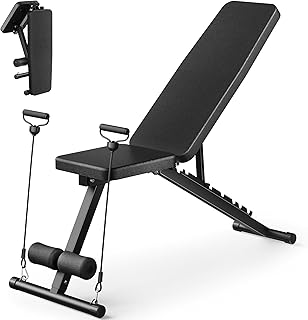
Adjustable Weight Bench for Home Gym
Adjustable Weight Bench for Home Gym punches above its price — 565 buyers rated it 4.5 stars. I would buy it again.
10. Finish With Paused Calf Raises

Calves are hard to grow, especially at home. Most people bounce through 30 rapid-fire calf raises on the edge of a stair, feel a slight burn, and quit. The Achilles tendon acts like a massive rubber band. When you bounce, the tendon does the work, and the calf muscle barely fires. To fix this, you’ve got to kill the stretch reflex. Stand on the edge of a stair or a thick book. Let your heels drop as far down as possible. I tried doing these on a flat floor for years and saw zero growth. You need that deficit stretch to see real changes. Hold this bottom position for three full seconds. One, two, three. Now, press up onto your tiptoes as high as you can. Hold that top contraction for two seconds. Slowly lower back down. This strict pausing method takes the momentum out of the movement. I use the bottom step of my staircase. The wood edge digs into my bare feet, so I always wear thick Nike crew socks. Hold onto the wall for balance. This isn’t a balance test; it’s a muscle isolation exercise. If you’re wobbling, you can’t contract the muscle effectively. Do 3 sets of 15 strict, paused reps. Your calves will feel incredibly tight the next day.
Building lower body strength in your living room doesn’t require a massive budget or a complicated setup. It requires strict form, slow tempos, and a willingness to push through the burning sensation. I wasted years doing high-rep bouncy circuits that just made my knees ache. Once I slowed down, bought a few heavy resistance bands, and focused on unilateral work like the split squats and deficit lunges, everything changed. No exaggeration. My legs got stronger, my balance improved, and my knee pain vanished. Try this exact routine three days a week for a month. Stick to the tempos and don’t skip the pauses. You won’t need a gym membership if you actually push yourself on these sets. Give it four weeks and watch how your clothes fit differently. I highly recommend saving this page or pinning it to your workout boards so you can reference the exact rep counts and tempos next time you’re standing in your living room wondering what to do.
Frequently Asked Questions
How often should I do a toned legs home workout?
I recommend doing this routine three times a week. Your leg muscles need at least 48 hours of recovery time between intense sessions to rebuild the torn fibers. Training them every single day just leads to joint inflammation and stalling progress.
Can I get toned legs without using heavy gym weights?
Yes, you absolutely can. By using slow tempos, unilateral exercises like split squats, and adding small tools like fabric resistance bands or adjustable ankle weights, you force your muscles to work incredibly hard. Progressive overload doesn’t always require a barbell.
Why do my knees hurt during home leg workouts?
Knee pain usually happens because of poor form, specifically letting your knees cave inward or your heels lift off the floor during squats and lunges. Try raising your heels on a small wedge block and slowing down your movements to protect your joints.
Are fabric resistance bands better than latex ones?
Fabric bands are vastly superior for lower body workouts. Cheap latex bands roll up your thighs, pinch your skin, and lose their elasticity quickly. Fabric bands stay flat, provide consistent tension for glute activation, and won’t snap against your bare legs.
