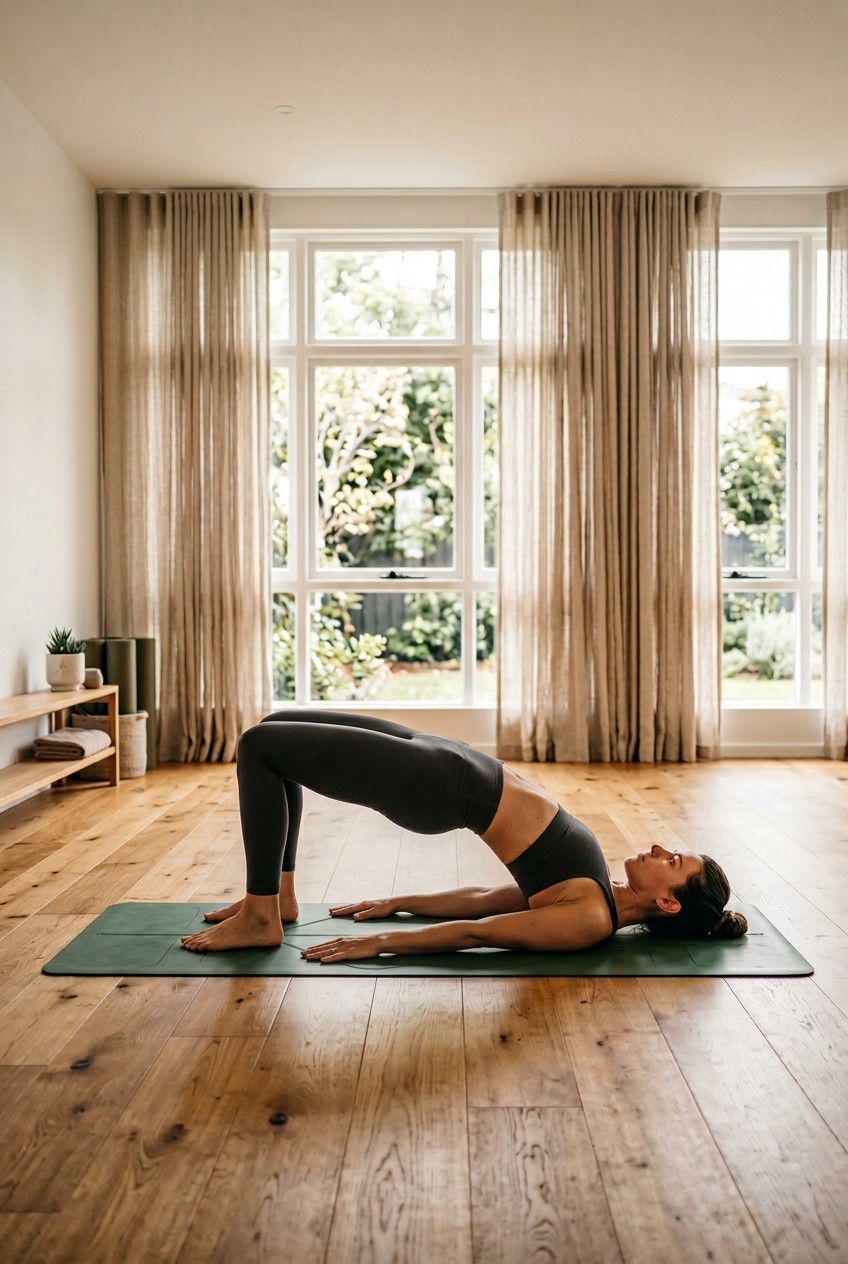
What’s Inside
- Start Your Pilates Workout Plan With The Right Mat Thickness
- Master Lateral Breathing Before You Do A Single Crunch
- Buy Real Grip Socks (Stop Sliding Around)
- Find Your Neutral Spine To Stop Lower Back Pain
- Build A Hybrid Pilates Workout Plan For 2026
- Invest In A Home Reformer If You’re Serious
- Don’t Neglect Your Feet And Toes
- Focus On Quality Reps And Listen To Your Joints
I spent my entire Tuesday morning last week on my living room floor, staring at the popcorn ceiling and clutching my bruised tailbone. I’d tried to jump into a new pilates plan using a paper-thin, 3mm mat I grabbed on clearance for $9.99 at Target. Huge mistake. The hard oak floor won that battle instantly. My lower back was screaming, and the cheap foam smelled like industrial glue and regret. If you’re trying to build a 30-day pilates plan that actually gets results without sending you to the chiropractor, you can’t just wing it. I’m Ryan. As a fitness trainer who reviews gear for a living, I’ve made every dumb mistake you can make on a mat. I’ve bought the wrong gear, rushed movements, and ignored my spine alignment completely. It’s time to fix that.
Skip the generic advice. It reads like a textbook and doesn’t help you in the real world. When you’re sweating, you need practical cues that make sense for your actual body. Let’s break down exactly what you need to do, buy, and feel over the next month to see real changes in your core strength and mobility. We’ll cover everything from the exact thickness of your mat to the specific way your toes should grip the floor.
1. Start Your Pilates Workout Plan With The Right Mat Thickness

Don’t underestimate mat thickness. A standard 3mm yoga mat is useless for Pilates. When you do an exercise like ‘Rolling Like a Ball,’ you’re balancing on your sit bones and rolling backward onto your spine. Do this on a thin mat, and you’ll feel every single vertebra grind against the hard floor. It sounds like knuckles cracking and feels twice as bad. You need a dedicated Pilates mat between 8mm and 15mm for cushioning, especially to protect your spine, knees, and wrists.
I was standing in line at Trader Joe’s last Friday, holding a 16 oz jar of their crunchy almond butter, and my lower back was throbbing. Why? Because I’d tried reverse crunches on a bare hardwood floor the night before. Never again. I swear by the Airex Coronella mat. It costs around $120 and is 15mm thick. Stepping on it feels like walking on a dense, supportive marshmallow. It doesn’t compress down to the floor when you put your weight on it. Learned that the hard way.
If you want something slightly thinner but still protective, Sweaty Betty’s Eco Yoga Mat sits around 6mm to 8mm thick and costs exactly $68. It provides a fantastic balance for both Pilates and yoga. It has a slightly sticky, textured grip that keeps sweaty palms from sliding out during planks. The foam is incredibly dense, so your tailbone won’t punch through to the floor when you’re doing V-sits. Throw out the cheap paper-thin mats. Your joints will thank you.
2. Master Lateral Breathing Before You Do A Single Crunch

A common mistake is rushing through exercises like you’re trying to beat a timer. Joseph Pilates, the founder, called his system “Contrology.” He emphasized absolute control over every muscle fiber. Instead of focusing on hitting 20 sloppy reps, slow down each movement. Inhale to prepare, and exhale during the hardest part of the effort. This allows your breath to support your core engagement and creates fluid transitions.
Beyond breathing, focus on lateral or diaphragmatic breathing. Most people breathe entirely in their chest, raising their shoulders to their ears. Inhale deeply into your ribcage, expanding it sideways like an accordion. As you exhale slowly, draw your abdominals in tightly. Imagine you’re tightening a thick leather belt around your waist by two notches. This technique is crucial because it activates the deep transverse abdominis muscles that actually flatten your stomach.
I used to hold my breath during the ‘Hundred’ until my face turned the color of a ripe tomato. I’d rush through the arm pumps just to get the burn over with. I figured out how crucial lateral breathing is while dragging a massive 24-pack of bottled water out of Costco last month. I braced my core, breathed laterally into my ribs instead of my chest, and my lower back didn’t tweak like it usually does when I lift heavy objects. Practice this standing up before you ever take it to the mat.
3. Buy Real Grip Socks (Stop Sliding Around)

For both mat and reformer work, grip socks are essential for preventing slips and maintaining hygiene. If you’re going to a studio, they won’t even let you on the equipment barefoot. I tried doing reformer lunges in regular cotton Hanes socks once. My back foot slipped on the sweaty black vinyl, I slammed my knee into the wooden frame, and it echoed through the studio. The carriage smelled like stale rubber, and my pride was shattered. Trust me on this. You might also like: 20 Gorgeous Garage Home Gym Setup Ideas to Steal Right Now
You need socks with thick, durable silicone grips. Brands like Tavi are popular for reformer grip and style, though they can be expensive at up to $40 per pair. If you want something that lasts forever, DeadSoxy’s TrueStay technology offers extreme durability. They guarantee 100+ wash cycles without the silicone peeling off. If you’re just starting out, Gaiam makes a great basic grip sock that costs exactly $12.99 at Target. You might also like: 20 Brilliant Commercial Home Gym Setup Ideas Worth Trying This Year
When you wear regular socks, your toes bunch up and you lose all connection with the floor. Good grip socks allow you to spread your toes wide, giving you a wider base of support for standing balance. Some specialized brands, like Knitido+, are designed with individual toe separation. They look like gloves for your feet, but they actively encourage toe articulation which fixes your leg alignment. Stop sliding around and get some traction. You might also like: 15 Beautiful Photoshoot Home Workout Ideas to Steal Right Now

NICEPEOPLE Adjustable Weight Bench for Home Gym
A dependable everyday pick — NICEPEOPLE Adjustable Weight Bench for Home Gym pulls in 32 ratings at 4.5 stars. Not flashy, just solid.
4. Find Your Neutral Spine To Stop Lower Back Pain

You’re probably ruining your lower back without realizing it. A frequent mistake during core work is over-arching or excessively tucking your pelvis. This disrupts your spinal support and turns off your deep core muscles. Instead, find your neutral spine. When lying on your back, there should be just enough space to slide your fingertips under your lower back. Engage your deep abs without clenching your glutes.
I spent months shoving my lower back into the floor during leg lifts like I was trying to crush a bug. I thought that meant my core was tight. In reality, I was just straining my lumbar spine. I was walking through Sprouts looking for 8 oz bags of chia seeds when I caught my posture in the reflection of the bulk bins. I was slouching like a caveman, with my pelvis tucked completely under me. Pilates fixes this, but only if you nail the neutral spine first.
As Joseph Pilates famously said, “A man is as young as his spinal column.” If your spine is stiff, you’ll feel old and achy. Beware of neck and shoulder tension. When performing curl-ups, many people lift their shoulders towards their ears or strain their neck forward. Keep your shoulders relaxed and heavy, drawing your shoulder blades down into your imaginary back pockets. Imagine holding a small green apple under your chin. This keeps your neck perfectly aligned.
5. Build A Hybrid Pilates Workout Plan For 2026

The fitness landscape is changing fast. The year 2026 is seeing a rise in hybrid Pilates models. People are finally blending traditional Pilates with heavy weight training, athletic conditioning, or mobility work. For noticeable results, aim for 3 to 4 sessions per week. Beginners can start with two to allow muscles to adjust, while advanced practitioners might increase to 4 or 5.
You don’t need a fancy studio to get a good routine going. I prefer doing Wall Pilates at home. It’s a huge trend. You use a blank wall to create balance and resistance challenges that mat work alone can’t provide. I even bought a 3-pound pair of Bala Bangles for $55 at Whole Foods to add extra ankle resistance during my wall routines.
Utilize online platforms for variety. Online Pilates classes are booming. Platforms like Pilates Anytime offer a vast library of classes for just $22 a month. Upskillist provides affordable subscriptions ranging from $10 to $39.99 a month with hybrid learning and AI-driven tools. These platforms allow you to filter by your specific focus, the duration you have available, and the equipment you own. It makes it easier to fit a real session into a busy workday.
6. Invest In A Home Reformer If You’re Serious

If you’re serious about taking your practice to the next level, a home reformer is a major investment. Mat work is fantastic, but the spring resistance of a reformer builds lean muscle faster. Entry-level models like the AeroPilates Pilates Studio 700 Reformer can be found for around $300 to $1357. These budget models use heavy-duty elastic bungee bands for resistance instead of metal springs.
I tried a cheap $150 knock-off reformer once. The elastic bands snapped mid-lunge, and the carriage ground against the aluminum rails with a horrible screeching sound. I pinched my finger in the track, and it swelled up like a purple grape for three days. You get what you pay for with these machines. No exaggeration.
For a true studio-quality experience, look at Balanced Body reformers. They range from $3,200 to over $8,000. They feature heavy-duty steel coil springs that provide a smooth, progressive resistance that feels like pulling a heavy door shut. Merrithew’s V2 Max Reformer, priced around $4,999, is also highly recommended by professionals. The carriage glides silently, the ropes don’t fray, and the footbar is rock solid. If you have the budget and floor space, a premium reformer will change how your body looks and feels.
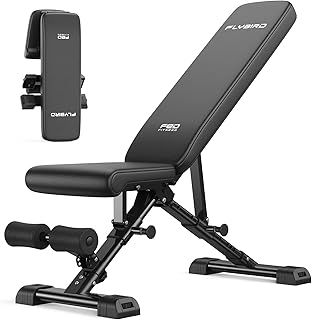
FLYBIRD WB5 Weight Bench
FLYBIRD WB5 Weight Bench punches above its price — 259 buyers rated it 4.5 stars. I would buy it again.
7. Don’t Neglect Your Feet And Toes

While often overlooked by beginners, proper foot engagement is a crucial foundation. You can’t just let your feet hang dead. You need to actively articulate your toes and engage your arches, even when wearing grip socks. This focus on the complex mechanics of the feet contributes to overall balance and stability throughout your entire kinetic chain.
Most people ignore their feet until they get plantar fasciitis. I was limping through Walmart a few months ago, trying to find a 16 oz bag of Epsom salts because my arches were cramping so badly. I’d been gripping the reformer footbar incorrectly for weeks, curling my toes like bird claws instead of wrapping my arches smoothly over the bar. It caused massive tension all the way up my calves.
To fix this, practice toe articulation. Try picking up a small towel off the floor using only your bare toes. Some grip socks, like the Knitido+ brand I mentioned, are specifically designed with toe separation to force this movement. Another pro tip: take a standard 16 oz plastic water bottle, freeze it solid, and roll it slowly under your bare foot for 5 minutes after your workout. It acts like an ice massage for your fascia and prevents the arch cramping that plagues so many beginners.
8. Focus On Quality Reps And Listen To Your Joints

Joseph Pilates emphasized that “a few well-designed movements, properly performed in a balanced sequence, are worth hours of doing sloppy calisthenics.” This means concentrating on correct form and muscle engagement for every single rep, rather than rushing to complete a set number. If your form breaks down on rep six, you stop at six. Don’t push to ten just to satisfy your ego.
Smart technology is increasingly integrated into Pilates, which is a big 2026 trend. Equipment now features sensors and AI-driven coaching. While not mainstream for all home users yet, look for apps or wearables that provide real-time feedback. I was at Kroger buying a 12-pack of eggs when my fitness watch buzzed, telling me my recovery score was a miserable 12 percent. I ignored the warning, did a heavy 45-minute session, and pulled a muscle in my neck. Took me years to figure out that rest is part of the workout.
Listen to your body and avoid pain. While Pilates encourages pushing past your muscular comfort zone, distinguish between muscle fatigue and sharp joint pain. As RTR Instructor Susan advises, “Pain is your body’s way of telling you that something isn’t right.” If you experience sharp, shooting pain, especially in your neck or lower back, take a break immediately. Reassess your neutral spine, check your breathing, and slow down.
If you stick to these rules, your 30-day plan will yield the core strength and flexibility you’re chasing. Don’t cheap out on your mat, respect your spine, and breathe through your ribs. I highly recommend bookmarking this guide so you can reference these form cues before your next session. Now get on the mat and get to work.
Frequently Asked Questions
How often should I do a pilates workout plan?
Aim for 3 to 4 sessions per week. Beginners should start with two days to let their muscles recover, while advanced users can push it to 4 or 5 days for maximum strength gains.
Do I need a reformer for a pilates workout plan?
You don’t absolutely need one. Mat Pilates is incredibly effective for building core strength. However, a reformer adds progressive spring resistance which helps accelerate muscle growth and improves flexibility much faster.
Why does my lower back hurt during Pilates?
You’re likely flattening your lower back into the mat instead of maintaining a neutral spine. You need to leave a tiny gap under your lower back to keep the load on your deep core muscles, not your spine.
What thickness should a Pilates mat be?
You need a mat that is between 8mm and 15mm thick. Standard 3mm yoga mats are way too thin and will cause serious bruising on your spine and tailbone during rolling exercises.
