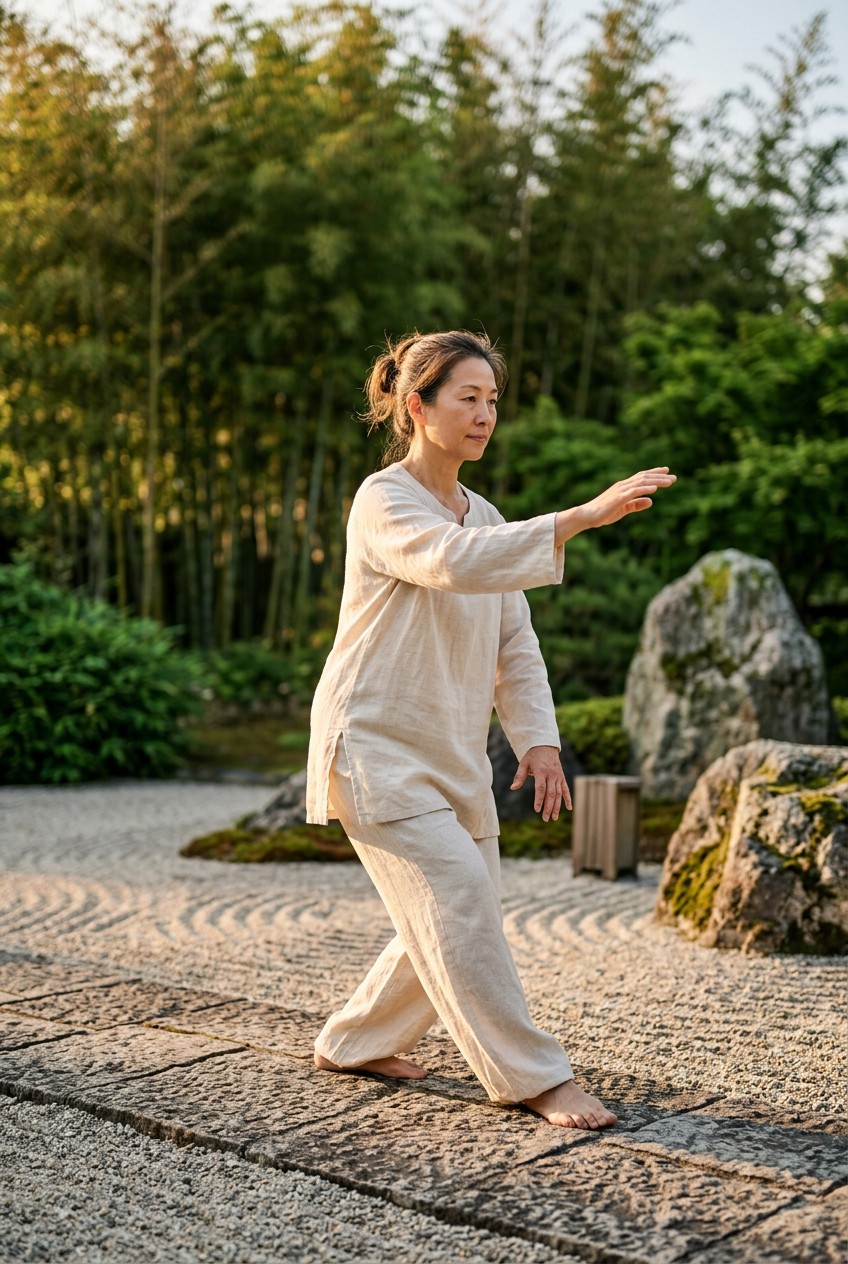
What’s Inside
- Establish Your Baseline Tai Chi Exercise Routine
- Nail The Shoulder-Width Stance From Day One
- Master The 70/30 Weight Shift
- Sink Your Elbows For Upper Body Relaxation
- Practice The Golden Chicken For Balance
- Adapt With Sun Style Tai Chi Exercise For Joint Health
- Rotate Your Waist Instead Of Twisting
- Keep Your Joints Soft And Unlocked
Last Tuesday night I was in my living room trying a basic tai chi exercise and failing. I’d just gotten back from Whole Foods with a $5.99 bag of organic green tea. I was stressed. My lower back was throbbing from deadlifts, so I figured I’d try something relaxing. I tried a slow wave motion with my hands I saw online. I lost my balance, stumbled, and knocked over my cold cup of black coffee onto the hardwood floor. The dark liquid pooled under the baseboards. The sharp, bitter, caramel-butter smell of stale dark roast filled the room. I felt ridiculous grabbing paper towels. I’m a fitness trainer. I lift heavy weights. I teach people how to squat. But moving slowly? I couldn’t do it. My brain was racing. I realized I was treating this ancient practice like a high-intensity speed drill. Most people get this wrong when they start. We rush. We tense our shoulders up to our ears. We treat it like a race. I tried this wrong for months before figuring out the mechanics. It took years. You don’t need a fancy studio. You just need a little space, some bare floor, and patience. Let’s break down the actual mechanics of how to do this at home. Skip the philosophy for now. We’re going to focus on the raw physical movements.
1. Establish Your Baseline Tai Chi Exercise Routine

I’ve always hated the idea of working out slowly. My brain wants to sprint. But the American College of Sports Medicine recommends practicing any tai chi exercise two to three times a week for 20 to 30 minutes. That’s the sweet spot for beginners. I started by buying an $8.99 basic black digital stopwatch online. I’d set it for 20 minutes and try to follow a video on my laptop. I recommend investing in real online instruction instead of bouncing around random free clips. Free clips leave you confused. Dr. Paul Lam’s Tai Chi for Health programs are fantastic for building a foundation. They cost $19.95 every two months. If you want lifetime access, Udemy has a “Learn 24 Yang Style Tai Chi” course for $34.99. I bought the Udemy one last November. I remember sitting on my scratchy rug, squinting at my dusty 13-inch laptop screen, trying to figure out where my hands should go. The biggest mistake I made was trying a full 60-minute session on day one. My legs were shaking. My mind was wandering. I quit for two weeks after that burnout. You can’t force this. Start small. Consistency builds muscle memory. You won’t get the joint benefits if you only do it once a month. Set a timer. Put your phone in another room. Focus on the 20 minutes right in front of you.
2. Nail The Shoulder-Width Stance From Day One

The foundation of everything is your stance. I’m embarrassed to admit how long I messed this up. I’d stand with my feet super close together like I was in a line at the bank. You can’t balance like that when you move your arms. Your feet need to be shoulder-distance apart. This keeps your center of gravity. When you move into a standard bow stance, both feet must be grounded. Your front foot points forward. Your back foot is angled 30 to 60 degrees. I drove to Walmart and bought a $4.50 roll of blue painter’s tape. I taped a box on my floor to show me where my feet should land. It left a sticky residue I had to scrub off, but it worked for my muscle memory. I also recommend a cushioned mat if you’re on concrete or wood. Greatmats sells 1-inch thick EVA foam Premium Martial Arts Mats for $20 to $50 per section. They feel squishy under bare feet. If you practice in a narrow stance, you’ll use weird compensatory movements to stay upright. Your lower back will ache. Your knees will complain. I learned this the hard way last summer when my IT bands tightened up. Keep your base wide. You’ll feel a deep stretch in your inner thighs. That means you’re doing it right.
3. Master The 70/30 Weight Shift

This practice relies on precise weight distribution. You aren’t just stepping; you’re pouring your body weight from one leg to the other like water. You need to shift your weight while keeping a low, stable center of gravity. A common mistake is keeping equal 50/50 weight on both feet during single-leg postures. You can’t lift a leg if it holds half your weight. You need a 70/30 split. Sometimes you need 100/0 to free the moving leg. I used to practice in slippery Kirkland Signature athletic socks I bought in a 3-pack for $12.99 at Costco. I was sliding all over the kitchen. My quads were burning. I couldn’t figure out why my transitions were so clunky. I was trying to move my empty foot before I shifted my weight. It’s like trying to open a heavy oak door while leaning your shoulder against it. Slow down. Shift 70 percent of your weight to your right leg. Feel the pressure in your right heel. Feel the left leg become light. Only then do you step. I swear by holding a heavy 26 oz Yeti Rambler water bottle (about $40) in front of my chest. The heavy water sloshing around forces me to keep my center of gravity low. You might also like: 20 Brilliant Commercial Home Gym Setup Ideas Worth Trying This Year

Fitvids Exercise Ball for Fitness, Yoga
Fitvids Exercise Ball for Fitness has been one of the most consistently praised picks in this category. 321 reviewers averaged 4.5/5.
4. Sink Your Elbows For Upper Body Relaxation

Physical tension is your enemy. If your arms and shoulders are tight, you ruin the fluid nature of the movements. Sports medicine specialist Rehal A. Bhojani, MD, points out that this art emphasizes continuous movement. You can’t achieve that if your upper traps are clenched by your ears. You have to keep your elbows sunk. Keep your arms lowered to relax your shoulder muscles. This mechanically enhances your diaphragmatic breathing. I used to hold my arms up so stiffly I looked like a tense turtle. My neck would throb after ten minutes. I’d have to take a hot shower with a 16 oz bottle of Dr. Bronner’s lavender soap (which I grab at Sprouts for $10.99) just to unclench. The lavender helped, but fixing my form was the real cure. When you raise your hands, imagine heavy iron weights hanging off your elbows. Let them drag down. As you sink your elbows, you’ll naturally take a deep breath into your belly. Inhale as you expand your chest. Exhale as you settle downwards. I couldn’t coordinate my breath with my movements for six months. I’d hold my breath until my face turned red. Focus on heavy elbows first. The breathing will follow. You might also like: 20 Inspiring Journal Home Workout Ideas You Haven’t Thought Of
5. Practice The Golden Chicken For Balance

If you want to stop tripping, you need balance drills. Studies show this practice is effective for core balance. It can reduce fall risk by 50 percent in older adults. My favorite drill is the “Golden Chicken Stance.” You stand on one leg. It sounds easy until you hold it for sixty seconds. I recommend holding onto a stable support initially. I use a cheap black Amazon Basics folding metal chair that cost $22.50. I grip the metal backrest. I lift my right knee to waist height. My left ankle wobbles as the stabilizing muscles fire. The mistake most people make is trying to close their eyes or drop the chair on day one to look cool. I tried that. I crashed into my coffee table and bruised my shin. Keep your hand on the chair. Stare at a fixed spot on the wall. Gradually increase the time you balance unassisted. After these drills, my calves are usually screaming. I drink a tall glass of cold tart cherry juice for recovery. I get the 32 oz bottles at Kroger for $6.49. The tart taste wakes me up, and the antioxidants help with the soreness. You might also like: 15 Brilliant Man Shed Home Gym Setup Ideas to Transform Your Space
6. Adapt With Sun Style Tai Chi Exercise For Joint Health

You don’t have to push through grinding joint pain. If you have bad knees, stiff hips, or arthritis, look into the “Tai Chi for Arthritis” program. It was developed by Dr. Paul Lam and is backed by the American College of Rheumatology and the Arthritis Foundation. This sun style adaptation features higher, safer stances. It includes gentle mobility movements rather than deep lunges. Research shows it can reduce joint pain by 35 percent and cut morning stiffness by 29 percent. I don’t have severe arthritis, but I get stiff knees in the winter. Some mornings, my kneecaps sound like bubble wrap. I used to slather on Biofreeze roll-on gel. I buy the 2.5 oz green tubes for $11.98 at the pharmacy. The menthol smell would clear my sinuses, but the stiffness returned by noon. Switching to these higher stances changed everything. You don’t sink into a deep, painful squat. You stand taller. You take smaller steps that don’t torque your knees. I practice this in my kitchen while snacking on a $4.99 bag of raw unsalted almonds from Trader Joe’s. The crunch and the slow movements make for a perfect morning routine. Don’t force yourself into deep postures because it looks athletic. High stances work for building internal strength.

Fitvids Exercise Ball for Fitness, Yoga
Fitvids Exercise Ball for Fitness punches above its price — 321 buyers rated it 4.5 stars. I would buy it again.
7. Rotate Your Waist Instead Of Twisting

This mechanical detail will save your lower back. When you turn, your entire structure must rotate as one unit. The movement initiates from your waist or pelvic area. You can’t twist your torso independently from your hips. Twisting disrupts your spinal alignment. It leads to imbalance and back pain. Proper rotation maintains shoulder-hip continuity. Imagine your shoulders and hips are connected by steel rods. They move together. I learned this the hard way. I used to twist my upper body while leaving my hips pointing forward. Last October, I felt a sharp pinch above my tailbone. I spent three days lying flat on the floor to massage the knots out. To fix this, I bought a Valeo fitness lifting belt for $15.99. I strapped it tightly around my waist during practice. The pressure gave me instant feedback. I could feel when my hips were moving and when they were stuck. If the buckle didn’t turn, my shoulders weren’t allowed to turn either. Stop twisting your spine like you’re wringing out a towel. Rotate your entire center. It feels robotic at first, but it protects your spinal discs and generates power.
8. Keep Your Joints Soft And Unlocked

The final piece is subtle joint softness. Never lock your joints. Keep a soft bend in your knees, elbows, and wrists. This fluidity is essential for absorbing and generating energy. It prevents joint strain and ligament tears. I used to lock my knees back like I was standing at attention. I’d wear these clunky Asics Gel-Contend 7 running shoes that cost $65. The heel drop combined with my locked knees caused hyperextension pain. I took the shoes off and practiced barefoot on my mat. Feeling the hard floor forced me to soften my knees to absorb my body weight. If you lock your joints, the energy stops flowing. You become brittle and easy to knock off balance. Think of your limbs like pliable rubber bands, not wooden sticks. They should always have a little bouncy give. I noticed a difference once I stopped locking my elbows on pushing motions. My shoulders stopped clicking. My movements looked graceful and felt effortless. These adjustments take time. Don’t beat yourself up if you catch yourself locking a knee. Just soften it, take a breath, and keep moving.
I’m not going to pretend mastering this is a quick process. It requires daily patience. You’ll feel awkward and frustrated for weeks. I certainly did. I wanted to quit multiple times. But if you stick with it, the mental clarity, the balance, and the joint relief are worth the frustration. I swear by doing 20 minutes of practice right after I wake up. It sets my brain straight, warms up my joints, and grounds me before I look at my phone. Grab some foam mats, find a quiet corner, and start stepping slowly. Forget about looking perfect or matching the master in the video. Just focus on your breathing, your heavy elbows, and your weight shifts. If you found this breakdown helpful, I’d love it if you saved or pinned this article for your next practice. Let me know which tips helped you the most, and keep moving.
Frequently Asked Questions
How often should I practice a tai chi exercise?
The American College of Sports Medicine recommends practicing two to three times a week for 20 to 30 minutes. Consistency is much more important than duration. Short, frequent sessions build muscle memory faster than one long, exhausting weekend session.
Do I need special shoes for this practice?
You don’t need expensive martial arts shoes. In fact, practicing barefoot or in flat, soft-soled socks on a foam mat is best for beginners. It allows you to feel the floor and properly distribute your weight without thick rubber soles getting in the way.
Can these movements really help with joint pain?
Yes. Modified programs, specifically the sun style variations, feature higher stances and gentle mobility work. Studies backed by the Arthritis Foundation show this can reduce joint pain by 35 percent and morning stiffness by 29 percent without heavy impact.
Why do my shoulders hurt when I practice?
You’re likely holding too much tension in your upper traps. Focus on sinking your elbows and letting your arms feel heavy. If you keep your shoulders hunched up by your ears, you’ll restrict your breathing and cause severe neck and shoulder fatigue.
