What’s Inside
- Prioritize Quality Flooring Early in Your Garage Gym Design
- Measure Ceiling Height Meticulously for Your Rack
- Invest in a Versatile, High-Quality Barbell
- Choose Bumper Plates for Floor and Barbell Protection
- Optimize Lighting to Complete Your Garage Gym Design
- Control the Climate and Airflow
- Maximize Wall Space for Clever Storage
- Incorporate Smart Tech and Entertainment
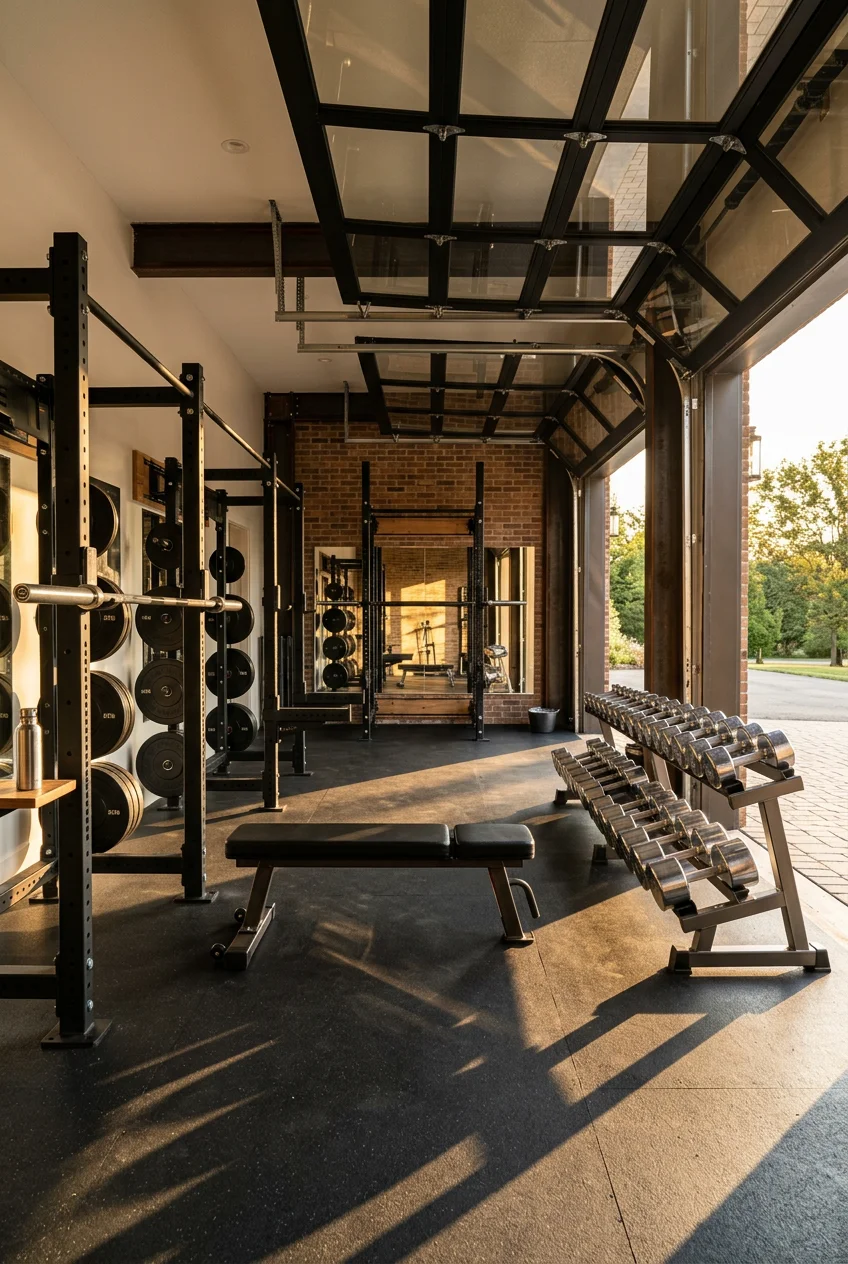
Last November, I dropped a 45-pound iron plate onto my bare concrete floor. It taught me a harsh lesson about garage gym design. The sound was like a shotgun blast echoing through my neighborhood. That crater in the floor looked like a small meteor strike. That was the moment I realized my setup was a total disaster. I’d bought cheap gear from Target and a $45 tub of bulk whey protein from Costco without thinking about the actual layout or infrastructure. You can’t just throw a bench in a dusty room and call it a day. Good gym spaces need specific measurements, heavy-duty materials, and logical planning. I learned this the hard way after ruining my floor and nearly breaking a window with a rogue barbell collar that snapped off mid-lift. Building a functional space takes effort. It’s worth it once you get the details dialed in. Let’s walk through how to build a space that makes you want to train, rather than a cluttered storage room you avoid.
1. Prioritize Quality Flooring Early in Your Garage Gym Design

Start with the floor. I did it wrong for months before figuring it out. When I first started lifting at home, I bought thin, interlocking foam puzzle mats. They cost me $19.99 for a six-pack. Three weeks later, my bench press had permanent divots in the foam, and the corners curled up so badly I tripped while carrying a 50-pound dumbbell. Skip the foam mats. They compress like a wet sponge and offer zero protection for heavy lifting.
Instead, get 3/4-inch thick rubber stall mats. These are the heavy, dense mats used for horses. You can find them at your local tractor supply store. They usually measure 6 feet by 4 feet and cost about $40 to $60 per mat. I drove my truck to a farm supply shop last Tuesday and loaded up six of them. They weigh nearly 100 pounds each, so bring a friend to help. They’ll smell like raw rubber for the first two weeks. Leave your doors open and run a fan to air them out. Once they settle, they’re indestructible.
These mats protect your concrete from impacts and provide a solid grip. Lay them across your entire workout area. Don’t skimp and just put them under the rack. You need a flat floor to prevent tripping when walking backward with a heavy barbell. I spent $300 on my flooring, saving me thousands in concrete repair bills. Plus, dropping a loaded barbell on 3/4-inch rubber gives a satisfying, muffled thud instead of a house-shaking crash. If you need to cut them to fit around a wall, slide a 2×4 piece of wood underneath the mat and score it repeatedly with a sharp utility knife.
2. Measure Ceiling Height Meticulously for Your Rack

Before you look at a power rack online, get a tape measure. Accurately measure your ceiling height in three different spots. A common mistake is assuming your ceiling is perfectly level. Mine wasn’t. The front near the driveway was a full inch lower than the back wall. You need at least 9 to 10 feet (about 2.7 to 3 meters) of clearance. This is crucial for a full range of motion during pull-ups and standing overhead presses.
Not measuring correctly leads to a massive headache. I bought a 90-inch tall rack from Titan Fitness for $450 without doing the math. I forgot to account for the metal door track running above my lifting zone. I also didn’t realize that my new stall mats would subtract almost a full inch from my total height. When I assembled the rack, the top pull-up bar was wedged against a wooden ceiling joist. I couldn’t get my chin over the bar without scraping my forehead on the rough wood. It was a $450 mistake. I had to pay a $75 restocking fee to return it. I learned that the hard way.
Learn from my failure. Take the exact height of the rack, add the thickness of your flooring, and then add your own height plus arm length for overhead work. If you’re 6-foot-2 like me, you need serious vertical space. If your ceiling is low, look into a squat stand or a shorter rack designed for basements. Don’t force a massive rig into a tiny box. You won’t use the pull-up bar if you’re constantly dodging structural beams.
3. Invest in a Versatile, High-Quality Barbell

Adopt a buy once, cry once philosophy for your primary barbell. This is the piece of equipment you’ll touch during every workout. The knurling texture, the whip, and the spin all dictate how the weight feels. I spent my first year lifting with a cheap, chrome-plated bar that came in a 300-pound weight set from Walmart. The knurling was so passive it felt like a smooth PVC pipe. My hands slipped constantly during heavy deadlifts, limiting my progress.
You need a bar with 190,000 PSI tensile strength for durability. Anything less will eventually bend if you drop it on the safety pins. I highly recommend the Rogue Echo Bar 2.0. It usually costs around $205. The zinc coating holds up well against humidity. If you want something with flair, the Synergee Games Cerakote Barbell is another budget-friendly option. It frequently runs under $250. The Synergee Games bar features needle bearings instead of standard bushings. This provides a smooth, fast spin ideal for Olympic lifts like cleans and snatches. You might also like: 12 Hip Thrust Workout You Need to See
I bought the red Cerakote version last spring. The finish feels slightly chalky, which holds lifting chalk incredibly well. You won’t regret spending $200 on a good bar. It prevents wrist strain and keeps the plates rotating smoothly during fast movements. Skip the cheap sporting goods store bars. They rust quickly and bend permanently. To keep your bar spinning nicely, apply a few drops of 3-in-One oil to the sleeves every six months and scrub the knurling with a brass bristle brush to remove dead skin and chalk buildup. You might also like: 9 Gym Poses Women Worth Trying

YOLEO Adjustable Weight Bench for Home Gym
A dependable everyday pick — YOLEO Adjustable Weight Bench for Home Gym pulls in 47 ratings at 4.5 stars. Not flashy, just solid.
4. Choose Bumper Plates for Floor and Barbell Protection

Iron plates look hardcore, but they’re a nightmare for a home setup. I told you about the crater I put in my concrete floor. After that, I switched to bumper plates. You want plates made from virgin rubber with a dense metal center. These are designed to withstand drops from overhead with a low bounce. A low bounce is vital. You don’t want a 225-pound barbell bouncing back up and smashing your shins. You might also like: 20 Lovely Aesthetic Home Morning Workout Routine to Inspire Your Next Project
I picked up a 260-pound set of Synergee bumper plates for $450. They safeguard both your floor and the sleeves of your barbell. Recycled crumb rubber plates are cheaper, but they smell like a tire fire and bounce wildly. Virgin rubber is denser, thinner, and much quieter. When I drop a deadlift now, it hits the floor and stops dead. The metal center ring ensures the plate slides onto the barbell sleeve without tearing the rubber.
A quick pro tip: you don’t need a full set of bumpers if you’re on a budget. Buy one pair of 45-pound bumper plates to set the proper height and absorb impact. You can fill the rest of the bar with cheaper iron plates. I grab iron plates off Facebook Marketplace for 50 cents a pound. But those 45-pound bumpers aren’t optional for floor protection. They also make the gym look cleaner. Wipe them down with a damp cloth once a month to keep the rubber looking fresh.
5. Optimize Lighting to Complete Your Garage Gym Design

Most garages come with a single, dim 60-watt bulb. This creates harsh shadows and makes the room feel like a dungeon. Proper lighting is a massively overlooked element. You can’t safely unrack a heavy squat if you can’t see the j-cups clearly in the mirror. I spent three months lifting in near darkness before I realized it was killing my motivation. I’d come home from buying overpriced organic chicken breasts at Whole Foods, walk into my dark garage, and immediately want to sit on the couch.
You need bright, even lighting. I bought a set of Barrina LED Shop Lights from Amazon. A pack of six 4-foot LED fixtures costs about $45. They link together with plug-in cords. I zip-tied them directly to my ceiling joists. The difference was staggering. The room went from a creepy storage unit to a bright training facility.
I opted for the 5000K daylight color temperature. It mimics natural sunlight and keeps you alert. Don’t use warm, yellow bulbs. They make the space feel sleepy. You want crisp, white light. I also added a $15 clamp light from Home Depot pointing at my lifting platform. It acts as a spotlight for recording form check videos. Good lighting costs less than $60 and changes the energy of the room. I used adhesive cable tie mounts to route the wires cleanly along the ceiling corners so it doesn’t look like a messy spiderweb.
6. Control the Climate and Airflow

A garage is an uninsulated metal box. In July, it’s a humid oven. In January, it’s a freezing meat locker. If you don’t plan for temperature control, you won’t train for months. I live in the Midwest. Last August, the temperature in my space hit 104 degrees. I tried doing a heavy leg day and ended up dizzy, sitting on the concrete drinking a gallon of cheap store-brand water from Kroger. It was miserable.
You need industrial-grade airflow. Don’t bother with a tiny oscillating desk fan. It won’t do anything against stagnant heat. I bought a 24-inch Lasko High Velocity Floor Fan for $125. It sounds like a jet engine, but it moves a massive volume of air. I point it at the squat rack. It dries the sweat off my skin instantly and makes a 90-degree day feel tolerable.
For winter, a standard space heater isn’t enough. I invested in a Dr. Heater 240-volt garage heater for $150. It requires a dedicated 240V outlet, which cost me $200 for an electrician. It was worth every penny. It heats my two-car space from 30 degrees to 60 degrees in twenty minutes. A pro tip for winter: keep your barbell inside the house and carry it out for your workout. Touching freezing cold metal knurling is brutal and ruins your grip. I also bought cheap foam insulation panels for $80 and stuffed them into my garage door panels to trap the heat.

SPORTBIT Adjustable Jump Rope for Fitness and Exercise
A dependable everyday pick — SPORTBIT Adjustable Jump Rope for Fitness and Exercise – Skipping Rope pulls in 89 ratings at 4.5 stars. Not flashy, just solid.
7. Maximize Wall Space for Clever Storage

Floor space is your most valuable asset. Every square foot taken up by clutter is space you can’t use for lunges or deadlifts. When I first set up my space, I left my foam rollers, jump ropes, and resistance bands scattered on the floor. It looked messy and I tripped over them constantly. I even tripped over a box of peanut butter pretzels I bought at Trader Joe’s that I stupidly left sitting next to my bench.
You’ve got to utilize your walls. I bought a Wall Control pegboard system for $110. It’s made of galvanized steel, not cheap particle board that rips out when you hang something heavy. I mounted two panels next to my rack. I use heavy-duty steel hooks to hang my lifting belt, fractional plates, bands, and collars. Getting everything off the floor makes the room feel twice as large.
I also installed a Rogue 3-Bar Gun Rack for $55. It bolts directly into the wall studs with lag screws. You’ll need a magnetic stud finder to make sure you hit the center of the wood. This rack holds my barbells horizontally on the wall. If you store barbells vertically in a corner, you risk knocking them over and damaging the sleeves. Wall storage keeps your gear organized and visually appealing. A clean gym is a motivating gym. When everything has a place, you spend less time searching for a 2.5-pound plate and more time lifting.
8. Incorporate Smart Tech and Entertainment

Lifting in silence is awful. You hear every joint pop and every heavy breath. You need a solid audio setup to drown out the suffering. I used to put my iPhone in a plastic cup to amplify the sound. It sounded like tinny garbage. Then I bought a JBL Charge 5 Bluetooth speaker for $149. It’s waterproof and dustproof, perfect for a garage. The bass is loud enough to rattle the cheap metal shelving in the corner.
A common mistake is mounting a TV too high. I see people put TVs near the ceiling. If you’re doing floor work or stretching, you strain your neck trying to watch it. I mounted a cheap 43-inch TCL Roku TV ($199) at eye level while standing. It’s perfect for watching form videos or streaming a baseball game while I do long sessions on the air bike. Because the wifi signal was weak, I added a $30 TP-Link wifi extender so my shows wouldn’t buffer.
I also added a $25 Wyze Cam in the corner. It serves two purposes. First, it acts as security since I leave my door cracked for fresh air. Second, I use it to record my heavy sets. I can pull up the footage on my phone instantly to check my squat depth. It’s much easier than trying to balance my phone against a water bottle every set. Tech doesn’t have to be expensive, but it impacts the vibe of your space.
Building a home gym doesn’t happen overnight. It took me three years of swapping out bad gear, returning equipment that didn’t fit, and rearranging heavy rubber mats to finally get it right. You’ll make mistakes, but sticking to these fundamentals will save you a lot of cash. Start with the heavy 3/4-inch rubber mats and a 190,000 PSI barbell that won’t bend. Everything else can be added slowly as your budget allows. I’m sitting in my garage right now looking at my setup, and I wouldn’t trade it for a commercial gym membership. You’ll appreciate having your own private space where you control the music and the equipment is always open. If you found this breakdown helpful, pin this article to your fitness or home improvement boards for later. You’ll definitely want to reference those ceiling measurements before you hit checkout on a massive power rack.
Frequently Asked Questions
How thick should garage gym flooring be?
You need 3/4-inch thick rubber stall mats. Thin foam mats won’t protect your concrete from heavy deadlifts. You can buy 6-foot by 4-foot heavy rubber mats at local tractor supply stores for about $50 each.
How tall does a garage ceiling need to be for a power rack?
You need a minimum of 9 to 10 feet of clearance. This allows for a full range of motion during pull-ups and standing overhead presses. Remember that your rubber flooring will subtract nearly an inch from your total height.
Are bumper plates better than iron plates for a home gym?
Yes, virgin rubber bumper plates are much better for home use. They protect your concrete floors from cracking, reduce noise drastically, and save your barbell sleeves from damage when dropped. They are worth the extra initial cost.
How do you heat a garage gym in the winter?
A standard space heater isn’t enough. You need a 240-volt electric garage heater mounted to the ceiling or wall. You’ll likely need an electrician to install a dedicated outlet, but it heats the space efficiently in twenty minutes.
