
What’s Inside
- Master Progressive Overload in Your Military Calisthenics Workout
- Prioritize Impeccable Form Over High Reps
- Elevate Your Grip Strength for Better Bar Work
- Optimize Performance with Diaphragmatic Breathing
- Invest in a Quality Pull-Up Bar for Home Training
- Scale Your Push-Up Variations for Chest Development
- Hammer Your Core with L-Sits and Hollow Body Holds
- Build Leg Endurance with High-Volume Air Squats
- Integrate Burpees for Full-Body Conditioning
- Add Running Intervals to Your Military Calisthenics Workout
- Use Rucking to Mimic Military Load Carriage
- Prioritize Active Recovery and Mobility Work
Last October, I tried to keep up with a marine buddy during his morning routine in a humid park in Austin, and I ended up dry-heaving behind a trash can after ten minutes. I realized my fancy gym machines hadn’t prepared me for a real military calisthenics workout, where your body weight is the only resistance you get. I spent the next six months completely rebuilding my training from the ground up. I ditched the heavy barbells, stopped relying on padded benches, and focused entirely on functional bodyweight movements. I learned very quickly that you can’t fake your way through strict pull-ups or chest-to-deck push-ups. If you want to build the kind of endurance and functional strength that holds up in the real world, you have to strip away the distractions. Here are twelve tactics that completely changed how I train, along with the exact mistakes I made along the way.
1. Master Progressive Overload in Your Military Calisthenics Workout

To consistently build strength and avoid plateaus, you’ve got to gradually increase the demands on your muscles. This is the fundamental principle that drives all strength gains. When I first started, I fell into the trap of rep chasing. I’d just try to do 50 sloppy push-ups instead of making the movement harder. I kept a little $2.99 Up&Up spiral notebook from Target in my gym bag and just wrote down higher numbers every week, but my chest wasn’t actually getting stronger. Learned that the hard way.
Don’t just do more reps. You’ve got to vary the difficulty. If you can easily knock out 20 standard push-ups, increase the repetitions slightly, but more importantly, change the leverage. Add more sets, decrease your rest time between sets from 90 seconds to 60 seconds, or advance to harder exercise variations. Moving from standard push-ups to diamond push-ups forces your triceps and inner chest to work twice as hard. A common mistake beginners make is sticking to the exact same routine for months. Your body adapts quickly. If you aren’t forcing it to adapt to a new stressor, you won’t grow. I started tracking my rest times with a cheap stopwatch, and cutting 15 seconds off my recovery periods made my usual routine feel completely impossible again.
2. Prioritize Impeccable Form Over High Reps

Correct technique is paramount in calisthenics to prevent injury and ensure effective muscle engagement. I used to cheat my range of motion constantly. I’d do half-reps on pull-ups just to say I hit a set of ten. Calisthenics athlete Ryan Sadilek cautions that cutting corners on range of motion prevents building necessary strength. Poor form is a common beginner mistake that can lead to injury and hinder long-term progress.
Always prioritize quality over quantity. For instance, in push-ups, ensure your chest nearly touches the hot, gritty floor. I actually place a yoga block or even my $14.98 Athletic Works yoga mat from Walmart folded up under my chest. If my shirt doesn’t brush the mat, the rep doesn’t count. Your arms must fully extend at the top. I recorded myself doing a set of push-ups last year and was embarrassed by how much my hips sagged. I thought I was keeping a tight core, but the video proved otherwise. Trust me on this. If you’re unsure about your form, set up your phone against a wall and record a set. Watching yourself is a brutal but necessary reality check. You’ll quickly see if your neck is craning forward or if your back is rounding.
3. Elevate Your Grip Strength for Better Bar Work

A strong grip is a critical, yet often overlooked, component for nearly all upper-body calisthenics movements and overall physical health. I used to fail on pull-ups not because my lats were tired, but because my hands literally couldn’t hold onto the bar anymore. My forearms would burn, and my fingers would just unroll. I started incorporating dead hangs into every single workout. I just hold onto the pull-up bar for 60 seconds or more at the end of my routine.
Grip strength is actually a powerful indicator of overall health and longevity. Studies link a stronger grip to lower mortality rates and better cardiovascular health. Dr. Darryl Leong, a leading researcher, suggests grip strength can be an easy and inexpensive test to assess an individual’s risk of death and cardiovascular disease. To build this, I started doing farmer’s walks. I didn’t want to buy expensive kettlebells, so I went to Costco and bought a 40-pound bag of Kirkland dog food for $35.99. I would literally bear-hug it or pinch-grip the thick plastic edges and walk laps around my driveway. It looks ridiculous, but the thick, awkward grip completely smoked my forearms. Add L-sits on the floor to build robust forearm and hand strength while simultaneously destroying your core.

FLYBIRD WB2 Weight Bench
FLYBIRD WB2 Weight Bench punches above its price — 215 buyers rated it 4.5 stars. I would buy it again.
4. Optimize Performance with Diaphragmatic Breathing

Proper breathing enhances oxygen intake, core stability, and overall performance. For the first two years of my training, I was a chronic breath-holder. I’d tense up during a heavy set of dips and hold my breath until my face turned purple. This is called the Valsalva maneuver, and unless you’re performing maximal barbell lifts under expert guidance, it can cause dangerous blood pressure spikes. I actually got dizzy and nearly passed out during a plank once because I just stopped breathing. You might also like: 20 Charming Black Garage Home Gym Setup Ideas Worth Trying This Year
You need to practice diaphragmatic belly breathing. Inhale deeply through your nose, allowing your abdomen to expand, and exhale through your mouth. For dynamic exercises, inhale during the eccentric lowering phase and exhale during the concentric contracting phase. When I drop down into a push-up, I breathe in. When I push away from the floor, I blow the air out forcefully. For static holds like planks, maintain consistent, short, and quick breaths. I keep a $12.99 Simple Truth stainless steel water bottle from Kroger right next to my mat. Taking a slow, deliberate drink of water between sets forces me to reset my breathing pattern before I jump back onto the bar. Diaphragmatic breathing maximizes oxygen intake and stabilizes your core, which you desperately need when your body weight is the only thing keeping you balanced. You might also like: 10 Gym Bag Essentials You Need to See
5. Invest in a Quality Pull-Up Bar for Home Training

A sturdy pull-up bar is a foundational piece of equipment for any calisthenics enthusiast. You can’t build a wide, thick back with push-ups alone. I tried using local park equipment for a while, but driving ten minutes just to do pull-ups in the rain got old fast. I finally bought a doorway bar for my apartment. For a versatile doorway option, I highly recommend the Iron Age Doorway Bar for around $85. It uses leverage to stay on the frame, so you don’t have to drill into your walls. The thick foam grips don’t tear up your hands as badly as bare metal. You might also like: 9 Aesthetic Fitness Gym for Every Budget
If you’re on a tighter budget, the Sagler Doorway bar runs around $40. I bought the Sagler first, and it works fine, but a quick warning. I didn’t measure my bathroom doorframe properly, and the pressure pads ended up cracking the cheap molding. No exaggeration. Measure your doorway width before you buy anything. I prefer the Iron Age model now because the higher crossbar gives me a few extra inches of clearance, which matters when you’re six feet tall and trying not to scrape your knees on the floor. Having a bar in your house means you can do a technique called greasing the groove. I just do three pull-ups every time I walk into my bedroom. By the end of the day, I’ve logged 30 reps without breaking a sweat.
6. Scale Your Push-Up Variations for Chest Development

Standard push-ups are great, but they stop building muscle mass once you can easily do sets of 20. You’ve got to change the angle to hit different muscle fibers. I spent months doing regular push-ups and wondered why my upper chest was completely flat. I started elevating my feet on a chair to do decline push-ups, which shifts the entire load onto your upper pecs and front deltoids. The blood rush to your head takes a week to get used to, but the pump is undeniable.
I also struggled with severe wrist pain from doing push-ups on hard floors. My wrists don’t bend back to 90 degrees comfortably. I bought a set of Perfect Fitness Pushup Elite handles for $29.99 at Target, and they solved the problem immediately. The handles rotate slightly, which takes the torque off your wrist joints and allows you to drop your chest a few inches lower than the floor. If you don’t want to buy handles, you can do push-ups on your knuckles on a soft surface. I tried knuckle push-ups on bare concrete once and bruised my knuckles so badly I couldn’t type the next day. Stick to a mat or grass if you go the knuckle route.

NICEPEOPLE Adjustable Weight Bench for Home Gym
NICEPEOPLE Adjustable Weight Bench for Home Gym has been one of the most consistently praised picks in this category. 33 reviewers averaged 4.5/5.
7. Hammer Your Core with L-Sits and Hollow Body Holds

Military core training isn’t about doing 500 crunches. Crunches just wreck your lower back and teach poor posture. Real functional core strength comes from anti-extension and isometric holds. The hollow body hold is the absolute king of this. You lie on your back, press your lower back flat into the ground, and hover your straight legs and arms a few inches off the floor. The first time I tried this, my entire body started shaking violently after twelve seconds.
If you have a gap between your lower back and the floor, you’re doing it wrong and risking injury. You’ve got to tilt your pelvis up. Once you master the hollow body, move on to L-sits. You sit on the floor, place your hands by your hips, and lift your entire body off the ground with your legs straight out in front of you. It requires immense triceps, core, and hip flexor strength. I cramped up in my quads so badly the first week I tried L-sits that I had to go to Whole Foods and buy a $6.99 bag of 365 brand Epsom salts for a hot bath. Start by doing them with your knees tucked into your chest, and slowly extend one leg at a time over a few weeks.
8. Build Leg Endurance with High-Volume Air Squats

Bodyweight squats often get a bad reputation because people think they don’t build mass. While they won’t give you massive bodybuilder legs, high-volume air squats build incredible muscular endurance and connective tissue strength. Military physical fitness tests often require you to perform continuous squats or lunges for time. I used to skip leg day if I didn’t have a barbell, which resulted in a very top-heavy physique and weak knees.
The key to air squats is speed and depth. You want to drop below parallel, meaning your hip crease goes below your knee joint, and explode back up. I aim for sets of 50 unbroken reps. Around rep 30, lactic acid floods your quads, and your brain starts begging you to stop. I eat a handful of Trader Joe’s peanut butter pretzels (they cost $3.49 a bag) about an hour before my workout just to get some quick carbs in my system to survive the leg burn. A massive mistake I made early on was letting my knees cave inward during the upward phase. This puts terrible shearing force on your knee ligaments. Actively push your knees out over your pinky toes on every single rep to engage your glutes.
9. Integrate Burpees for Full-Body Conditioning

There is no exercise I hate more than the burpee, which is exactly why I force myself to do them. They are the ultimate test of cardiovascular endurance and full-body coordination. A strict military burpee requires you to drop down, touch your chest and thighs completely to the deck, push back up, jump your feet in, and jump vertically with your hands clapping behind your head. No flopping, no worming your way up.
I used to try doing sets of 100 burpees for time. I’d hit rep 40, my form would completely disintegrate, and I’d end up just peeling my chest off the floor like a wet noodle. Instead of chasing a massive number, I break them into an Every Minute on the Minute (EMOM) format. I do 10 strict burpees at the top of every minute for 10 minutes. The remaining time in that minute is my rest. It keeps my heart rate spiked without sacrificing form. Because burpees drain you so fast, hydration is critical. I mix a scoop of Sprouts brand electrolyte powder, which runs about $14.99 a tub, into my water bottle to keep my muscles from cramping during the later rounds.
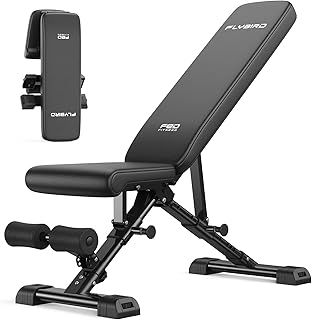
FLYBIRD WB5 Weight Bench
Honestly, FLYBIRD WB5 Weight Bench surprised me — sturdier than it looks in the photos, and over 259 buyers gave it 4.5 stars.
10. Add Running Intervals to Your Military Calisthenics Workout

You can’t have a complete military-style routine without running. Calisthenics builds the muscular endurance, but running builds the aerobic engine. I used to jog a slow three miles and call it a day. It was boring, and it didn’t translate to explosive power. I switched to combining sprints directly into my bodyweight circuits. Running 400 meters as fast as you can, immediately followed by a max set of pull-ups, will humble you instantly.
I track my intervals using a Garmin Forerunner 55 watch I bought for $199.99. It vibrates to tell me when to sprint and when to recover. A great beginner circuit is running 200 meters, doing 20 push-ups, running another 200 meters, and doing 20 air squats. Repeat that five times. The transition from running to an upper-body static movement forces your heart to pump blood rapidly between different muscle groups. I made the mistake of doing these intervals in old, worn-out tennis shoes and ended up with terrible shin splints. Invest in proper running shoes with good forefoot cushioning if you plan on mixing sprints with jumping calisthenics movements.
11. Use Rucking to Mimic Military Load Carriage

Rucking is simply walking with a weighted backpack. It is the foundation of infantry training and one of the best ways to build bulletproof legs and a strong lower back without the impact of running. I started rucking because I wanted a low-intensity cardio option that still felt like a workout. I threw some heavy books into an old school backpack, which was a terrible idea. The books shifted around, dug into my spine, and the thin straps cut off the circulation to my arms.
I eventually upgraded to a GoRuck Rucker 4.0, which costs around $215. It sits high on the back and has thick, padded straps designed specifically for carrying heavy iron plates. If you don’t want to spend that much, you can use a sturdy surplus military pack and wrap a dumbbell in a thick towel. Start with 20 pounds and walk for two miles. The added weight forces your core to engage with every step and turns a simple walk into a serious calorie-burning session. Just make sure you wear thick wool socks. I wore thin cotton ankle socks on a five-mile ruck last summer and came home with blisters the size of quarters on both heels.
12. Prioritize Active Recovery and Mobility Work

When you train with high-volume calisthenics, your muscles get incredibly tight. Your lats lock up from pull-ups, and your chest tightens from hundreds of push-ups, which pulls your shoulders forward into a permanent slouch. I ignored stretching for years. I thought it was a waste of time until I couldn’t lift my arms straight over my head without my shoulders clicking and popping.
You’ve got to spend time opening up your joints. I bought a TriggerPoint GRID foam roller for $34.99 and started rolling out my upper back and lats every night while watching TV. It hurts at first. It feels like rolling over a bag of marbles, but it breaks up the fascia and restores blood flow to the tight areas. I also do dead hangs specifically for recovery, focusing on letting my shoulders relax completely to decompress my spine. Don’t skip mobility work. Ten minutes of stretching after a brutal bodyweight session will cut your soreness in half the next day and keep your joints healthy enough to train again.
Switching to a military-style bodyweight routine completely altered my perspective on fitness. You don’t need a gym membership, and you don’t need complicated machines to get in the best shape of your life. Start with the basics, focus on perfect form, and force yourself to progress the difficulty when things get easy. If you found these tactics helpful, pin this article or save it to your bookmarks so you can reference the exact form cues before your next workout.
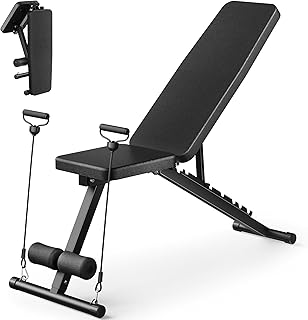
Adjustable Weight Bench for Home Gym
Adjustable Weight Bench for Home Gym has been one of the most consistently praised picks in this category. 551 reviewers averaged 4.5/5.
Frequently Asked Questions
Can I build muscle with just a military calisthenics workout?
Yes, you can absolutely build muscle using bodyweight exercises. The key is progressive overload. Once you can easily perform 15-20 reps of an exercise, you must advance to a harder variation, like moving from standard push-ups to diamond push-ups, to continue challenging the muscles.
How often should I do a calisthenics routine?
For beginners, three to four days a week is ideal. This allows for adequate recovery between sessions. As your connective tissues adapt and your endurance improves, you can increase frequency, but always listen to your body and prioritize rest days to avoid overuse injuries.
Do I need any equipment for military calisthenics?
While the core of the training is bodyweight, a sturdy pull-up bar is highly recommended to properly train your back and biceps. Exercises like pull-ups and chin-ups are very difficult to replicate without a bar. A doorway pull-up bar is an inexpensive and space-saving option.
Why is my lower back hurting during planks and push-ups?
Lower back pain during these movements usually indicates a weak core or improper form. If your hips sag toward the floor, it puts immense pressure on your lumbar spine. Focus on actively squeezing your glutes and bracing your abdominal muscles to maintain a straight, rigid bodyline.
