What’s Inside
- Find Angled Overhead Lighting For Your Gym Pics Aesthetic
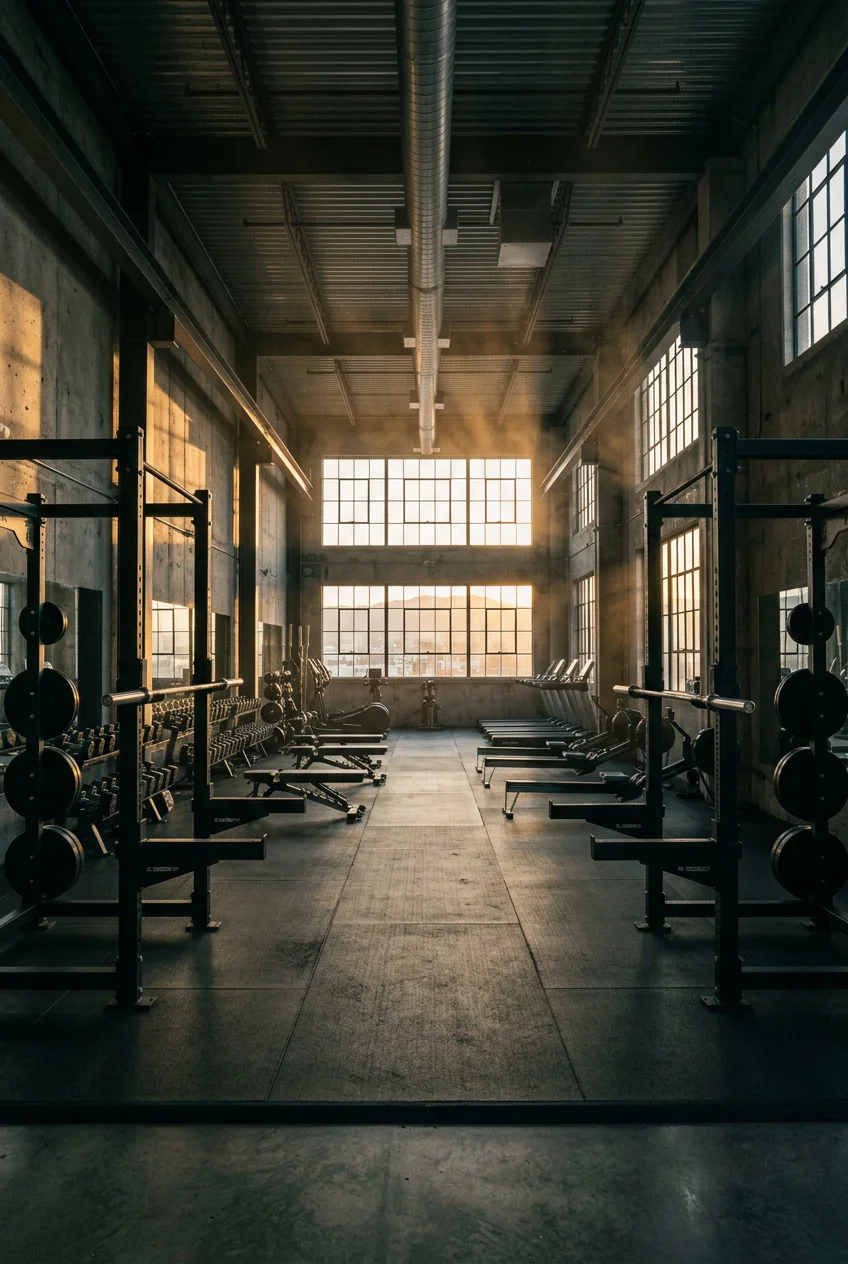
- Use Side Lighting Near Windows For Deep Muscle Shadows
- Time Your Photos Right After Your Working Sets
- Run A Specific 20-Rep Circuit Before Hitting Record
- Wear Solid Colors Instead Of Distracting Patterns
- Mount Your Phone On A Magnetic Tripod
- Drop The Camera Below Eye Level For A Gym Pics Aesthetic
- Rotate 45 Degrees Into The Three-Quarter Turn
- Lock In Your Camera Settings To Blur The Background
- Skip Heavy Filters And Try The Bodybuilder Water Trick
Last Tuesday at Target, I looked at my camera roll and realized every workout photo I’d taken looked like a blurry hostage picture. If you want gym pics that actually look intentional, you need a strategy. The overhead lighting at my local Crunch Fitness makes me look like a melted candle. Those blinding fluorescent lights and the sharp, metallic smell of rubber mats don’t scream professional photoshoot. Let’s fix that. I’ve spent years taking terrible photos and I’m tired of it. I tried forcing bad angles, using cheap filters, and wondering why my hard work wasn’t translating to the screen. It turns out, a high-quality fitness image is about controlling your environment, not just flexing harder. Trust me.
1. Find Angled Overhead Lighting For Your Gym Pics Aesthetic

Most people walk right under a giant fluorescent light to take a photo. I did this wrong for months. Last October, I took what I thought was a great shoulder shot at Crunch Fitness. When I checked my phone, the direct light cast dark shadows under my eyes and nose. I looked like a tired raccoon. Standing under a light source flattens your chest and washes out your abs entirely.
To fix this, step slightly in front of or behind the light. This creates diagonal shadows that carve out muscle definition, especially around your triceps and shoulders. You want the light hitting you from above and slightly to one side. I learned from a pro that shadows are what actually show depth. Without them, you have no definition.
If you shoot at home, you can replicate this easily. I bought a basic Onn ring light for $14.99 at Walmart last week. Instead of pointing it at my face, I raised it to seven feet and angled it down at 45 degrees. The difference in my delts was massive. The angled light catches the separation between muscle groups. Next time you finish a set, look up. Find a light panel, step two feet away from the center, and watch how the shadows fall across your collarbone.
2. Use Side Lighting Near Windows For Deep Muscle Shadows

Overhead lighting is fine, but side lighting creates dramatic pop you can’t fake with editing. Last Thursday, I parked at the gym next to the Whole Foods on 4th Street. The gym has massive frosted windows along the eastern wall. The morning sun was hitting the mirrors, creating a perfect wash of light from one side. I positioned myself so the window was to my right.
This technique creates natural highlights on one side and deep shadows on the other. The contrast makes muscles appear much more defined. I wore a $48 Gymshark Arrival t-shirt, and the side light caught the fabric’s drape perfectly. That shadow line cut my physique in half, adding a ton of depth.
A common mistake is facing the window directly. If you stand squarely facing the glass, the light fills in all your shadows. You end up looking flat, like a 2D cutout. I did this constantly when I started. I thought more light meant a better picture. It’s really about controlling the shadows. Turn your shoulder 90 degrees to the glass and watch how the shadows wrap around your obliques. Your skin texture and muscle separation will look totally different.
3. Time Your Photos Right After Your Working Sets

The best time to capture your physique is immediately after your working sets. Your muscles are engorged with blood and fluid. This creates a temporary pump that makes them look fuller. You have a short window to capture this. Don’t wait too long. The effect is fleeting.
I used to finish my workout, drive twenty minutes home, and try to take photos in my bathroom. The pump was gone. I looked deflated compared to the gym floor. Now, I take my photos before I pack my bag. Last Monday, I bought a $3.49 Celsius energy drink at Sprouts to power through a heavy chest day. The caffeine and citrulline gave me a massive pump. My veins were popping. I took the photo right there next to the bench press.
The difference between a resting muscle and a pumped one is huge. If you wait thirty minutes, your body clears the blood out. You’re losing free definition. Get your phone out while your heart rate is up. You’ll capture the actual physical effort, and the engorged muscles catch the light better.

Trideer Exercise Ball for Yoga, Pilates & Fitness
A dependable everyday pick — Trideer Exercise Ball for Yoga pulls in 529 ratings at 4.5 stars. Not flashy, just solid.
4. Run A Specific 20-Rep Circuit Before Hitting Record

If you’re doing a dedicated shoot, you need a pre-photoshoot pump-up routine. You can’t just walk in cold. Before a shoot, perform a light circuit of push and pull movements. Use light weights and aim for 20 reps per set. This forces blood into the muscles without making you sweat profusely.
I bought a $22.50 pair of 10lb CAP dumbbells from Target to keep in my car for outdoor shoots. Before I set up my camera, I run through a quick circuit. Twenty lateral raises, twenty bicep curls, twenty rows, and twenty push-ups. I repeat this twice. The goal is to get the muscles tight. Heavy lifting before a photo makes you shake, which blurs the shot. You might also like: 12 Aesthetic Gym Pics You Need to See
Nutrition plays a huge role. An hour before my last shoot, I ate a $1.19 plain bagel from Kroger and drank 32 ounces of water. The carbs and hydration pull fluid into the muscle cells, making them look rounder. Early on, I tried shooting while fasted. I thought being empty would make me look leaner. Instead, I looked flat and stringy. Eat some carbs, do a light circuit, and keep the sweat to a minimum so your skin doesn’t look greasy. You might also like: 9 Workout Plan Gym You Need to See
5. Wear Solid Colors Instead Of Distracting Patterns

Your clothing choices dictate where the viewer’s eye goes. Opt for solid-colored clothing that fits well. This keeps the focus on your physique. Avoid busy patterns, neon prints, or massive brand logos. Unless you’re getting paid to promote them, they just distract from the subject. You might also like: 20 Gorgeous Garage Home Gym Setup Ideas to Steal Right Now
I learned this the hard way. Last summer, I bought a $65 neon green camo shirt from an Instagram ad. I wore it for a back day photo. The chaotic pattern completely hid my shoulder definition. The camera couldn’t capture the shadows because the pattern was too loud. I switched to a solid black $35 Lululemon Fundamental tee from the clearance rack. The black fabric absorbs light, letting my outline stand out against the gym background.
Fit is just as crucial as color. Baggy clothes hide your proportions, while overly tight clothes bunch up and create weird fabric folds. Brands like Ryderwear make shirts with a slight taper that flatter a muscular build. When you wear a solid, well-fitted shirt, the fabric drapes naturally over your chest.
6. Mount Your Phone On A Magnetic Tripod

Stop leaning your phone against a water bottle. You won’t get the angle you want, and you risk destroying your device. You need a portable phone tripod for consistent angles. A tripod lets you step back, frame the shot, and pose without rushing to a bench.
I tried balancing my phone against a 45lb plate two years ago. The floor vibrated, my phone slid, and the screen cracked. After paying for the repair, I bought the BLAUBECK Magnetic Phone Holder for $18. It sticks to the squat rack. If you don’t want a magnetic one, the Pocket Tripod PROv2 Universal Kit costs $49.95. It’s a carbon fiber option that folds to the size of a credit card. I keep it in my bag next to my $12.99 Kirkland protein bars from Costco.
The Pocket Tripod has a 105-degree range of motion. I can adjust the tilt to capture my whole body without cropping my feet. Using a tripod also means I can use the rear-facing camera, which has a better sensor than the selfie camera. Your photos will instantly look sharper.

Iron Gym Pull-Up Bar – Total Upper Body Workout Bar for
If you want something that just works, Iron Gym Pull-Up Bar – Total Upper Body Workout Bar for Doorway is a safe bet (25 reviews, 4.5 stars).
7. Drop The Camera Below Eye Level For A Gym Pics Aesthetic

Camera height changes the perception of your body. If you want a gym aesthetic that emphasizes power, position your camera below eye level and tilt it upwards. This angle elongates your physique, makes your shoulders look broader, and gives your poses a more imposing look.
Shooting from above eye level does the opposite. It makes your head look huge and your legs look tiny. I realized this while reviewing a $110 pair of Nike Metcon 8s. I set my tripod at six feet high, pointing down. My proportions looked ridiculous. I looked like a cartoon character with stubby legs. I had to reshoot the entire session.
Now, I set my tripod at chest or stomach height. If I’m doing a seated exercise, I drop it to knee height. This angle captures the full range of motion and makes the weights look heavier. Make sure you step back so your feet aren’t cropped out. A full-body shot from a low angle anchors you to the ground. It’s a simple trick, but it changes the mood from a casual snapshot to a purposeful fitness image.
8. Rotate 45 Degrees Into The Three-Quarter Turn

Standing straight and facing the camera is the worst way to show off your work. A flattering pose involves angling your body roughly 45 degrees. This is the three-quarter turn. It adds depth, creates natural shadows, and makes the frame look dynamic.
I stood flat-footed facing the mirror for years, wondering why my waist looked wide and my chest looked flat. It’s because the lens flattens 3D objects. By turning 45 degrees, you force the camera to see the thickness of your chest, the width of your shoulders, and the taper of your waist. I was wearing a $28 pair of YoungLA shorts last month, leaning against the locker room wall. I turned my hips away from the lens but twisted my shoulders back toward it. The photo highlighted my obliques in a way a straight-on shot never could.
This pose works for almost every muscle group. If you’re showing off your back, turn 45 degrees away and look over your shoulder. This highlights the lats and traps while keeping your waist tight. Don’t just stand there like a wall. Shift your weight, pop your front knee, and let the angle do the work.
9. Lock In Your Camera Settings To Blur The Background

You can’t rely on auto settings for professional photos. Gyms are difficult environments. The lighting is mixed, people move, and backgrounds are cluttered. If you use a DSLR, set a shutter speed of at least 1/500s. This freezes motion, which is crucial for action shots.
I learned this trying to shoot a pull-up photo. I left my camera on auto. Because the gym was dim, it lowered the shutter speed. The photo was a blurry, unusable mess. Now, I shoot in manual mode using my $998 Sony A6400 with a $350 Sigma 16mm lens. I open the aperture to f/1.4. A wide aperture creates a narrow depth of field, keeping me in focus while blurring the gym background.
I keep my ISO low, around 1600, to prevent grain. If you’re using a phone, you don’t need manual exposure, but you should use Portrait Mode. It simulates that blurred background. Always use the rear camera, tap your face to lock focus, and adjust the exposure slider down slightly to make the shadows richer.

2 Pack Yoga Mat Towel with Grip Dot
If you want something that just works, 2 Pack Yoga Mat Towel with Grip Dot is a safe bet.
10. Skip Heavy Filters And Try The Bodybuilder Water Trick

The fitness industry is moving away from fake-looking photos. The current trend is all about authenticity. People want to see genuine effort and real lighting. They don’t want a photo that looks like a CGI superhero. Avoid excessive filters or retouching that distorts reality.
Instead of airbrushing your skin, use a practical effect. Bodybuilders have used the oil and water trick for decades. Apply a tiny amount of oil to your skin, then spritz it with water. The oil gives your skin a sheen, and the water beads up, creating texture that catches light and enhances vascularity. I use a $5.99 jar of organic coconut oil from Trader Joe’s. I rub a dime-sized amount over my shoulders and arms.
Don’t use too much oil. I did this once and looked like a glazed donut. It ruined my shirt and looked ridiculous. Keep it subtle. For the final polish, I use fitness-specific Lightroom presets. I bought a pack called Dopamine Gym Presets for $15. With one click, it optimizes the contrast and pulls down the harsh yellow tones of the gym lights without making my skin look orange. Focus on subtle adjustments to clarity, and let your hard work show through.
Taking solid workout photos doesn’t require a film crew. It just takes intentionality with your lighting, angles, and timing. I’ve ruined hundreds of photos by rushing, standing under terrible lights, or wearing the wrong gear. Once you dial in these ten details, your camera roll will look completely different.
I’d recommend grabbing a cheap tripod and practicing the 45-degree turn at home before you try it in a crowded gym. It saves you a ton of awkward fumbling. If you found this breakdown helpful, pin this article to your fitness board so you can reference these settings before your next heavy leg day. No exaggeration. Now get out there, chase that pump, and capture the proof.
Frequently Asked Questions
How do I get a better gym pics aesthetic with my phone?
Clean your lens, use the rear-facing camera for higher resolution, and lock your focus by tapping the screen. Lower the exposure slider slightly to deepen the shadows, which enhances muscle definition naturally without needing heavy filters.
What is the best lighting for fitness photos?
The best lighting is angled overhead lighting or strong side lighting from a window. Avoid standing directly underneath a light source, as it washes out your core and casts dark, unflattering shadows under your eyes and nose.
Should I take gym photos before or after my workout?
Always take your photos immediately after your working sets. This captures the temporary muscle pump caused by blood and fluid rushing to the muscles. If you wait even twenty minutes, you lose significant visible definition.
What should I wear for aesthetic workout pictures?
Stick to solid-colored, well-fitting activewear in dark shades like black, navy, or olive green. Avoid busy patterns, bright neon colors, or large logos, as they distract from your physique and can hide natural muscle shadows.
