What’s Inside
- Master Overhead Lighting with a Twist for Gym Mirror Pics
- Hunt Down Side Lighting for Depth
- The Portable Ring Light Fix
- Upgrade Your Camera’s Low-Light Specs
- Use a Pocket Tripod for Consistent Angles
- Clean the Glass and Clear the Background for Gym Mirror Pics
- Angle Your Body to Emphasize Muscle Groups
- Look at the Mirror, Not the Phone Lens
- Flex Subtly and Engage Your Core
- Edit for Refinement, Not Fiction
Last Tuesday, I stood in the locker room at LA Fitness staring at my phone in total disbelief. I’d just finished a brutal ninety-minute push day. My muscles were pumped. But my gym mirror pics made me look like a melted candle. Taking decent gym mirror pics is a skill I failed at for years before I finally understood the mechanics of light and angles. I used to stand flat-footed under the brightest bulb I could find, snap a blurry photo, and wonder why I looked different on camera than I did in real life. You don’t need a pro photographer following you around to get a decent shot. You just need to understand how a phone camera processes light and how your body positioning dictates the final image. I spent the last three years testing different phone setups, lighting angles, and portable tripods to figure out what works. Here are the adjustments that actually make a difference when you’re documenting your progress.
1. Master Overhead Lighting with a Twist for Gym Mirror Pics

Most gyms use massive fluorescent bays that blast light downward. If you stand dead center under one, the light hits your head and shoulders, casting dark shadows over your chest and abs. I did this wrong for months. The trick is to step exactly half a pace forward or backward from the direct beam. When you step slightly in front of the light, the beam hits your torso at an angle. This creates strategic micro-shadows under your pecs, your anterior delts, and the ridges of your abs.
I figured this out while buying a 12-pack of Core Power protein shakes for $26.99 at Costco. The warehouse lighting there mimics standard gym lighting perfectly. I looked up at the 5000K to 6500K cool white bulbs and noticed how the light wrapped around the boxes. Cool white light emphasizes sharp lines; warm light just washes everything out. You want that cool, clinical light hitting you from a slight angle, not directly on top of your skull. Take a step back, watch the shadows on your triceps shift in the mirror, and stop when the separation between the muscle bellies pops. It takes two seconds but changes the whole image. Learned that the hard way.
2. Hunt Down Side Lighting for Depth

Direct front lighting flattens your physique. It kills the shadows, which means your lens can’t detect any depth. You’re basically erasing your hard work. Actively seek out light sources coming from the side. This could be a frosted window near the stretching mats or a wall-mounted sconce in the studio. Side lighting creates bright highlights on the side closest to the light and deep shadows on the other. This contrast is what makes muscle separation look chiseled.
I stopped by Whole Foods for a $9.99 hot bar lunch a few weeks ago and stood near their massive front windows. The natural side light hitting my arm made it look twice as defined as it did in my bathroom mirror. You can replicate this in the gym. Find a spot where the primary light hits your left or right shoulder. Turn your body slightly toward it. If you’re photographing your back, let the light scrape across your lats. I’ve taken photos in dark, dungeon-like gyms where the only light was an exit sign. By positioning that light to my side, the photo showed more detail than a fully lit room.
3. The Portable Ring Light Fix

If you train at 5 AM in a place with terrible, yellow-tinted bulbs, you can’t rely on ambient light. I got tired of muddy, grainy photos, so I bought the Westcott Mini Ring Light. It costs $29.99 and clips onto phones up to 0.6 inches thick, which clears my phone case easily. It has three brightness levels and charges via USB-C. The battery lasts about two hours. The light it casts is even and fills in the harsh shadows overhead lights create.
For a wider spread, the Lume Cube 18″ Portable LED Ring Light runs about $199.99. It lets you adjust the color temperature from 3200K to 5600K. I’ll admit a mistake here. I once brought a massive ring light into a crowded gym and blinded a guy on the treadmill because I had the brightness maxed out. No joke. Keep the brightness moderate. I usually pick up gear at the Target tech aisle, where they have clip-on lights in the $15 to $40 range. A small, pocket-sized light is all you need to override bad overhead bulbs. You might also like: 15 Cozy Aesthetic Morning Workout Routine That Are Totally Worth It

TOPOKO Upgrade Pull Up Bar for Doorway
A dependable everyday pick — TOPOKO Upgrade Pull Up Bar for Doorway – Max Capacity 440 lbs pulls in 24 ratings at 4.5 stars. Not flashy, just solid.
4. Upgrade Your Camera’s Low-Light Specs

Gym locker rooms and weight areas are notoriously dim. If you’re using a phone from five years ago, the tiny sensor just can’t process enough light, resulting in a grainy, pixelated mess. The hardware matters as much as your posing. I recently upgraded my device because my old camera turned every photo into a blurry smudge once I left direct sunlight. If you’re serious about your progress, you need a camera with a large sensor and strong low-light capabilities. You might also like: 15 Creative Inside She Sheds Home Gym Setup Ideas to Steal Right Now
The Google Pixel 8 Pro retails for around $999 and handles harsh, mixed gym lighting better than most. The Samsung Galaxy S24 Ultra sits around $1299 and offers sharp detail in dim conditions. I use the iPhone 16 Pro Max, which costs $1199. The 48MP sensor captures more ambient light, meaning the shutter speed stays fast and the image stays crisp even if my hands are shaking after a heavy set of deadlifts. I compared these at the Walmart electronics counter before buying. A good camera won’t fix a bad pose, but a bad camera will definitely ruin a good one. You might also like: 20 Creative Men Home Workout Ideas You’ll Want to Bookmark
5. Use a Pocket Tripod for Consistent Angles

Trying to balance your phone against a 45-pound plate is a bad idea. I did this last year; a guy dropped a barbell, the floor vibrated, and my phone smashed face-first onto the rubber. That cost me a $250 screen repair. You need a way to stabilize your phone for consistent, hands-free shots. A portable tripod kills the shaky-hand blur and lets you control the exact height and angle.
I use the Pocket Tripod PROv2 Universal Kit. It costs $49.95, folds to the size of a credit card, and lives in my wallet. It provides a 105-degree range of motion, so I can tilt the phone up from the floor to make my legs look larger. If you need height, grab a basic extendable tripod for about $24.99 on Amazon. These reach from 60cm up to 180cm. Another great option is the GOAT Case for $29.99. The back is lined with micro-suction cups that stick directly to the mirror. I slap it on the glass, set a ten-second timer, and step back.
6. Clean the Glass and Clear the Background for Gym Mirror Pics

Nothing ruins a physique update faster than a greasy fingerprint over your chest or a background cluttered with weight belts and shaker bottles. Gym mirrors are gross. They’re covered in chalk, sweat, and handprints. I used to ignore this, but the camera lens always focuses on the smudges on the glass rather than the reflection, ruining the sharpness.
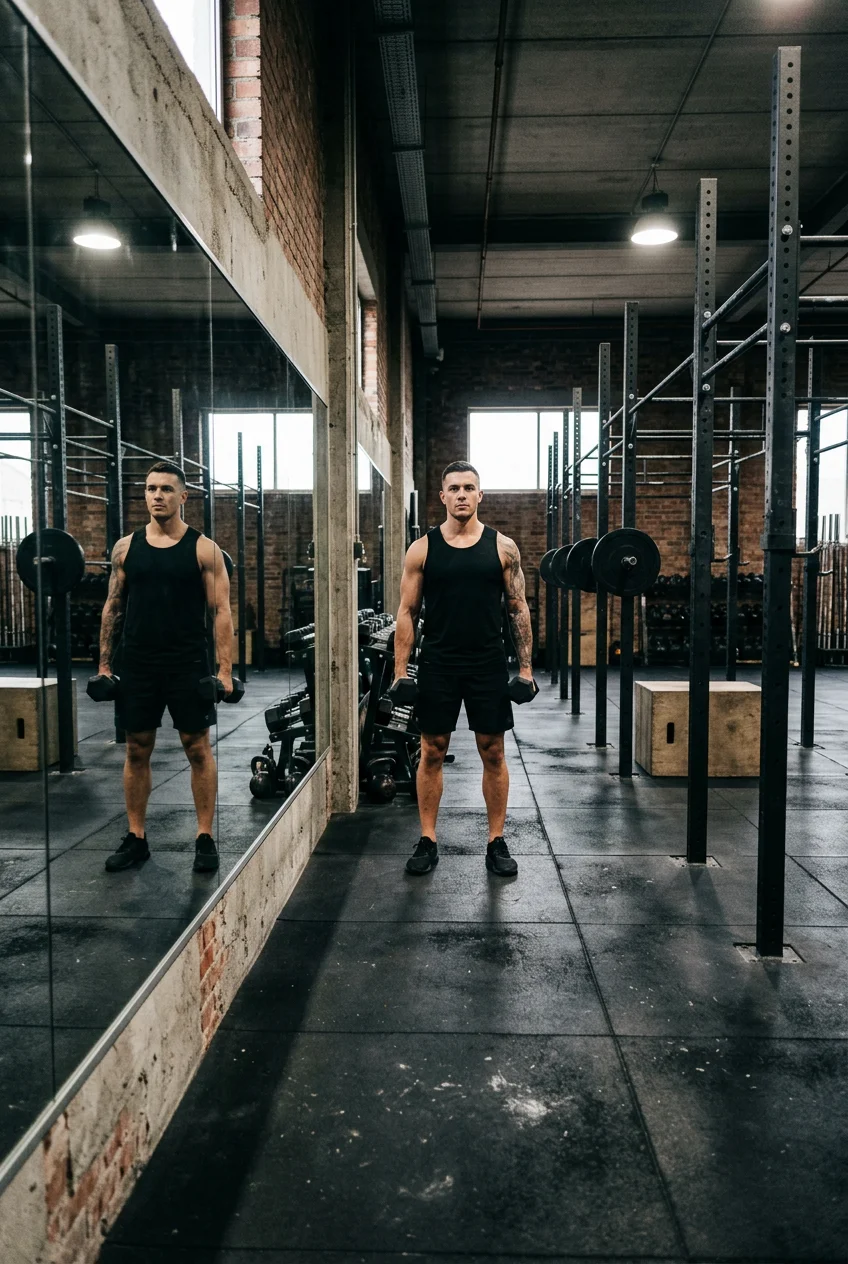
I keep a travel pack of Windex wipes in my gym bag. I buy the 28-count pack for $4.29 at Kroger. Before I take a photo, I pull one out, ignore the ammonia smell, and wipe down a two-foot square section. It takes ten seconds. Next, check the background. I once took what I thought was a great photo, only to realize there was a sweaty towel on a bench and a guy blowing his nose behind me. Kick the stray dumbbells out of the frame. Move your bag. You want a clean background that forces the eye onto your physique. A simple brick wall works best.

NICEPEOPLE Adjustable Weight Bench for Home Gym
If you want something that just works, NICEPEOPLE Adjustable Weight Bench for Home Gym is a safe bet (33 reviews, 4.5 stars).
7. Angle Your Body to Emphasize Muscle Groups

Standing square to the mirror makes your waist look blocky and hides the thickness of your chest and back. The camera is two-dimensional, so you have to create the illusion of width through rotation. Never stand straight on. Plant your feet and rotate your torso about forty-five degrees away from the mirror. This turn emphasizes your quads, highlights your chest, and makes your waist look smaller.
I was grabbing a $3.49 Celsius at Sprouts after a workout and caught my reflection in the glass door. Because I was standing sideways reaching for the can, my shoulders looked twice as wide as they do when I stand flat. Think about cropping, too. If you want to highlight lat width and pecs, shoot horizontally. If you want a full-body shot that elongates your legs, hold the phone vertically and keep the lens just above eye level. Tilting the top of the phone toward the mirror will subtly enhance your upper body while keeping your waist tight.
8. Look at the Mirror, Not the Phone Lens

This is the most common mechanical error. When you take a selfie, your instinct is to look at the tiny black lens on the back of your phone. Don’t. Because the lens is offset from the center of the mirror, looking at it makes your eyes look crossed or strained. You end up looking like you’re glaring at your own hand.
I stared at the lens for a year before someone told me I looked like a tense serial killer in every photo. The fix is simple. Look directly at your own face in the mirror. Lock eyes with yourself. This keeps your head in a neutral position, relaxes your jaw, and prevents that awkward gaze. It’s the same principle as making eye contact with the cashier at Trader Joe’s instead of staring at their scanner. It just looks more human. Let the phone camera capture your reflection passively while you focus on your posture.
9. Flex Subtly and Engage Your Core

You don’t need to hit a pro bodybuilding pose to look good, but don’t stand there completely relaxed. A relaxed muscle looks soft under harsh lighting. The goal is a subtle, isometric contraction that pushes blood into the muscle without making it look like you’re trying to pass a kidney stone. Posture is the foundation. Roll your shoulders up, back, and down. This broadens your clavicles and lifts your chest.
Next, engage your core. Don’t suck your stomach in; just brace your abs as if someone is about to toss a medicine ball at you. I once flexed my lats so hard I caught a cramp and had to drop my phone. Keep the tension at about sixty percent of your max. If you’re holding a dumbbell, grip the knurling tight. The tension in your hands travels up your forearms into your biceps, creating vascularity without contorting your body into an uncomfortable pose.

PROIRON Door Pull Up Bar Doorway Frame Chin Up Bar from
PROIRON Door Pull Up Bar Doorway Frame Chin Up Bar from 28.3in-38.2in punches above its price — 602 buyers rated it 4.5 stars. I would buy it again.
10. Edit for Refinement, Not Fiction

The fitness industry in 2026 is leaning into authenticity. People are tired of fake-looking bodies. Your editing should enhance the lighting and contrast, not alter your structure. I use VSCO, which costs $29.99 a year, for its subtle color grading. Snapseed is a free app from Google that offers precise tools for brightness and contrast. If you want professional control over shadows and highlights, Adobe Lightroom Mobile is $9.99 a month and processes RAW files beautifully.
Skip apps like FitPix that offer “abs editor” features. It’s always obvious when someone warps the background tiles to make their waist smaller. I was sitting in my truck outside Trader Joe’s last week, eating a $1.99 dark chocolate peanut butter cup, editing a photo from that morning’s leg day. I realized the raw, sweaty, red-faced version looked better than the version where I smoothed out my skin. Drop the exposure to deepen the shadows, bump the sharpness by ten percent, and leave it alone. The raw reality of a hard workout resonates better than a filtered fantasy.
Getting a great shot doesn’t require a studio. By cleaning the glass, stepping back from overhead bulbs, and using a $30 clip-on light, you can change how your physique translates to the camera. I’ve ruined hundreds of photos by ignoring these basics. Save this guide, pin it to your fitness inspiration board, and try adjusting your angle by forty-five degrees during your next session. You’ll see the difference in muscle depth immediately.
Frequently Asked Questions
What is the best lighting for gym mirror pics?
The best lighting is cool white light (5000K-6500K) coming from a slight angle. Avoid standing directly under overhead bulbs. Step slightly forward or backward to create shadows that enhance muscle definition and depth.
Where should I look when taking a mirror selfie?
Always look directly at your own reflection in the mirror, not at the camera lens on your phone. Looking at the lens causes your eyes to look strained or crossed, while looking at your reflection keeps your expression natural.
How do I make my muscles look bigger in photos?
Turn your body 45 degrees away from the mirror rather than standing straight on. Engage your core, roll your shoulders back, and grip your phone tightly to create natural vascularity and tension in your arms.
Do I need a professional camera for gym photos?
No. Modern smartphones like the iPhone 16 Pro Max or Pixel 8 Pro have excellent low-light sensors. A clean mirror, good side lighting, and a portable tripod or GOAT case are far more important than buying a DSLR.
