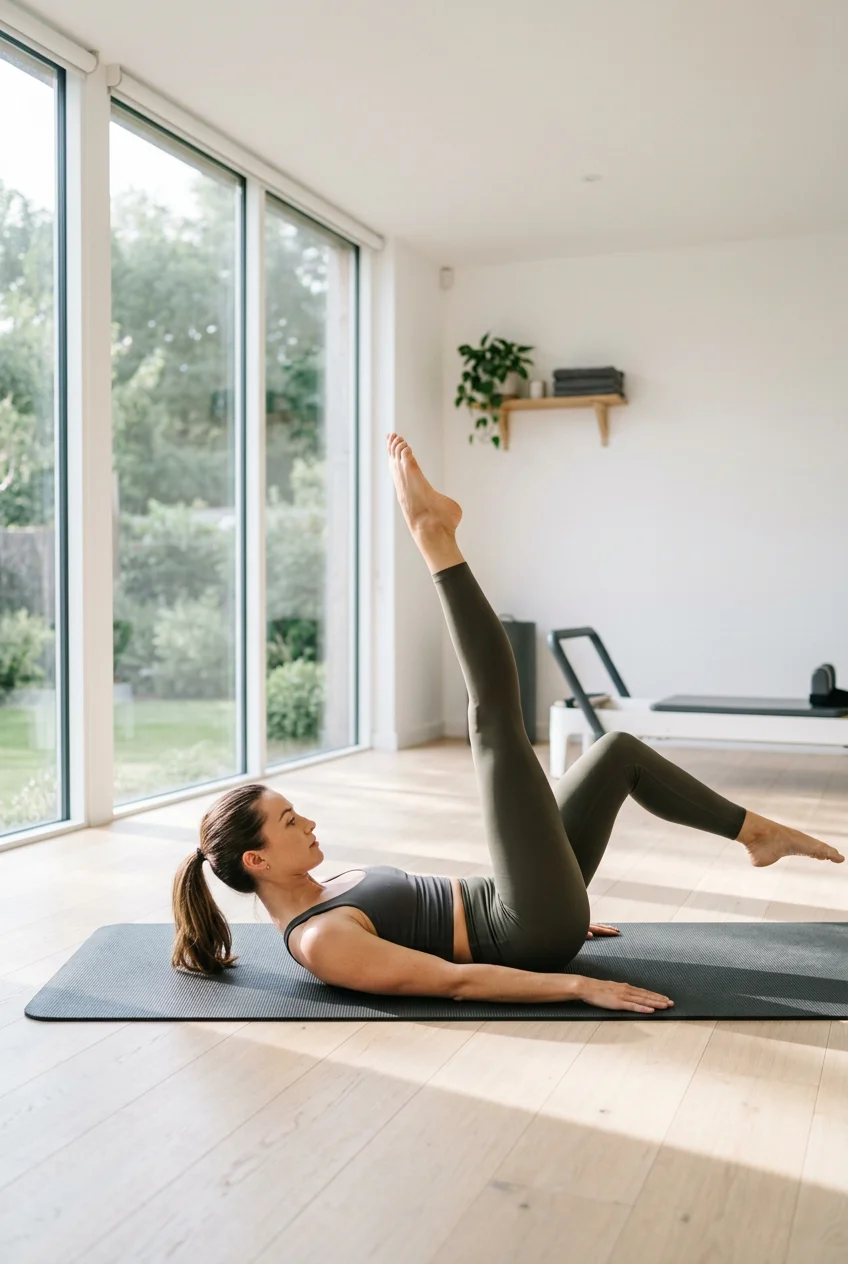
What’s Inside
- Upgrade Your Setup for a Real Mat Pilates Workout
- Master Lateral Breathing Before Moving a Muscle
- Engage Your Powerhouse (Not Just Your Abs)
- Visualize the Pearl Necklace for Spinal Articulation
- Add Small Props to Intensify Your Mat Pilates Workout
- Fix Pelvic Instability with Targeted Bridges
- Protect Your Neck with the Imaginary Orange Trick
- Use Verified Apps Instead of Random Videos
- Slow Down and Find the “Just Right” Challenge
Last November, I was lying on the hardwood floor of my living room, trying to force my way through a mat pilates workout while my tailbone screamed in agony. I had a thin 3mm yoga mat folded in half, sweat dripping into my eyes, and a lower back spasm that lasted three days. I thought this was supposed to be easy stretching. I was completely wrong. I’m a fitness trainer, and I’ve spent years lifting heavy weights while entirely ignoring my deep core stabilizers. That arrogant mistake cost me. I ended up with awful posture, rounded shoulders, and a nagging hip impingement that made even walking uncomfortable. I finally swallowed my pride and started studying the actual mechanics of a mat pilates workout. The truth is, most guys in the gym think they can breeze through these floor routines. They can’t. When you actually follow the classical principles, it burns in a way that a heavy deadlift never will. I spent the last two years testing different mats, props, and digital platforms to figure out what actually translates to better mobility and core strength. I’ve wasted money on cheap gear that snapped, and I’ve followed bad advice from fitness influencers who didn’t know a pelvic tilt from a hip thrust. I’m writing this to save you the headache and the lower back pain. Let’s break down exactly how to set up your routine, what gear is actually worth your money, and the specific form cues that stop you from cheating the movements. Learned that the hard way.
1. Upgrade Your Setup for a Real Mat Pilates Workout

Ditch your thin yoga mat right now. I tried doing the “Rolling Like a Ball” exercise on a standard 4mm mat I bought for $15 at Target back in 2019. It felt like someone was repeatedly hitting my spine with a wooden mallet. Yoga mats are designed for standing grip and balance. A mat pilates workout requires thick cushioning because you spend 80 percent of the time rolling on your spine, knees, and tailbone. You need a mat that’s specifically 8mm to 15mm thick (roughly 0.3 to 0.6 inches). I bought the Airex Fitline 180 Mat for $75, and the 10mm closed-cell foam completely stopped the bruising on my vertebrae. The STOTT Pilates Deluxe Pilates Mat is another solid option at 15mm thick, usually priced around $65. The tradeoff with these thicker mats is that they’re bulky. You can’t easily roll them up and shove them in a standard gym bag. They take up a lot of closet space, and they tend to curl at the edges if you don’t store them flat. But the joint protection is non-negotiable. If you try to do a classical routine on a hard floor, your body will instinctively tense up to protect your bones. That tension ruins your form and prevents you from engaging your deep core muscles. You end up fighting the floor instead of focusing on your breath and alignment. Spend the extra money on proper 15mm foam. Your tailbone will thank you, and your practice will instantly improve because you won’t be distracted by sharp, stabbing pain in your joints.
2. Master Lateral Breathing Before Moving a Muscle

Most people breathe completely wrong during core work. I spent my first three months of practice holding my breath during the tough parts. I’d turn red in the face, finish a set of the “Hundred,” and stand up feeling incredibly dizzy. I actually had to sit down in the produce section at Whole Foods last Tuesday because I was still practicing shallow chest breathing while carrying heavy grocery bags, which triggered a mild head rush. Joseph Pilates emphasized lateral breathing as the foundation of every movement. You need to inhale deeply through your nose, expanding your ribs laterally out to the sides and into your back. Then, exhale slowly through pursed lips while drawing your belly button gently toward your spine. This specific breathing pattern acts as a mechanical pump for your deep core. I practice this by wrapping a standard $12 Theraband resistance band around my lower ribs. When I inhale, I actively try to stretch the band outward with my ribcage. If you only breathe into your upper chest, you’re creating tension in your neck and shoulders. If you breathe into your lower belly, you lose the abdominal engagement required to protect your lumbar spine during leg extensions. It takes weeks of annoying, repetitive practice to make lateral breathing feel natural. You’ll constantly forget and revert to shallow breathing the second an exercise gets difficult. Don’t skip this step. If you aren’t breathing correctly, you aren’t doing Pilates. You’re just doing awkward floor gymnastics.
3. Engage Your Powerhouse (Not Just Your Abs)

I used to think core work just meant doing crunches until my superficial six-pack muscles cramped. That’s a massive misconception. Joseph Pilates called the core the “Powerhouse.” This area includes your abdominals, lower back, pelvic floor, hips, and glutes. If you only flex your upper abs, you’re missing the entire point of the system. I learned this the hard way when I pulled a lower back muscle lifting a 40-pound bag of dog food at Sprouts. My superficial abs were strong, but my deep stabilizers were incredibly weak. To find your Powerhouse, imagine a thick leather corset tightening around your midsection. You want to draw everything inward and upward, starting from your pelvic floor and pulling up to your lower ribs. Every single movement in a mat routine initiates from this central anchor. When you do a leg circle, the effort shouldn’t come from your hip flexor. It comes from the stability of that corset holding your pelvis completely still against the floor. I still struggle with this. Sometimes I catch my hip flexors taking over during leg extensions. I feel a clicking in my hip joint, which is a dead giveaway that my Powerhouse has checked out. When that happens, I stop, reset my breathing, and actively squeeze my glutes and pelvic floor before moving my legs again. It requires immense mental focus to keep these deep muscles fired up for a full 30-minute session.

KEEP Extra Thick NBR Yoga Mat for Women & Men, 10mm Thick
A dependable everyday pick — KEEP Extra Thick NBR Yoga Mat for Women & Men pulls in 35 ratings at 4.5 stars. Not flashy, just solid.
4. Visualize the Pearl Necklace for Spinal Articulation

Spinal articulation is the hardest concept for weightlifters to grasp. We’re taught to keep our spines rigid and straight to protect them under heavy loads. I spent years moving my torso like a solid block of concrete. When I first attempted a Pilates Roll-Up, I literally couldn’t get off the floor without aggressively throwing my arms forward and using momentum. I had zero spinal mobility. To fix this, you have to use the “string of pearls” imagery. Visualize your spine as a heavy pearl necklace resting on a table. When you pick it up, you don’t lift the whole thing at once. You lift one pearl at a time. As you perform a Pelvic Curl or a Roll-Up, you need to peel your spine off the 15mm mat sequentially. First the tailbone, then the lower lumbar vertebrae, then the mid-back. I practiced this against a wall for a month. It’s frustrating and humbling. I actually had to buy a bulk bottle of ibuprofen at Costco because forcing my rigid back to bend caused intense muscle soreness in my erectors. But learning to move segment by segment is what eventually cured my chronic lower back stiffness. Move slowly and force your brain to connect with each individual inch of your spine. If you hit a flat spot where three vertebrae move together as a chunk, pause and try to isolate them. It takes patience, but it restores the natural curve and shock absorption of your back. You might also like: 8 Before And After Fitness for Every Budget
5. Add Small Props to Intensify Your Mat Pilates Workout

You don’t need a $3,000 Reformer machine to get a brutal workout. Small, cheap props add enough resistance to make standard mat exercises incredibly difficult. I bought a cheap $8 generic fitness ring at Walmart last year, and the plastic handle snapped off during my second use, nearly hitting me in the face. I replaced it with a Balanced Body Magic Circle for $35, and the fiberglass construction is significantly better. You place the ring between your ankles during leg lifts, and the inner thigh burn is immediate. I also use a 9-inch soft Pilates ball, which costs about $12. Placing the partially deflated ball under your sacrum during core work creates an unstable surface. Your deep pelvic floor muscles have to work overtime just to keep you from rolling off the ball onto the floor. I also keep a set of light to medium tension resistance bands nearby. A simple 4-foot latex band (usually $10 for a pack of three) wrapped around your feet during a seated row mimics the spring tension of a Reformer machine. The tradeoff with props is that they require more coordination and balance. If you can’t stabilize your pelvis using just your body weight, don’t add a Magic Circle yet. Master the bare floor first. Props shouldn’t be used to distract you from bad form; they should be used to challenge perfect form. You might also like: 10 Gym Poses For Men You Need to See
6. Fix Pelvic Instability with Targeted Bridges

Pelvic instability ruins your posture and causes a cascading chain of injuries down your legs. I have a nasty habit of dumping my weight into my right hip when I stand. I noticed this clearly when I was standing in line at Kroger holding a heavy handbasket. My left hip was hiked up, and my lower back was completely asymmetrical. Mat exercises specifically target this imbalance. You need to focus heavily on the Bridge pose and Pelvic Tilts. Lie on your back, bend your knees, and gently tilt your pelvis up and down. You’re trying to find “neutral spine,” where your hip bones and pubic bone form a flat, level triangle parallel to the ceiling. When you lift into a Bridge, the goal isn’t to push your hips as high as physically possible. That just hyperextends your lower back and pinches your lumbar spine. The goal is to maintain that level pelvic triangle while lifting. I do 15 slow, controlled Bridges every single morning. I place my thumbs on my lower ribs and my fingertips on my hip bones to physically monitor if my pelvis is tilting sideways. If I feel a dip on one side, I squeeze my weaker left glute harder to compensate. This mindful correction translates directly to how you walk and stand throughout the day. It fixes the root cause of the pain rather than just stretching the tight muscles. You might also like: 9 Gym Poses Women Worth Trying

Gaiam Yoga Mat, Pilates & Exercise Mat
Gaiam Yoga Mat punches above its price — 457 buyers rated it 4.5 stars. I would buy it again.
7. Protect Your Neck with the Imaginary Orange Trick

Neck tension is the most common complaint I hear from people starting this practice. During exercises like the “Hundred” or the “Single Leg Stretch,” you have to hold your head and shoulders off the mat for extended periods. For the first six months, I strained my neck so badly I had to ice it every night. I was jutting my chin forward and using my fragile cervical spine muscles to hold the weight of my heavy head. I even got a tension headache while browsing the frozen aisle at Trader Joe’s because my neck muscles were completely locked up from a bad morning session. The fix is the imaginary orange cue. Pretend you have a small orange tucked right under your chin. You want to gently hold it there without crushing it and without letting it drop. This maintains a neutral cervical spine. More importantly, the lift shouldn’t come from your neck at all. You need to slide your shoulder blades down your back and curl up from your bra-line (or mid-chest). The tension should sit squarely in your upper abdominals. If your neck starts burning, put your head down immediately. It’s better to do the leg movements with your head resting on the 15mm foam than to practice bad, painful habits. Never sacrifice your neck health just to complete the full number of repetitions.
8. Use Verified Apps Instead of Random Videos

YouTube is full of generic fitness influencers labeling their fast-paced ab circuits as “Pilates.” I followed a 15-minute free video once and ended up doing sloppy bicycle crunches at lightspeed while listening to terrible EDM music. That isn’t the classical method. If you want actual results, you need instruction from someone with a comprehensive 600-hour certification. Those instructors understand anatomy and know how to provide modifications for specific injuries. I use the Pilatesology app, which costs $20 a month. It focuses strictly on classical, old-school routines. The instructors are incredibly precise with their verbal cues. If you prefer a more modern, fitness-forward approach, Pilates Anytime is another great platform for $22 a month. The interface on Pilates Anytime is slightly clunky, and finding specific beginner routines takes a lot of annoying scrolling, but the sheer volume of classes makes it worth the price. Don’t waste your time on random social media clips from people who just want views. A certified instructor will remind you to drop your shoulders, engage your pelvic floor, and breathe laterally exactly when you start to fatigue and forget. Paying $20 for expert digital guidance is significantly cheaper than paying a physical therapist $150 an hour to fix your strained lower back. Trust me on this.
9. Slow Down and Find the “Just Right” Challenge

Joseph Pilates famously said that a few well-designed movements, properly performed, are worth hours of sloppy calisthenics. Rushing is the enemy of this entire discipline. I used to try to cram a 30-minute routine into 15 minutes before running out the door to work. I used momentum, swung my legs wildly, and completely bypassed my deep stabilizing muscles. I was sweating profusely, but I wasn’t actually getting stronger. You have to slow down and find the “just right” challenge. This means finding the exact point where the exercise is difficult, but you can still maintain perfect form and lateral breathing. If you’re shaking uncontrollably, gritting your teeth, and holding your breath, you’ve gone too far. Back off and modify the movement. There’s a lot of nuance to the benefits of this practice. While it improves physical performance, balance, and quality of life, the claims about it drastically increasing bone mineral density on its own are mixed. But the mental benefits are undeniable. Moving slowly and focusing entirely on your breath forces you to be mindful. It drops your anxiety and significantly reduces daily fatigue. Aim for consistency over high intensity. Practicing for just 20 minutes, two to three times a week, yields massive improvements in your posture and joint health. You don’t need to destroy your muscles every day to see real progress.
I still do heavy squats and deadlifts in the gym, but a dedicated mat pilates workout is what actually keeps my joints functioning and my lower back pain-free. It forces you to fix the weak links in your core that traditional barbell lifting ignores completely. Start with a thick 15mm mat so you aren’t bruising your tailbone, focus entirely on your lateral breathing before you even move your legs, and stop rushing through the movements like it’s a race. The slower you go, the harder it gets. If you found this breakdown helpful, save this article or pin it to your fitness boards so you can reference these specific form cues before your next session. Your spine will thank you, and you’ll actually start seeing the core strength you’ve been working so hard for. No exaggeration.

Retrospec Solana Yoga Mat 1" Thick w/Nylon Strap for Men &
Retrospec Solana Yoga Mat 1″ Thick w/Nylon Strap for Men & Women – Non has been one of the most consistently praised picks in this category. 142 reviewers averaged 4.5/5.
Frequently Asked Questions
How thick should a mat be for a mat pilates workout?
You need a dedicated mat that’s 8mm to 15mm thick. Standard yoga mats are usually 3mm to 4mm and won’t provide enough cushioning for your spine and tailbone during rolling exercises. A thicker foam mat prevents bruising and allows you to focus on core engagement instead of joint pain.
Can I build muscle with just a mat pilates workout?
Yes, you can build significant core strength and muscular endurance. While it won’t build bulky muscle mass like heavy weightlifting, it targets deep stabilizing muscles, improves posture, and enhances overall body control. Adding small props like resistance bands or a Pilates ring increases the challenge for your limbs.
How often should a beginner do a mat pilates workout?
Beginners should aim for two to three sessions per week. Consistency is much more important than duration. Practicing for just 20 minutes a day yields better results for your mobility and core strength than doing one exhausting hour-long session once a week.
Do I need a Reformer machine to see real results?
You don’t need a Reformer machine at all. Joseph Pilates actually developed the mat routines first as the foundation of his entire system. Mat exercises require you to support your own body weight without the assistance of springs, making them incredibly effective for building deep core stability.
