
What’s Inside
- Master the “O” Exercise for Cheek Toning
- Incorporate Daily Gua Sha for Lymphatic Drainage
- Invest in a Microcurrent Device for a Slim Face Workout
- The Neck and Jaw Stretch for Definition
- Stop Friction with the Right Face Oil
- Avoid This Slim Face Workout Mistake: Over-Pressuring
- Facial Cupping for Circulation and Lift
- Fix Your Posture Before You Start
- The Wine Cork Rainbow Technique
- Chill Your Facial Roller for De-puffing
- Jawline Resistance with Thumbs
- Don’t Neglect the Neck Area
I started looking into facial fitness after catching my reflection in the self-checkout camera at Target last November. The harsh fluorescent lighting caught every ounce of puffiness, making me realize I needed a real slim face workout. I immediately bought a cheap rubber jaw-chewing block online. That was a massive mistake. I chewed on that $12 piece of silicone for three weeks until my molars literally ached, and all I got was a sore jaw. It turns out, you can’t just chew your way to a sharper jawline. You need actual muscle activation, lymphatic drainage, and consistency. After ditching the rubber block, I spent the next eight months testing actual facial fitness tools and techniques. From FDA-cleared microcurrent devices to basic stretches you can do at your desk, I figured out what actually moves the needle. Here’s the exact routine and gear I’ve used to fix my jawline. It takes about fifteen minutes total, but you’ve got to do it consistently. Let’s break down the mechanics.
1. Master the “O” Exercise for Cheek Toning

Start with the basics. The “O” exercise targets the mid-face and helps reduce general puffiness by activating the zygomaticus muscles. You form a long, exaggerated “O” shape with your mouth. Keep your lips slightly parted and make sure your teeth are completely covered by your lips. You hold this exact position for 10 seconds, then release. I do this 10 to 15 times daily. I usually knock these out in my truck while sitting in the drive-thru line at Starbucks or waiting for gas at Costco. You’ll look ridiculous doing it. A barista definitely caught me mid-rep last Tuesday, but the muscle activation is undeniable. When you hold the pose correctly, you feel a distinct burn right under your cheekbones after about the sixth rep. This isn’t just stretching the skin. It forces the underlying cheek muscles to contract and hold tension, similar to an isometric plank for your core. I tried doing this without covering my teeth at first, which just created weird creases around my mouth. Cover the teeth. It smooths the skin while forcing the muscle to do the actual lifting.
2. Incorporate Daily Gua Sha for Lymphatic Drainage

If you wake up with a puffy face, muscle exercises won’t fix it. You need lymphatic drainage. I use the Mount Lai Jade Facial Roller, which runs exactly $38 at Sephora. I bought it in January after my cheap plastic roller snapped in half. You pair it with a facial oil. I use the 4 oz bottle of 100% Jojoba oil from Trader Joe’s. It costs $7.99 and lasts for about six months. You apply about half a teaspoon of oil to your face and neck. Take the Gua Sha tool and gently scrape in upward and outward motions. Start from the center of your face, move out towards your hairline, and then scrape down the sides of your neck. That downward motion on the neck is crucial because it pushes the lymphatic fluid toward your lymph nodes to drain. I spend about two to three minutes doing this every morning. Apply light to medium pressure. The first week I tried this, I pushed way too hard and ended up with red streaks across my cheekbones that lasted for hours. More pressure doesn’t equal faster drainage. Learned that the hard way.
3. Invest in a Microcurrent Device for a Slim Face Workout

This is where the actual tech comes in. I use the NuFACE Trinity+ Starter Kit. It costs $395. Yes, it’s expensive. I avoided buying one for a year because of the price tag, but the low-level electrical currents genuinely stimulate the facial muscles in a way manual stretching can’t. It’s an FDA-cleared device that forces your facial muscles to contract. I use it three to five times a week for about ten minutes a session. Dermatologists usually say you need four to six weeks to see visible results, and they’re right. I didn’t notice any difference until week five. The biggest negative is the conductive gel you’ve got to use. It costs $35 a tube, feels like sticky aloe vera, and dries out too fast if you apply it to your whole face at once. Pro tip: apply the gel in small sections. Do your left jawline, then apply gel to the right jawline. If you stick with it, the electrical stimulation tightens the muscle fibers along the jaw and cheeks, offering a non-invasive lift that basic exercises struggle to achieve. You might also like: 11 Aesthetic Gym Body You Need to See

FLYBIRD WB2 Weight Bench
FLYBIRD WB2 Weight Bench punches above its price — 215 buyers rated it 4.5 stars. I would buy it again.
4. The Neck and Jaw Stretch for Definition

Most guys I train completely ignore their neck muscles when trying to lean out their face. You’ve got to strengthen the platysma muscle to pull the jawline tight. The neck and jaw stretch is simple but highly effective. You tilt your head slightly upward, then lift your chin up and forward at a 45-degree angle towards your right shoulder. You hold that maximum extension for three seconds. You’ll feel a deep, tight pull from your collarbone up to your earlobe. Return your head to the center, then repeat on the left side. I do 20 repetitions on each side every evening. I started doing these while sitting on the couch watching Netflix. The first few times, my neck cramped up on the fifth rep because those muscles are notoriously weak on anyone who works at a computer all day. You’ve got to ease into the range of motion. I’d recommend starting with just ten reps if your neck feels stiff, then building up to the full twenty. Over a few months, tightening this muscle group pulls the skin under your chin taut, which directly contributes to a sharper jawline angle. You might also like: 10 Ab Workouts At The Gym Worth Trying
5. Stop Friction with the Right Face Oil

You can’t just drag tools or your dry hands across your face. Friction pulls the skin, breaks down collagen, and creates premature wrinkles. I learned this the hard way when I tried doing manual jaw sweeps dry. It felt like rug burn. You need a proper slip. If you have dry skin, you want a richer oil. Go to Whole Foods and grab a 2 oz bottle of pure Argan or Avocado oil for about $14. If you have oily or acne-prone skin like I do, heavy oils will break you out immediately. I stick to lightweight, non-comedogenic options. Grapeseed oil or the Trader Joe’s Jojoba oil I mentioned earlier are perfect. You only need about four to five drops. Warm the oil between your palms for ten seconds before pressing it into your skin. It provides exactly enough glide for a Gua Sha or facial cup without leaving a greasy residue that ruins your pillowcases. Never skip the oil prep. It takes ten seconds and protects your skin barrier from mechanical damage. I’ve ruined enough shirts with excess oil to know you should apply it sparingly. You might also like: 15 Creative Inside She Sheds Home Gym Setup Ideas to Steal Right Now
6. Avoid This Slim Face Workout Mistake: Over-Pressuring

This is the most common mistake I see when people start a facial routine. They treat their face like a tight hamstring. They dig their knuckles in and pull the skin as hard as possible. The skin around your eyes and on your front neck is incredibly delicate. Using heavy pressure there will literally stretch the elastin fibers and create new lines. When you’re doing any manual face exercises or using tools, use feather-light pressure around the orbital bone and the center of your throat. For your forehead, jawbone, and cheek muscles, you can graduate to medium pressure. I used to dig my thumbs into my under-eye area trying to force the puffiness out. All I got was bruised capillaries that looked like dark circles for a week. The lymphatic vessels sit right below the surface of the skin. You don’t need deep tissue massage pressure to move the fluid. A light, sweeping motion is scientifically more effective for drainage than a heavy, dragging pull. Let’s keep the heavy pressure for the foam roller on your legs, not your face.

FLYBIRD WB3 Weight Bench Fits up to 6’5”
FLYBIRD WB3 Weight Bench Fits up to 6’5” punches above its price — 16 buyers rated it 4.5 stars. I would buy it again.
7. Facial Cupping for Circulation and Lift

Facial cupping is a trending approach for 2026, but the mechanics are solid. I bought a set of small, soft silicone facial cups from an apothecary brand on Amazon for $24. You apply your facial oil first. Then, you squeeze the silicone cup, place it on your skin, and release it to create a gentle suction. You immediately glide the cup upward and outward across your face. The suction pulls blood flow to the surface and encourages lymphatic drainage. It gives you a temporary firming effect that’s very noticeable. I do this for about five minutes before heading to social events. There’s one massive rule here: you must keep the cups moving constantly. I left a cup sitting on my right cheek for four seconds while I checked a text message, and it left a perfectly round, purple hickey on my face for three days. Keep the suction light and keep the tool gliding. It flushes the tissue with fresh oxygen and nutrients, which helps muscle recovery after your resistance exercises. I wouldn’t recommend glass cups for beginners because they’re too easy to drop and shatter.
8. Fix Your Posture Before You Start

You can’t get a defined jawline if your posture is terrible. This is a surprising but crucial mechanical reality. If you sit at a desk slouching forward, your shoulders roll in, and your neck protrudes. This forward head posture shortens the muscles in the front of your neck and creates a pocket of loose skin and fat under your chin. It completely ruins your facial muscle alignment. Before I do any face workout, I reset my posture. I stand up tall, roll my shoulders back and down, and pull my head back so my ears align over my shoulders. I even bought a basic lumbar support pillow from Walmart for $15 to force my lower back into alignment while I work. When your spine is aligned, your facial muscles have the proper tension to move effectively. If you try doing jaw stretches while hunched over a keyboard, you’re fighting your own anatomy. Fix the structural foundation first, then worry about the micro-movements of your cheeks. It’s impossible to drain lymphatic fluid properly if your neck is pinched forward all day.
9. The Wine Cork Rainbow Technique

This is an old-school theater trick that genuinely works for double chin reduction. You need a standard wine cork. You place the cork vertically between your teeth, wrapping your lips tightly around it. Tilt your head up toward the ceiling. Place both of your hands flat on your upper chest to anchor your collarbone skin. Now, with the cork in your mouth, make a slow “rainbow” motion with your chin, tracing an arch from your left shoulder to your right shoulder. I perform 6 to 8 repetitions of this arch. It activates a complex web of muscle groups in the neck, the jawline, and the orbicularis oris muscle around your mouth. I tried this last month after reading a vintage vocal coaching manual. The burn in the under-chin area is intense. The cork forces your mouth to stay in an isometric hold, which prevents you from cheating the stretch by moving your jaw joint. Wash the cork with soap and water after you use it, obviously. I keep a dedicated, clean cork in my bathroom drawer just for this exercise so I’m not searching the kitchen every morning.
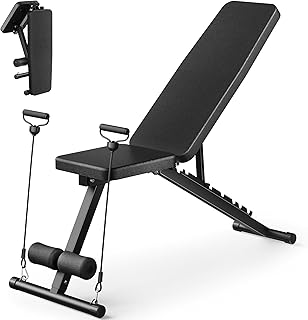
Adjustable Weight Bench for Home Gym
Adjustable Weight Bench for Home Gym has been one of the most consistently praised picks in this category. 565 reviewers averaged 4.5/5.
10. Chill Your Facial Roller for De-puffing

Temperature plays a massive role in facial fitness. I keep a $20 Rose Quartz Roller in my kitchen refrigerator, sitting right next to the eggs. The cooling effect is unmatched for reducing morning puffiness, especially around the eyes. Cold temperatures constrict the blood vessels, which temporarily makes the skin appear tauter and flushes out stagnant fluid. I grab it every morning at 6 AM and spend exactly five minutes rolling outwards from the center of my face. The stone holds the cold for about three minutes before it warms up to body temperature. I used to leave it in the freezer, but that was a mistake. The stone got so cold it actually stuck to my damp skin and caused a minor ice burn on my cheek. The refrigerator provides the perfect temperature. It’s a quick, mechanical way to shrink the tissue before you start your active muscle contractions. Plus, the cold stone feels incredible when you’re half-awake and trying to get your coffee going. I bought mine at Kroger on a whim, but any solid stone roller will hold temperature well.
11. Jawline Resistance with Thumbs

You can build resistance without expensive tools. I use this thumb technique to target the masseter and jawline muscles directly. Place both of your thumbs side-by-side right at the bony tip of your chin. Rest your other fingers lightly on your neck below each ear for stability. Now, push your chin down into your thumbs to create downward resistance. While maintaining that firm pressure, slowly slide your thumbs outward along the sharp edge of your jawbone, ending just below each earlobe. I repeat this 10 times. You have to use medium pressure here. It should feel like a deep tissue sweep along the bone. I started doing this in the shower since my face wash provides the perfect amount of glide. It breaks up tension in the jaw, especially if you grind your teeth at night like I do. The resistance forces the jaw muscles to work against your thumbs, which builds strength and definition over time without needing to chew on a rubber block. If your thumbs start to ache, you’re pressing too hard into the bone itself. Focus on the muscle tissue just above the bone.
12. Don’t Neglect the Neck Area

If you want to consolidate your routine, you can look into multi-functional devices that target both the face and the neck. I tested the TheraFace Pro, which runs about $399. It comes with magnetic attachments for microcurrent, LED light therapy, and percussive massage. It’s a highly efficient way to address toning, puffiness, and muscle tension with one battery-powered handle. The percussive massage attachment is aggressive but brilliant for releasing tight jaw and neck muscles. Regardless of what tools you use, you must keep them clean. I failed to clean my jade roller for two weeks last summer and ended up with a cluster of cystic acne on my right cheekbone. Bacteria and old face oil build up on these tools instantly. After every single use of my rollers, Gua Sha stones, or microcurrent probes, I wipe them down with a cotton round soaked in 70% rubbing alcohol. It takes fifteen seconds. Let the alcohol evaporate completely before you store the tools. It ensures a hygienic practice and prevents you from grinding yesterday’s bacteria back into your pores today. Your neck skin is thin and prone to breakouts, so keep those tools sterile. No exaggeration.
Building a leaner, stronger face isn’t about spot-reducing fat. It’s about muscle activation, draining stagnant fluid, and being incredibly consistent. I’ve used this exact routine for over a year now, and the structural changes to my jawline and cheekbones are real. Skip the gimmicky chew toys and stick to the mechanical drainage and resistance movements that actually work. If you found this breakdown helpful, pin this article to your fitness board so you can reference the routine tomorrow morning. The tools aren’t cheap, but the manual stretches are completely free, so you have zero excuses not to start today. Trust me, your future self will thank you for it.
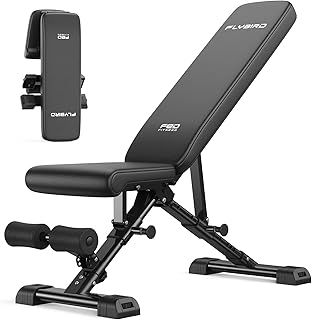
FLYBIRD WB5 Weight Bench
Honestly, FLYBIRD WB5 Weight Bench surprised me — sturdier than it looks in the photos, and over 259 buyers gave it 4.5 stars.
Frequently Asked Questions
How often should I do a slim face workout?
For manual stretches like the ‘O’ exercise or jaw stretches, daily practice is best. For microcurrent devices, aim for 3 to 5 times a week. Consistency over four to six weeks is required to see visible changes in muscle tone.
Do I really need face oil for Gua Sha?
Yes. Using tools on dry skin causes friction, which can break down collagen and create wrinkles. Use a lightweight, non-comedogenic oil like Jojoba or Grapeseed to provide enough slip without clogging your pores.
Can chewing gum or rubber blocks sharpen my jawline?
Chewing heavy rubber blocks often leads to jaw pain and TMJ issues rather than a defined jawline. It’s safer and more effective to use targeted resistance stretches and lymphatic drainage techniques.
Why is posture important for facial fitness?
Forward head posture shortens the muscles in the front of your neck, creating a pocket of loose skin under your chin. Proper spinal alignment ensures your facial muscles have the correct tension to move and drain lymphatic fluid effectively.
