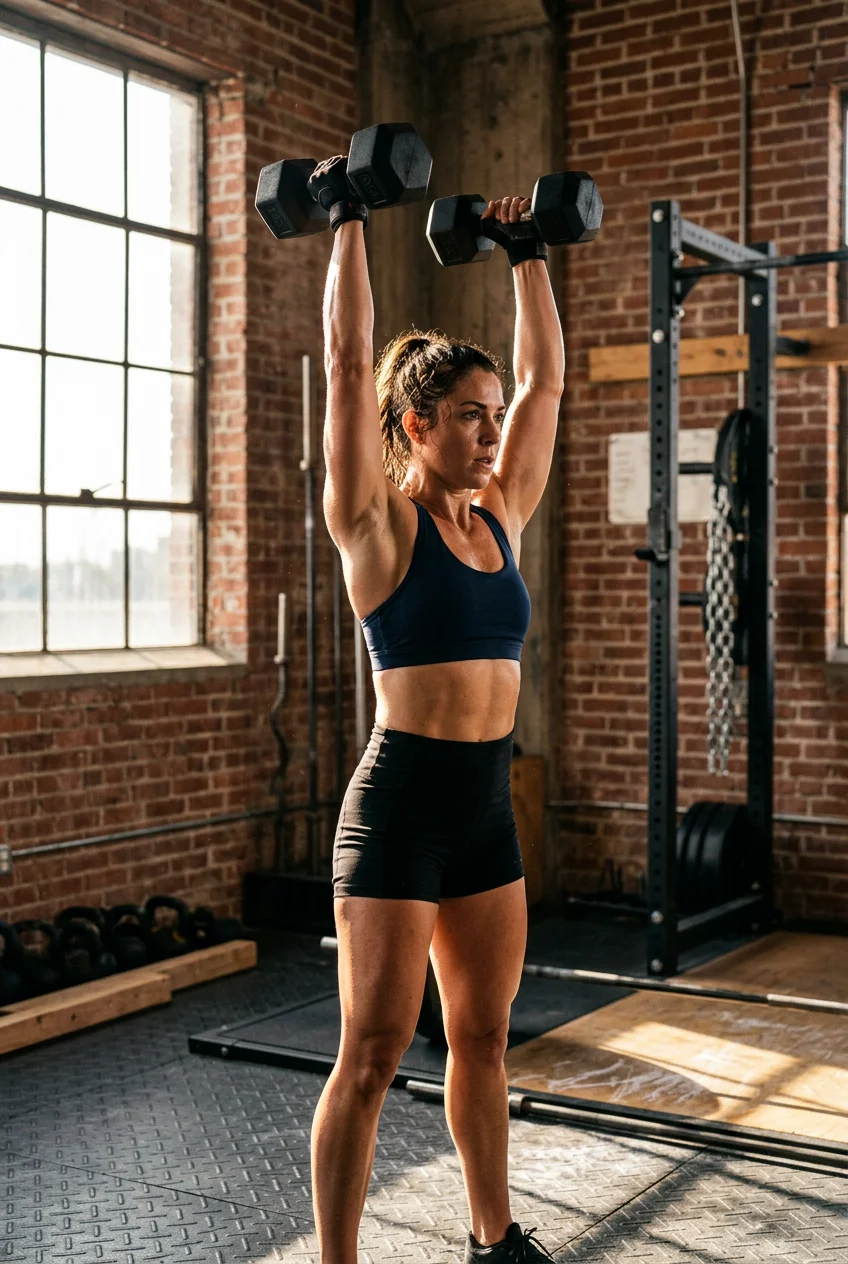
What’s Inside
- Bicep Curls with Resistance Bands (Tone Arms Workout Staple)
- Tricep Dips on a Sturdy Bench
- Overhead Tricep Extensions
- Push-Ups (Modified or Full)
- Hammer Curls for Forearm Strength
- The Ultimate Tone Arms Workout: Commando Planks
- Tricep Kickbacks
- Lateral Raises for Shoulder Definition
- Front Raises
- Arm Circles (Warm-up or Burnout)
- Diamond Push-Ups
Last Tuesday at Whole Foods, I dropped a 24 oz jar of $7.99 organic marinara sauce right in the middle of aisle four. Red sauce splattered everywhere. The glass shattered across the floor. My grip completely failed because I’d tried a horrible tone arms workout earlier that morning. It left my muscles weak instead of strong. I’m Ryan Brooks. I test fitness gear and program workouts for a living. I’ve made every mistake you can imagine when trying to build upper body strength. Most people grab heavy weights, swing them around, and wonder why their elbows hurt. Building strength takes specific movements, correct form, and a little patience. I put together this tone arms workout to fix the mistakes I see every single day in the gym. You don’t need a massive gym membership. You just need a few basic tools and the willingness to sweat. Let’s get into the exact moves I use with my personal training clients.
1. Bicep Curls with Resistance Bands (Tone Arms Workout Staple)

I’m starting with a classic because it works perfectly. Bicep curls are essential for any tone arms workout. Most people get this wrong. They use momentum instead of muscle. I personally swear by the SPRI Xertube resistance band. You can grab one for exactly $14.98 at Target. The medium resistance (green color) is perfect for high reps. Stand on the middle of the rubber band with feet hip-width apart. Grab the hard plastic handles. Keep your elbows glued tightly to your ribs. Curl your hands up toward your shoulders. Squeeze hard at the top. Lower the handles slowly. It should take three full seconds to bring your hands back down to your sides. I tried this wrong for months before figuring it out. I’d let the band snap my arms back down quickly. My elbows ached for days afterward. The distinct rubber smell of a fresh band always reminds me to control the eccentric part of the move. Do 3 sets of 15 reps. If the band feels too loose, step your feet wider apart. This takes up slack and increases the tension instantly. You’re going to feel a deep burn right in the center of your bicep muscle. Skip the cheap unbranded bands. They snap easily and sting like crazy when they hit your bare leg. Trust me on this.
2. Tricep Dips on a Sturdy Bench

The back of the arm is a trouble spot for almost everyone. Tricep dips fix that quickly. You need a solid surface. I used a wobbly plastic patio chair in my garage last summer. The chair kicked out from under me. I scraped my entire back on the rough concrete floor. Avoid doing that. Use a real bench. I recommend the CAP Barbell flat bench. It costs $49.99 at Walmart. It has a firm, black vinyl pad that avoids slipping under pressure. Sit on the edge of the bench. Place your hands next to your hips. Your fingers should grip the edge tightly. Walk your feet out forward. Slide your butt off the bench. Lower your body until your elbows hit a 90-degree angle. Push back up. The vinyl texture gives you a great grip even when your palms get sweaty. I do 3 sets of 12 reps here. If you’re a beginner, keep your knees bent. If you want a challenge, straighten your legs completely. Keep your back close to the bench. If you drift too far forward, you put terrible strain on your shoulder joints. I’ve seen clients complain of shoulder pain constantly, and it’s always because they drift away from the bench. Keep your chest up and breathe out forcefully as you push up.
3. Overhead Tricep Extensions

This move targets the long head of the tricep. You need a single dumbbell. I use a 15 lb Hex dumbbell. You can buy one for $17.99 at Costco in their seasonal fitness aisle. Stand up straight. Hold the dumbbell with both hands by one of the rubber heads. Press it straight over your head. Lower the weight slowly behind your head. Keep your elbows pointing forward. Never let them flare out to the sides. Push the weight back to the top. I see a huge mistake here all the time. People arch their lower back heavily to push the weight up. I did this during a heavy lifting phase last year. I ended up with lower back spasms that kept me in bed for two days. Squeeze your glutes. Brace your stomach like someone is going to punch you. This keeps your spine neutral and safe. The cold metal handle of the dumbbell gets slippery as you sweat. Keep a tight grip on the rubber head. Do 3 sets of 10 reps. If you fail to keep your elbows pointing forward, the weight is too heavy. Drop down to a 10 lb dumbbell. Form matters more than the number printed on the side of the weight. You might also like: 20 Creative Men Home Workout Ideas You’ll Want to Bookmark

NICEPEOPLE Adjustable Weight Bench for Home Gym
NICEPEOPLE Adjustable Weight Bench for Home Gym has been one of the most consistently praised picks in this category. 33 reviewers averaged 4.5/5.
4. Push-Ups (Modified or Full)

Push-ups are brutal but necessary. They work your chest, shoulders, and triceps all at once. You need a good mat to protect your wrists and knees. I use the Lululemon The Reversible Mat 5mm. It runs $88.00. I know that sounds pricey, but it has a sticky polyurethane top layer. Your hands stay planted when you sweat. Get into a plank position. Place your hands slightly wider than your shoulders. Lower your chest until it almost touches the mat. Push back up forcefully. If you struggle with a full push-up, drop to your knees. I feel zero shame doing modified push-ups. I do them when I’m burned out at the end of a long session. Keep your neck neutral. Avoid staring at your feet. Look at a spot on the floor about six inches in front of your hands. After a tough set of 3 sets of 15 reps, I always grab a cold drink. I drink a 16 oz Orgain chocolate protein shake. It costs $3.49 at Sprouts. The cold, thick chocolate liquid is the best reward after grinding out push-ups on a sweaty rubber mat. Breathing is crucial here. Inhale on the way down, exhale sharply on the way up. You might also like: 15 Brilliant Dark Basements Home Gym Setup Ideas Worth Trying This Year
5. Hammer Curls for Forearm Strength

Standard curls are great, but hammer curls build thicker forearms and hit the brachialis muscle. This helps your arms look defined from every angle. Grab two dumbbells. I like the Ignite by SPRI 15 lb rubber dumbbells. They cost $24.99 each at Target. Stand tall. Hold the weights at your sides with your palms facing your legs. Curl the weights up toward your shoulders. Keep your palms facing each other the whole time. It looks like you’re swinging a heavy hammer. Squeeze at the top. Lower them slowly. I learned the value of forearm strength last Thanksgiving. I tried opening a stubborn 16 oz jar of Trader Joe’s Crunchy Almond Butter. It costs $5.99. My hands were slipping. My forearms were burning. I finally popped the lid, but I realized my grip strength was terrible. Hammer curls fix that weakness. Do 3 sets of 12 reps per arm. Never swing your torso. If you resort to throwing your lower back into the movement, drop the weight immediately. The rubber coating on these dumbbells prevents them from clanking loudly if you accidentally bump them together. Focus on a tight squeeze at the top of the movement for maximum muscle activation. You might also like: 20 Beautiful Home Gym Setup Ideas That Changed Everything
6. The Ultimate Tone Arms Workout: Commando Planks

This is the most exhausting move in any tone arms workout. Commando planks destroy your shoulders, triceps, and core all at once. Start in a high plank position on your hands. Lower your right arm down to your forearm. Then lower your left arm to your forearm. You’re now in a forearm plank. Push back up with your right hand. Then push up with your left hand. That marks one complete rep. I use a Gold’s Gym 5mm yoga mat for this. It costs $9.98 at Walmart. It provides just enough cushion for my elbows. I rushed this movement once on a bare hardwood floor in my living room. I scraped the skin right off my left elbow. It stung in the shower for a solid week. Learned that the hard way. Take your time. Keep your hips as still as possible. Imagine balancing a full glass of water on your lower back. Do 3 sets of 10 reps. Alternate which arm goes down first to avoid muscle imbalances. The sweat literally drips off my nose onto the mat during these. It’s a miserable exercise, but the results are undeniable. Your shoulders will feel like solid stone afterward.
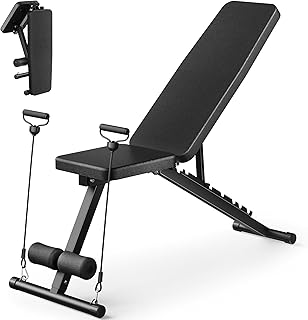
Adjustable Weight Bench for Home Gym
Adjustable Weight Bench for Home Gym has been one of the most consistently praised picks in this category. 551 reviewers averaged 4.5/5.
7. Tricep Kickbacks

Kickbacks isolate the tricep perfectly. You need lighter weights for this specific movement. I use 5 lb vinyl-coated dumbbells. You can find them for $8.99 at Kroger in their small fitness aisle. The vinyl coating feels smooth and stays warm during winter garage workouts. Stand with your feet hip-width apart. Hinge forward at the hips until your torso is almost parallel to the floor. Bend your elbows to 90 degrees. Keep your upper arms locked tightly against your ribs. Straighten your arms behind you. Squeeze the tricep hard. Return to the starting position slowly. The biggest mistake I see is swinging the whole arm. Your shoulder joint must remain completely still. Only the elbow bends. I used to swing 20 lb dumbbells doing this. I failed to work my triceps at all. I just used momentum to cheat. Drop the ego. Grab the 5 lb weights. Do 3 sets of 15 reps. You’re going to feel a sharp, burning sensation right above your elbow by the tenth rep. That means you’re doing it right. Keep your neck in line with your spine. Never crank your head up to look in the mirror.
8. Lateral Raises for Shoulder Definition

Broad shoulders make your waist look smaller. Lateral raises are the secret to building those shoulder caps. You need very light weights. I use 3 lb neoprene dumbbells. They cost $5.99 at Target. Stand tall. Hold the weights at your sides. Keep a tiny bend in your elbows. Raise your arms straight out to the sides until they reach shoulder height. Pause for one full second. Lower them slowly. Do 3 sets of 15 reps. I see people flying the weights up like a bird flapping its wings. They use their legs to bounce the weight up. That completely defeats the purpose of the exercise. Stand perfectly still. The neoprene material absorbs sweat, so the weights stay firmly in your hands. If you feel a pinching pain in your neck, you’re shrugging your shoulders. Keep your shoulders pulled down and away from your ears. I struggled with neck tension for years because I shrugged during this exercise. It gave me terrible tension headaches. Focus on pushing the weights away from your body, not just lifting them straight up toward the ceiling.
9. Front Raises

Front raises target the anterior deltoid (the front of your shoulder). You can use dumbbells, but I prefer a kettlebell. Holding one heavy object with both hands keeps my form strict. I use a 10 lb cast iron kettlebell. It runs $16.99 at Walmart. Stand with your feet shoulder-width apart. Hold the kettlebell by the horns (the sides of the handle). Keep your arms straight. Lift the bell straight in front of you until it reaches eye level. Lower it slowly. Do 3 sets of 12 reps. The rough texture of the cast iron handle builds calluses on your palms. I like that gritty feeling. Never lean back as you lift the weight. Your core has to work hard to keep you upright. After a heavy set of these, my shoulders are completely smoked. I always keep a cold bottle of water nearby. I grab a 33.8 oz bottle of Whole Foods 365 Everyday Value Electrolyte Water. It costs $1.49. The crisp, cold water is exactly what I need before moving on to the final burnout exercises. Brace your abs hard before every single rep.
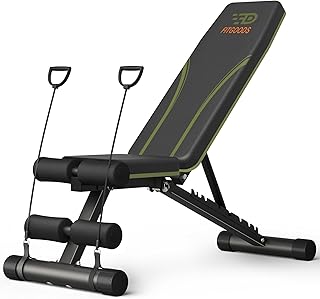
Fitgoods Adjustable Weight Bench for Home Gym
If you want something that just works, Fitgoods Adjustable Weight Bench for Home Gym is a safe bet (86 reviews, 4.5 stars).
10. Arm Circles (Warm-up or Burnout)

Arm circles sound like a joke. They remind me of elementary school gym class. But if you add light weights, they become a brutal burnout. I use Bala Bangles 1 lb wrist weights. They cost $55.00 at Target. They wrap tightly around your wrists with thick Velcro. Stand tall. Extend your arms straight out to the sides. Make small, tight circles forward for 30 seconds. Then reverse and make small circles backward for 30 seconds. Do 3 sets total. I tried doing this for three minutes straight once without resting. By minute two, my arms felt like they were filled with wet sand. I failed to even lift them to scratch my nose. The soft silicone texture of the Bala Bangles feels great against the skin, unlike cheap scratchy nylon weights. Keep your core tight. Never let your arms drop below shoulder level. The burn creeps up on you slowly. It starts as a mild warmth in your shoulders and turns into a deep, intense fire. It’s the perfect way to exhaust every remaining muscle fiber in your upper body before calling it quits.
11. Diamond Push-Ups

We finish with the hardest bodyweight move for triceps. Diamond push-ups force your triceps to handle almost your entire body weight. Get into a push-up position. Bring your hands close together under your chest. Your thumbs and index fingers should touch, forming a diamond shape. Lower your chest toward your hands. Push back up. I use the Perfect Fitness Pushup Elite stands for these when my wrists hurt. They cost $29.99 at Costco. They rotate slightly, which takes the pressure off my wrist joints. If you lack stands, just put your hands flat on the floor. Do 3 sets to failure. That means you keep going until you physically fail to push back up. My muscles shake violently during the last few reps. Sweat drips off my chin. It’s an ugly, painful finish to the workout. But this is where the real changes happen. If you can only do one rep, do one rep. Next week, you’ll do two. Never let your lower back sag. Keep your body in a straight, rigid line from your head to your heels.
Building strong arms takes consistency. You can’t do this routine once and expect massive changes. I recommend doing this sequence two times a week. Give your muscles at least 48 hours to recover between sessions. Never skip your rest days. Your muscles rebuild when you sleep, not when you lift. Eat enough protein. I usually grill a 6 oz chicken breast from Whole Foods ($6.99/lb) right after my shower. Get enough sleep. The gear I mentioned helps, but your effort is what actually matters. Save this page. Pin it to your fitness board. Pull it up the next time you’re standing in your living room wondering what to do. Put in the work, and I promise you’ll see the difference. No exaggeration.
Frequently Asked Questions
How often should I do this tone arms workout?
I recommend doing this tone arms workout two times a week. Your muscles need at least 48 hours to recover and rebuild. Doing it every single day leads to overtraining and joint pain. Stick to a consistent schedule for the best results.
Can I do a tone arms workout without weights?
Yes, bodyweight moves like push-ups, commando planks, and tricep dips are incredibly effective. However, adding light resistance bands or small dumbbells helps target specific muscles like the biceps and shoulders more directly. You’re going to see faster progress with a mix of both.
Why do my elbows hurt during tricep extensions?
Elbow pain usually means your form is off or the weight is too heavy. Ensure your elbows point straight forward, not out to the sides. If the pain continues, drop to a lighter weight or switch to resistance bands to reduce joint stress.
Will this workout make my arms bulky?
No, it’s very difficult to accidentally build massive, bulky arms. This routine focuses on high reps and moderate weights to build lean muscle and definition. You’ll develop strong, toned arms without looking like a competitive bodybuilder. Consistency and diet play the biggest roles.
