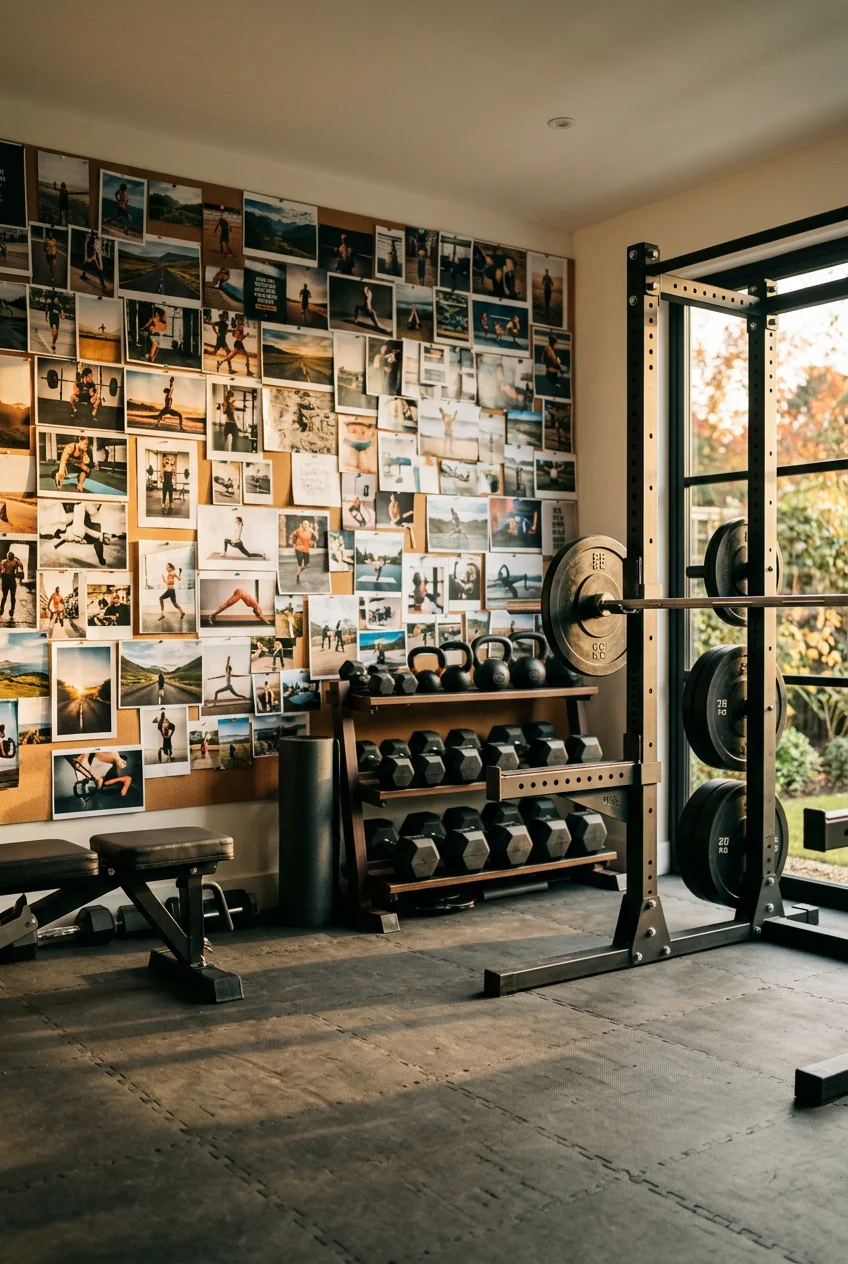
What’s Inside
- Choose the Right Foundation for Your Gym Vision Board Pictures
- Print High-Quality Gym Vision Board Pictures
- Be Hyper-Specific with Your Exercise Visuals
- Pinpoint Exact Nutritional Goals and Brands
- Use Adhesives That Actually Hold Up
- Seal the Entire Board for Longevity
- Integrate Measurable Milestones and Trackers
- Build a Digital Version for Your Phone
- Dedicate 10 Percent to a Reverse Vision Board
I glued a bunch of magazine cutouts to a flimsy piece of cardboard last January, and by March, it looked like a recycling bin exploded in my bedroom. The edges were curling, the pictures were fading, and the whole thing just made me feel guilty every time I walked past my dresser. If you want gym vision board pictures to actually work, you can’t just slap a photo of a random fitness model next to a picture of a salad. I tried this wrong for months before figuring it out. I’m Ryan, a fitness trainer, and I’ve seen dozens of clients fail their New Year resolutions by February simply because their goals aren’t visually anchored to reality. I learned that the hard way.
Listen, your brain ignores generic imagery. When you paste a picture of a perfectly lit, oiled-up bodybuilder on your wall, your subconscious immediately dismisses it as an advertisement. It doesn’t register as a personal target. To fix this, you need hyper-specific visuals, the right physical materials, and a layout that forces you to take action. Let’s break down exactly how to build a board that actually keeps you accountable, using materials you can grab locally today.
1. Choose the Right Foundation for Your Gym Vision Board Pictures

Most people grab a leftover Amazon shipping box, cut off a flap, and start gluing. I did this last year. The cardboard absorbs moisture from the glue, warps within forty-eight hours, and looks terrible leaning against your bedroom wall. You need a rigid foundation if you want this thing to last all year.
For a physical board, you have two solid options. The cheapest route is a standard 22-inch by 28-inch white poster board. You can grab one at Walmart for $1.98 in the school supply aisle. It’s thin, but it works if you plan to pin it tightly to a corkboard. However, I highly recommend upgrading to a sturdy 16-inch by 20-inch foam core board. I buy the Elmers brand foam boards at Michaels for $6.50. The foam core is a quarter-inch thick, perfectly rigid, and stands up on its own if you want to prop it on your desk or dresser. The bright white background also makes your photos pop much better than the dull grey of recycled cardboard.
Don’t buy a colored background. I tried a neon green foam board once thinking it would look energetic, but it just clashed with all the photos and gave me a headache. Stick to stark white. It forces your eyes to focus entirely on the gym vision board pictures you’ve selected, rather than the negative space around them. If you’re building a digital version, open Canva and set your custom dimensions to 1920 by 1080 pixels for a desktop wallpaper. The crisp white background rule applies there, too.
2. Print High-Quality Gym Vision Board Pictures

Printing your photos on cheap, 20-pound copy paper using an inkjet printer that’s running low on magenta ink is a guaranteed way to ruin your board. The printer paper gets instantly soggy the second you apply adhesive, and the ink smears if you accidentally touch it with a damp finger. I ruined a great shot of a squat rack this way last Tuesday. Trust me on this.
If you want your board to look intentional, you need actual glossy photographs. I take all my saved digital images, put them on a USB drive, and walk into the CVS Photo department. Using their Kodak kiosk, I print standard 4×6 photos. They cost about $0.35 per print, meaning you can get fifteen high-quality images for under six bucks. The glossy finish resists moisture, the colors are incredibly vibrant, and the thick photo paper adds a great tactile weight to your board.
If you insist on printing at home, you have to upgrade your paper. I use HP Everyday Photo Paper with a glossy finish. A pack of 100 sheets runs $12.99 at Target. It feeds right through a standard home printer but gives you that thick, professional feel. When you cut out your images from this thicker paper, the edges stay sharp and clean. You won’t get those ragged, tearing edges that happen when you try to cut cheap printer paper with dull scissors.
3. Be Hyper-Specific with Your Exercise Visuals

This is where almost everyone messes up. Do not pin a picture of a generic fit person smiling while holding a dumbbell. That image tells your brain absolutely nothing about what you actually need to do today. Your gym vision board pictures need to represent the exact, specific movements and milestones you are training for. You might also like: 15 Creative Workout Motivation Tips You Haven’t Thought Of
If your goal is to finally nail a strict pull-up, find a photo of someone at the exact top of the movement, chin over the bar, back muscles engaged. If your goal is a specific race, don’t just pin a picture of running shoes. Print an image of a runner crossing the finish line with a visible race clock showing your target time. Last year, my goal was a sub-25-minute 5K. I printed a photo of a digital race clock reading exactly 24:59 and pinned it dead center on my board. You might also like: 12 Abs And Cardio Workout Worth Trying
This specificity engages your brain’s reticular activating system. It primes you to notice opportunities and track progress related to that exact goal. I also recommend printing photos of the specific equipment you want to master. When I was learning Olympic lifts, I pinned a close-up photo of the aggressive knurling on a rogue barbell, covered in white chalk. Every time I looked at it, I could almost smell the chalk and feel the rough steel. That sensory connection gets you off the couch much faster than a generic fitness quote.

Jump Rope, Tangle-Free Rapid Speed Jumping Rope Cable with
Honestly, Jump Rope surprised me — sturdier than it looks in the photos, and over 242 buyers gave it 4.5 stars.
4. Pinpoint Exact Nutritional Goals and Brands

Your nutrition visuals need the exact same level of detail as your exercise photos. A picture of a green apple and a tape measure is useless. It belongs in a stock photo library, not on your wall. You need to feature the exact fuel you plan to buy, prep, and eat. You might also like: 11 Full Body Workout At Gym That Actually Work
I include the exact brands of supplements and snacks I use to hit my macros. Right now, I have a cut-out of Optimum Nutrition Gold Standard Whey Protein, specifically the Double Rich Chocolate flavor. I buy the 2-pound tub for $44.99 at Whole Foods. I also pin a picture of the exact RXBARs I keep in my gym bag. I buy the Chocolate Sea Salt flavor for $8.99 a box at Trader Joe’s. Pinning the actual packaging trains your brain to reach for those specific items when you’re walking down the grocery store aisle.
Skip the fat-free stuff. It tastes like wet cardboard, and if you secretly hate eating it, putting it on your board will just build resentment toward your diet. I used to pin photos of plain boiled chicken breast and broccoli because I thought that’s what a fitness board required. I never ate it. Now, I pin photos of vibrant, well-seasoned steak fajitas or a toasted everything bagel loaded with a measured half-cup of avocado and two poached eggs. Show the exact portion sizes. If your goal is hydration, don’t just show water. Print a picture of a 32-ounce Nalgene bottle with the text ‘Refill 3x Daily’ written across it.
5. Use Adhesives That Actually Hold Up

The tape you use matters. I tried using standard clear scotch tape rolled into little loops behind my photos. Within three weeks, the dry winter air in my apartment turned the tape brittle, and my photos started curling off the board and dropping onto the floor. Waking up to find your goals literally falling apart is a terrible way to start a Monday.
For thin paper cutouts, you need a simple glue stick. I buy the Elmer’s Disappearing Purple Glue Stick. You can get a 3-pack for $4.50 at Kroger. The purple color lets you see exactly where you’ve applied it, ensuring you hit the corners so they don’t curl, and it dries perfectly clear. It goes on smooth and doesn’t leave wet, wrinkly pockets behind the paper.
However, if you printed your gym vision board pictures on the thick, glossy CVS photo paper I mentioned earlier, a glue stick won’t cut it. The photos are too heavy. For those, I use Tombow repositionable tape rollers. You can find them in the craft aisle at Sprouts or Michaels for about $7.99. You just drag the roller across the back of the photo, and it lays down a strip of high-tack adhesive. The best part is the repositionable formula. If you stick a photo down crooked, you can carefully peel it up and adjust it without ripping the foam core board underneath.
6. Seal the Entire Board for Longevity

This is a trick I learned from a friend who builds architectural models, and it completely changed how my boards look. Once you have all your photos and trackers glued down exactly where you want them, you need to seal the entire surface. Without a seal, the glossy photos gather dust, the edges eventually catch on things, and the whole board starts looking grimy by July.
You need a bottle of Mod Podge. I buy the matte finish version. A 16-ounce bottle costs $10.49 at Michaels. You take a wide foam brush and literally paint a thin, even layer of the white liquid over the entire board, directly over your photos. The first time I did this, I panicked. The board looked cloudy and ruined. But it dries completely clear within twenty minutes.
I have to warn you about one mistake I made. Do not press hard with the foam brush. I was brushing too aggressively over a thin magazine cutout, and the wet friction tore the paper right down the middle. Use light, sweeping strokes. Just glide the foam brush over the surface. Once it dries, it creates a unified, protective shell over the whole board. It locks down every edge, prevents the photos from fading in the sunlight, and gives the final product a really clean, intentional texture.

Ally Peaks Pull Up Bar for Doorway
If you want something that just works, Ally Peaks Pull Up Bar for Doorway is a safe bet (1 reviews, 4.5 stars).
7. Integrate Measurable Milestones and Trackers

A board full of pictures without a timeline is just a wish list. You need to anchor those gym vision board pictures to hard dates and measurable actions. I don’t just want to see a picture of a guy deadlifting. I want to see exactly how many workouts it’s going to take me to get there.
I print out a small, 12-week grid tracker and glue it directly onto the bottom right corner of my board. Each little square represents one workout. Then, I use a Sharpie Chisel Tip Permanent Marker (I buy the 12-pack at Costco for $14.99) to put a thick, black ‘X’ through each box after I get home from the gym. The physical act of uncapping that marker, smelling the ink, and crossing off the box is incredibly satisfying. It builds momentum.
You also need to write specific numbers next to your photos. Don’t just pin a picture of a scale. Take that Sharpie and write ‘Lose 12 lbs by August 1st’ right across the image. If you want to increase your bench press, write ‘Bench 225 lbs for 3 reps’ next to the photo of the barbell. When you hit that milestone, don’t peel the photo off. Take a red marker, draw a massive checkmark over it, and write the date you achieved it. Seeing those conquered goals piling up on your board proves to your brain that the system is working.
8. Build a Digital Version for Your Phone

Even if you build a physical board for your bedroom, you aren’t in your bedroom when you’re deciding whether to order a greasy burger at lunch or hit the gym after work. You need your gym vision board pictures in your pocket. I recreate my physical board digitally so it’s the first thing I see when I pick up my phone.
I use Canva Pro, which costs $12.99 a month, but you can easily do this on their free tier. I create a custom canvas sized at 1080 by 1920 pixels, which perfectly fits most smartphone lock screens. I upload the exact same photos I printed at CVS and arrange them digitally. The trick here is to leave the top third of the image relatively blank or dark, so the white text of your phone’s digital clock is still easy to read.
I tried setting a busy collage as my lock screen once, and I couldn’t read my notifications or the time. It annoyed me so much that I changed my background back to a plain black screen after two days. Keep the digital layout clean. Put your main goal right in the center where your thumb naturally rests. Every time you unlock your phone to mindlessly scroll social media, you’re forced to look at your 5K goal or your meal prep targets. It’s a harsh but necessary reality check.
11. Dedicate 10 Percent to a Reverse Vision Board

This is the most powerful adjustment I’ve made to my goal-setting process. A traditional board only shows you the mountain you still have to climb, which gets incredibly demoralizing on days when you’re tired, sore, and lacking motivation. You need a reminder that you aren’t starting from zero. I dedicate the bottom left corner of my board—about ten percent of the total space—to past victories.
I call it the reverse vision board section. I pin physical proof of things I’ve already conquered. Right now, I have an old race bib from a 10K I ran three years ago. I also pinned a photo of a pair of jeans that used to fit me tight but are now three inches too big in the waist. I even pinned a small, printed screenshot of a text message from a friend congratulating me on hitting a PR.
When you hit a plateau, and you will hit a plateau, looking at those future goals can feel oppressive. Your brain starts telling you that you can’t do it. That’s when you look at the bottom left corner. You look at the race bib. You look at the old photos. It provides instant, undeniable proof that you have done hard things before, and you’re fully capable of doing them again. It shifts your mindset from self-doubt to proven confidence. Took me years to figure out.
Building a board this way takes a little more effort than just saving a few pictures on Pinterest. But if you actually buy the foam core, print the glossy photos, and map out your specific numbers, you’re building a tool that works. Don’t let another February roll around with abandoned goals. Grab your keys, head to the store, and build your board this weekend. Make sure to pin this guide so you have the exact dimensions and supply lists when you’re standing in the craft aisle.
Frequently Asked Questions
What size should a physical gym vision board be?
A 16×20 inch foam core board is the ideal size. It’s large enough to hold 10-15 specific images and trackers without feeling cluttered, but rigid enough to stand up on a dresser without warping.
How many gym vision board pictures should I use?
Limit your board to 10-15 highly specific images. Overcrowding your board creates visual noise and overwhelms your brain. Leaving white space helps you focus entirely on your primary fitness and nutrition goals.
What is the best way to attach pictures to a vision board?
For thin paper, use a purple disappearing glue stick to prevent wrinkling. For heavier glossy photo prints, use a repositionable tape roller. Avoid liquid glue, as it warps the paper and cardboard backing.
Should I include pictures of myself on my vision board?
Yes, including unflattering or sweaty photos of yourself working out grounds the board in reality. It proves you are capable of hard work, making your future goals feel much more attainable than generic fitness model photos.
