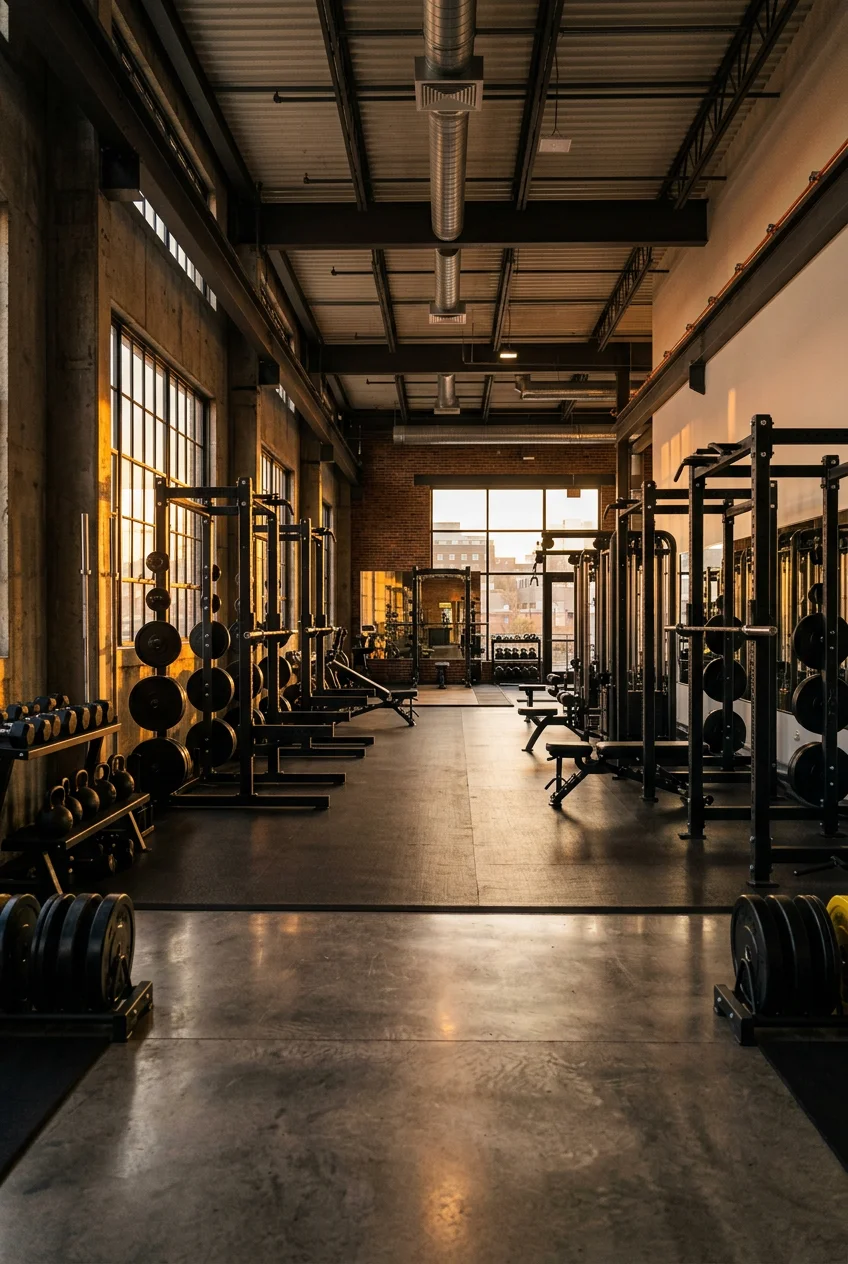
What’s Inside
- The Pre-Shoot Pump and Olive Oil Strategy
- Sculpting with Overhead and Side Lighting
- Low Angles for Power (Gym Pictures Ideas)
- Creative Mirror Compositions and Clutter Control
- Mid-Movement Action Shots with Relaxed Faces
- Dialing In Your Exact Camera Settings
- Solid-Colored Apparel for Cleaner Shots (Gym Pictures Ideas)
- Mobile Editing with Snapseed’s Healing Tool
- Professional Polish with Adobe Lightroom
Last Tuesday at my local LA Fitness, I spent twenty minutes trying to get a decent post-workout shot near the dumbbell rack. I stood there, sweating through my shirt, and snapped a few photos under the main ceiling fixtures. When I looked at my phone, I realized I looked like a washed-out ghost standing next to a chalk-covered trash can. If you’re struggling to capture your physical progress, you need better gym pictures ideas. I used to just point my phone at the nearest mirror and hope for the best. That resulted in hundreds of blurry, badly lit photos where you couldn’t even tell I’d been lifting weights for the past hour.
The harsh fluorescent lights found in most commercial gyms wash out every ounce of muscle definition you’ve worked for. It’s frustrating when your real-life physique doesn’t translate to the camera lens. I tried this wrong for months before figuring it out; learned that the hard way. I’d stand directly under the brightest light I could find, thinking more light meant better image quality. Wrong. It just created weird, dark shadows under my eyes and flattened my chest and shoulders. I’ve spent the last three years testing different camera angles, portable lighting setups, and mobile editing tricks to figure out what works in a busy gym.
These aren’t just theoretical concepts. They’re practical setups you can pull off with a smartphone, a cheap tripod, and a little spatial awareness. You don’t need a professional photography crew following you around the weight room. Let’s break down exactly how to set up your shots, what gear justifies its price tag, and how to edit your photos without making yourself look like a plastic action figure.
1. The Pre-Shoot Pump and Olive Oil Strategy

Most people walk into the gym, take a photo cold, and wonder why they look flat. An expert tip is to perform a light, targeted workout right before you start snapping. This “pump” increases blood flow to the muscles you’re targeting, making them appear fuller and more defined on camera. Before I shoot any upper body photos, I drop and do 3 sets of 15 pushups, followed by some light lateral raises with 10lb dumbbells. I usually fuel up with exactly 1/2 cup of dry oats mixed with protein powder from Sprouts about an hour beforehand to ensure my muscles have enough glycogen to fill out.
Once you have a pump, it’s time to manage your skin’s texture. I used to splash water from the fountain on my arms to make them look sweaty. The problem? Water evaporates in thirty seconds and leaves messy spots all over the rubber floor mats. Instead, mist your skin with an olive oil-based hair sheen. I buy the OS olive oil spray for $4.99 at my local Kroger. It comes in a 12 oz aerosol can and creates a natural, non-sticky sheen that highlights muscle contours perfectly. You just need a two-second spray from about a foot away. Don’t overdo it, or you’ll look like you’re entering a bodybuilding stage in 1995. The oil catches the overhead light and creates deep contrast in the muscle separations.
2. Sculpting with Overhead and Side Lighting

Gym lighting is notoriously terrible. It’s usually a mix of cheap fluorescent tubes and weird natural light bleeding in from tinted windows. To get definition, you need to master overhead and side lighting. Position yourself under a strong overhead light to create dramatic, downward shadows that accentuate muscle definition. If you stand with the light hitting you in the face, the light fills in all the shadows, making you look flat. I learned this the hard way after taking dozens of photos facing the front windows at my gym, wondering why my abs disappeared.
When the built-in gym lighting isn’t cooperating, I bring my own. Supplementing with portable LED panels is the easiest way to control your environment. I carry the Aputure MC in my gym bag. It costs around $89, and it’s roughly the size of a thick credit card. It has a magnetic back, so I just slap it onto the side of a steel squat rack, angle it 45 degrees toward me, and turn the brightness to 60 percent. If you want something more powerful, the Godox ML60 runs between $139 and $269 and offers incredible precision, though it’s bulkier. By placing the light to your side, you sculpt the light across your body, creating impactful rim lighting that separates you from the messy, distracting background of the gym floor. You might also like: 20 Gorgeous Garage Home Gym Setup Ideas to Steal Right Now
3. Low Angles for Power (Gym Pictures Ideas)

The angle of your camera dictates the mood of the photo. If you shoot from eye level, you capture the room exactly as it is, which is often boring. If you shoot from above, you make the subject look small and compressed. To emphasize strength, you need to employ low angles. Place your camera or phone significantly below eye level, angled slightly upward. This makes the subject appear more powerful, dynamic, and physically larger. It’s a classic trick used in comic books and action movies, and it works for gym pictures ideas. You might also like: 20 Inspiring Journal Home Workout Ideas You Haven’t Thought Of
I used to balance my phone against my water bottle on the floor, which resulted in my phone crashing face-first onto the concrete a dozen times. Now, I use a basic 50-inch portable tripod I picked up for $19.99 at Target. I set the tripod legs as short as they go, placing the lens about knee-height. If I don’t have my tripod, I’ll grab a standard 45lb bumper plate, lay it flat on the floor, and wedge my phone into the center ring. When you shoot from this low angle, the ceiling lights act as a natural backlight, and your shoulders and chest look massive relative to the rest of the frame. Just make sure you aren’t jutting your chin out too far when looking down at the lens, or you’ll end up with a prominent double chin in every single shot. You might also like: 20 Inspiring Outfit Home Workout Ideas That Changed Everything

Resistance Bands, Pull Up Assist Bands – Workout Bands
Honestly, Resistance Bands surprised me — sturdier than it looks in the photos, and over 41 buyers gave it 4.5 stars.
4. Creative Mirror Compositions and Clutter Control

Gyms are lined with mirrors. Instead of a standard, straight-on selfie, use them creatively to add depth and capture dynamic reflection shots. You can shoot over your shoulder, capture your reflection while sitting on a bench, or use two angled mirrors to create an infinity effect. However, be mindful of what else is reflecting in that glass. I once posted a photo I was proud of, only for someone in the comments to point out a guy in the background adjusting his underwear. Always check the deep background of your reflection.
Before you open your camera app, control your background clutter. A common mistake that ruins photo quality is a messy environment. Ensure no stray foam rollers, chalk blocks, or sweaty towels are visible. I keep a small travel-sized bottle of Windex glass cleaner (about $3.89 at Target) and a microfiber cloth in my gym bag. Gym mirrors are covered in fingerprints, sweat, and chalk dust. Taking thirty seconds to wipe down a two-foot square section of the mirror before you shoot makes the final image sharper. Keep the focus on your form, not the dirty smudge right across your face.
5. Mid-Movement Action Shots with Relaxed Faces

Static posing in front of the dumbbell rack is getting a little stale. If you want your content to stand out, prioritize action shots to convey energy. This aligns with the 2026 trend of showcasing the “experience in motion.” Moving beyond static poses by capturing subjects mid-movement adds authentic dynamism. Shots of someone lifting heavy weights, performing strict pull-ups, or in the peak of a box jump show athleticism rather than just vanity. I get my best shots during the eccentric phase of a deadlift or a heavy barbell row.
There’s a major catch to action shots, though. While your body is engaged in a strenuous pose, you have to maintain a relaxed facial expression. I ruined so many great deadlift photos because my face was scrunched up, my eyes were bulging, and my face was bright red. It looked like I was in agony, not projecting confidence. To fix this, I drop the weight slightly for the photo set. If my working set is 315 lbs, I’ll drop it to 225 lbs for the photos. This allows me to maintain perfect form, wear my solid Nike Metcon 9 shoes ($130) for a stable base, and relax my jaw and forehead while pulling the bar. The weight still looks heavy, but my face doesn’t look like a straining tomato.
6. Dialing In Your Exact Camera Settings

You can have the best lighting and angles in the world, but if your camera settings are wrong, the photo goes in the trash. For smartphone photography, never rely on auto-focus. Always tap on your screen to lock focus on your subject, then manually drag the sun icon down slightly to lower the exposure. This deepens the shadows and adds definition. If you’re using a dedicated mirrorless camera, set a low f-stop, like f/1.8, to blur the background. This is crucial in a busy gym because it hides the messy equipment racks behind you and makes you pop off the screen.
When you’re trying to capture fast motion, like kettlebell swings or battle ropes, a slow shutter speed will just give you a blurry mess. I used to shoot battle ropes on auto, and my hands were just a smeared blur. You need a shutter speed of 1/3000th of a second or faster to freeze action effectively. If you’re shooting a wider scene to show the whole gym, shooting at f/8 or above on wider lenses helps ensure the subject and the immediate surroundings remain crisp. It takes an extra twenty seconds to dial these settings in, but the difference in sharpness is undeniable.

YOTTOY Anti-Burst Exercise Ball for Working Out
A dependable everyday pick — YOTTOY Anti-Burst Exercise Ball for Working Out pulls in 24 ratings at 4.5 stars. Not flashy, just solid.
7. Solid-Colored Apparel for Cleaner Shots (Gym Pictures Ideas)

What you wear impacts the final image. Dress strategically with well-fitting, solid-colored workout attire. Avoid busy patterns, camouflage, or large, distracting logos unless you’re being paid to promote that brand. Complex patterns confuse the camera’s sensor and divert attention away from your actual physique and movement. I once wore a bright neon green graphic tee for a back workout shoot. The shirt was so loud that it cast a sickly green reflection onto the bottom of my chin, and the graphic hid the width of my lats.
Solid, muted colors are the foundation of good gym pictures ideas. Black, olive green, navy, and dark grey absorb light in a way that highlights the shadows of your muscles. For women, popular choices like the Lululemon Align leggings (exact price $98, usually in the 25-inch inseam) are favored for their seamless aesthetic and matte finish that doesn’t reflect harsh gym lights. Personally, I buy basic Hanes solid black cotton-blend tees from Walmart for $12 in a 3-pack. They fit tight on the arms, don’t have any distracting tags or logos, and cost so little I don’t care if I ruin them with chalk or olive oil spray. Keep the wardrobe simple so the physical effort remains the focal point.
8. Mobile Editing with Snapseed’s Healing Tool

Nobody posts a raw photo anymore, but you don’t need a desktop computer to clean up your shots. For a free mobile editing solution, I use Google’s Snapseed app. It’s available on iOS and Android, and it handles large files without crashing. The feature I use the most is the “Healing” tool. Gyms are chaotic, and even if you try to control the background, someone always leaves a towel on a bench or a brightly colored shaker bottle on the floor. I once had a perfect squat photo ruined by a bright pink Whole Foods water bottle sitting behind my heel. The Healing tool lets you tap the bottle, and the app replaces it with the rubber floor texture.
Snapseed also offers “Selective” adjustments, which are crucial for gym lighting. Sometimes the overhead light hits your shoulders perfectly but leaves your legs in darkness. You can drop a selective pin on your legs and bump the brightness and structure in that one specific area without blowing out the rest of the photo. The app even allows you to edit RAW files directly on your phone for maximum quality. Just be careful with the “Structure” slider. Pushing it past +20 makes the photo look deep-fried and grainy.
9. Professional Polish with Adobe Lightroom

If you want to step up from mobile apps and build a consistent visual brand, use Adobe Lightroom for post-processing. A standard photography plan starts at $11.99 per month, and it’s worth it if you post regularly. The biggest issue with gym photos is the color temperature. Fluorescent lights cast a sickly yellow or green tint over everything. An expert tip for a clean, modern aesthetic is to manually adjust the white balance in Lightroom to approximately 3900 Kelvin. This cools down the yellow tones and gives the skin a more natural, crisp look.
A common mistake is excessive editing, which leads to an unrealistic or “plastic” appearance. I used to crank the clarity slider all the way to +50, thinking it made me look shredded. In reality, it made my skin look like sandpaper and gave the whole photo a fake, HDR vibe. Focus on enhancing natural muscle definition by slightly dropping the highlights and lifting the shadows, correcting minor flaws rather than drastically altering the physique. To cultivate a professional brand identity, maintain a cohesive color palette. I created a specific Lightroom preset with my 3900 Kelvin adjustment, a slight contrast bump, and a desaturation of distracting background colors like neon yellows and reds. Applying this consistent preset takes two seconds and makes my entire feed look intentional.
Getting great shots in a crowded, poorly lit fitness center takes patience. You’re going to feel a little awkward setting up a tripod or wiping down a mirror while people are doing cardio behind you. But once you lock in your lighting, find your angles, and apply a clean edit, the results speak for themselves. The next time you’re packing your gym bag, throw in a cheap tripod, that $5 can of olive oil spray, and maybe a clean black shirt. I usually grab a bulk box of Kirkland protein bars from Costco on my way home to refuel after a long shoot. Try these setups during your next session, and save or pin this guide so you can reference the exact camera settings and lighting angles when you’re standing on the gym floor trying to remember how to fix that harsh yellow lighting.

Foam Roller Set – High Density Back Roller
Foam Roller Set – High Density Back Roller has been one of the most consistently praised picks in this category. 2 reviewers averaged 4.5/5.
Frequently Asked Questions
What is the best lighting for gym pictures ideas?
The best lighting comes from directly overhead or at a 45-degree angle to the side. This casts dramatic shadows that highlight muscle definition. Avoid direct frontal lighting, as it fills in shadows and flattens your physique on camera.
How can I make my muscles look more defined in photos?
First, get a light ‘pump’ by doing a few sets of pushups or lateral raises before shooting. Then, lightly mist your skin with an olive oil-based sheen spray to catch the overhead light and emphasize muscle separation.
What camera settings should I use for action shots at the gym?
To freeze fast movements like kettlebell swings, use a shutter speed of 1/3000th of a second or faster. If you want a blurred background to make yourself stand out, use a low f-stop like f/1.8.
How do I fix yellow gym lighting in my photos?
Use an editing app like Adobe Lightroom to adjust the white balance. Setting the color temperature to approximately 3900 Kelvin cools down the harsh yellow and green tints from fluorescent lights, giving your photos a clean, modern look.
