What’s Inside
- Prioritize Core Engagement to Prevent Back Arching
- Control the Movement, Avoid Momentum
- Limit Leg Height to Maintain Hip Stability
- Incorporate Fabric Resistance Bands for Your Fire Hydrant Workout
- Progress with Ankle Weights Gradually
- Utilize Adjustable Ankle Weights for Progressive Overload
- Implement the Fire Hydrant Pulse Variation
- Try the Standing Fire Hydrant for Advanced Stability
- Focus on the Mind-Muscle Connection
- Integrate Fire Hydrants into Your Warm-Up Routine
- Incorporate Fire Hydrants as a Finisher
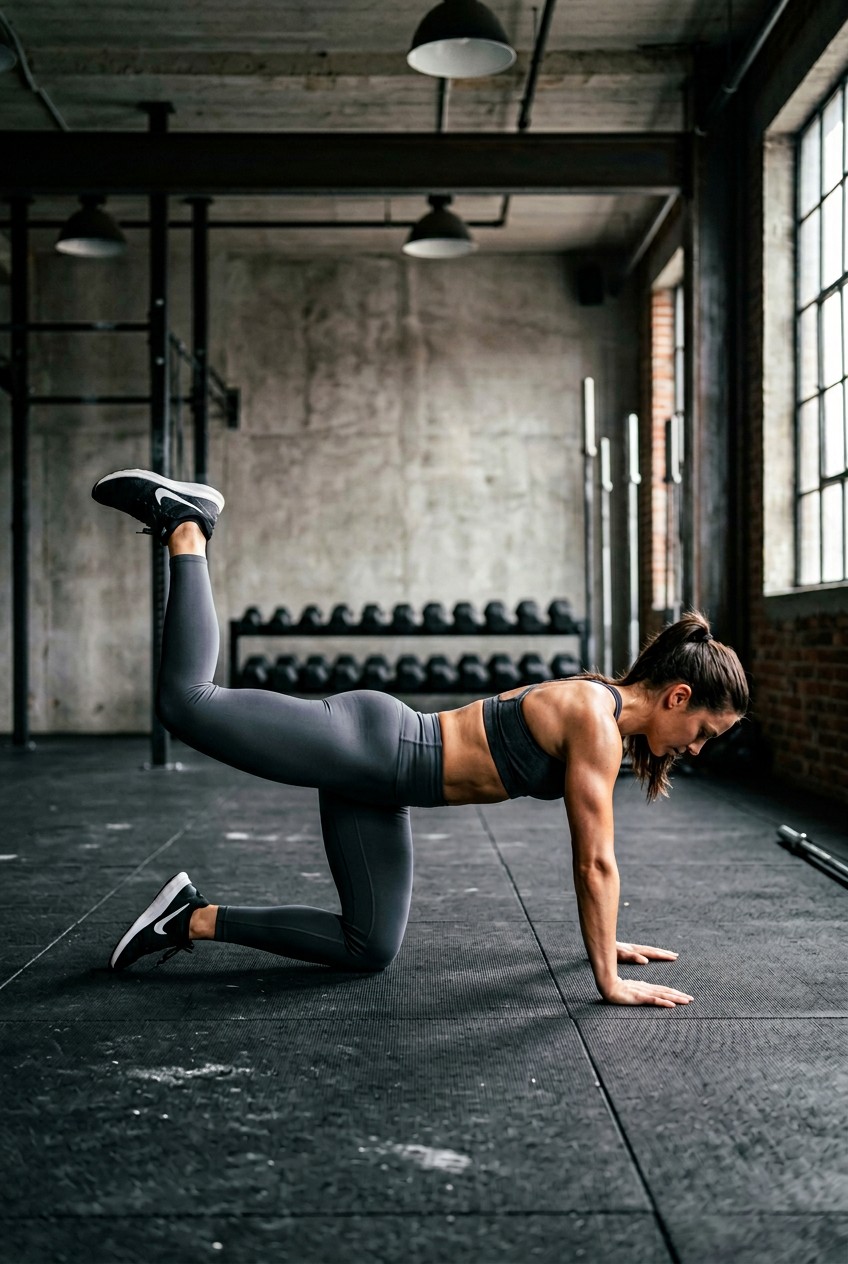
Last Tuesday at Target, I dropped a ten-pound kettlebell straight onto the floor because my glutes were completely asleep. It was humiliating. If you want to fix weak hips, a proper fire hydrant workout is mandatory. I’ve spent years doing this specific movement completely wrong. I’d rush through the reps, arch my lower back, and wonder why my knees hurt. I’m here to fix that for you. Skip the fat-free advice. We’re getting into the brutal, honest truth about glute isolation. Here are eleven ways to actually get results.
1. Prioritize Core Engagement to Prevent Back Arching

I used to think my lower back was just naturally tight. Last month, I was lying on my Lululemon Reversible Mat (the 5mm one that costs $98) trying to bang out some reps. I felt this sharp, pinching pain right above my tailbone. I realized I was ignoring my core. If you don’t actively brace your stomach, your spine takes all the load. Imagine someone’s about to punch you in the gut. Pull your belly button down toward the floor. I tried this wrong for months before figuring it out. Took me years to figure out. My pelvis was tilting everywhere. You need to lock that pelvis in place. If your back arches, you’re just dumping tension into your lumbar spine instead of your glutes. I actually learned this the hard way carrying groceries. I was holding heavy bags and my lower back seized up. I had to drop a $12.99 pack of toilet paper right on the asphalt. It was embarrassing. The culprit was weak glutes and a weak core from doing exercises like this incorrectly. Now, I spend a solid thirty seconds just finding my core engagement before I even lift a leg. I press my palms into the mat, squeeze my abs, and hold. It’s tedious, but it works. I won’t do a single rep until my core’s rock solid. Grab a cheap $4.99 yoga block from Walmart and put it on your lower back. If it falls off when you lift your leg, your core isn’t engaged enough.
2. Control the Movement, Avoid Momentum

Resist the urge to rush. I see people at the gym flapping their legs like a dying bird. It’s ridiculous. I used to do it too. I’d try to hit fifty reps in thirty seconds. I thought faster meant better. I was dead wrong. Perform each repetition slowly and with complete control. You need to focus on engaging your glutes throughout the entire range of motion. Jerking motions reduce muscle activation. They also put unnecessary strain on your hip flexors. I actually heard a loud popping sound in my hip last month when I tried to speed through a set. It sounded like a dry twig snapping. I had to ice my hip with a $3.99 bag of frozen peas from Trader Joe’s for two days. Don’t be an idiot like me. Take three full seconds to lift your leg. Pause for one second at the top. Take another three seconds to lower it back down. You’ll feel a deep, burning ache in your outer glute. That means it’s working. I like to use a metronome app on my phone to keep my pace honest. It’s annoying to listen to that ticking sound, but it forces me to slow down. Quality always beats quantity here. If you can only do eight perfect reps, stop at eight. Don’t force fifteen ugly ones just to hit a number.
3. Limit Leg Height to Maintain Hip Stability

Lifting your leg too high is a massive mistake. I see it every single day. People think higher is better. They crank their knee up to the ceiling. All this does is force your hips to rotate. The second your hips rotate, you lose all glute engagement. Your lower back takes over. I spent years doing this wrong. I thought I was getting a great stretch. I wasn’t. I was just reinforcing bad movement patterns. Focus on lifting only as high as you can without your hips rotating. Your hips should remain pointing straight down at the floor. It’s a much smaller range of motion than you think. For most people, it’s only about six to eight inches of lift. I tested this theory last week after grabbing a 16oz green juice for $8.99 at Whole Foods. I went home and filmed myself doing the exercise. When I stopped trying to lift my leg so high, the isolation in my gluteus medius was intense. It felt like someone injected hot sauce directly into my muscle. It’s a humbling experience. You have to drop your ego. Nobody cares how high you can lift your leg. They care about results. Keep your torso completely still. Imagine balancing a glass of water on your lower back. If you lift too high, the water spills. Don’t spill the water. You might also like: 20 Gorgeous Garage Home Gym Setup Ideas to Steal Right Now
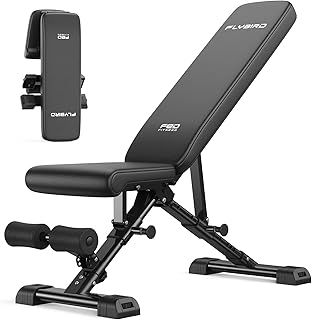
FLYBIRD WB5 Weight Bench
Honestly, FLYBIRD WB5 Weight Bench surprised me — sturdier than it looks in the photos, and over 259 buyers gave it 4.5 stars.
4. Incorporate Fabric Resistance Bands for Your Fire Hydrant Workout

If you want to make your fire hydrant workout significantly harder, you need resistance bands. But don’t use those cheap latex ones. They are garbage. I bought a pack of rubber bands for $9.99 a few years ago. They rolled up my leg, pinched my skin, and ripped out my leg hair. It was excruciating. I threw them straight in the trash. You need fabric resistance bands. They stay put. They don’t roll. They provide consistent tension. For superior glute activation, I highly recommend the Gymreapers Hip Bands. They cost about $19.99. Another great option is the REP Circle Hip Bands set. You get three bands (light, medium, heavy) for around $25. Place the band right above your knees. Not on your knees. Above them. The added tension forces your glutes to work twice as hard just to initiate the movement. Start with the light band. Master the form. Then move up. Don’t jump straight to the heavy band. Your form will break down immediately. You’ll start compensating with your lower back. Stick to the medium band for at least a month before progressing. The fabric texture makes a huge difference in grip against your skin. You might also like: 15 Creative Inside She Sheds Home Gym Setup Ideas to Steal Right Now
5. Progress with Ankle Weights Gradually

Once you can comfortably perform twenty-five bodyweight repetitions with perfect form, it’s time to add weight. Bodyweight alone won’t build muscle forever. You need progressive overload. Introduce ankle weights gradually. Don’t strap five pounds to your leg right away. Your hip flexors will scream at you. Start with lighter options. I personally swear by the Theraband Ankle Weights. You can get them in 1 to 2.5 pounds per ankle. They cost around $24.99. If you want something more stylish, check out Bala Bangles. They range from 1 to 3 pounds and cost about $55 for a pair. I bought the Bala Bangles last year. Honestly, they look great, but they get incredibly sweaty and start smelling like old cheese if you don’t wash them. That’s a small negative, but they function perfectly. I usually wear my 2.5-pound Theraband weights when I do my morning routine. Just last Thursday, I wore them while walking to Sprouts to buy two scoops of bulk whey protein. I looked ridiculous, but my glutes were firing the whole walk. When you use ankle weights, the lever arm changes. The weight is further away from your hip joint. This makes a two-pound weight feel like ten pounds. Keep your movements slow. If you feel any pinching in your knee joint, take the weights off immediately. You might also like: 20 Charming Black Garage Home Gym Setup Ideas Worth Trying This Year
6. Utilize Adjustable Ankle Weights for Progressive Overload

If you’re serious about long-term progression, you need adjustable ankle weights. Buying a new set of fixed weights every month gets expensive. I learned this the hard way. I had a closet full of random one-pound and two-pound weights collecting dust. It was a massive waste of money. Invest in something like the Sportneer Adjustable Ankle Weights. They allow you to vary the resistance from 2 to 10 pounds per ankle in 2-pound increments. They cost around $35.99 on Amazon. This allows for precise progressive overload. You can add just a little bit of weight each week. I love these weights, but I’ve got to admit one flaw. The velcro is incredibly scratchy. If you don’t wear tall socks, it will scrape your ankles raw. I made that mistake last month. I was bleeding by the end of my third set. Now, I always wear thick Nike crew socks. I usually keep my Sportneer weights set at four pounds. It’s the sweet spot for me. Any heavier, and my form starts to get sloppy. Adjustable weights give you the freedom to train anywhere. Just make sure the sandbags are securely fastened inside the pockets before you start lifting.

NICEPEOPLE Adjustable Weight Bench for Home Gym
NICEPEOPLE Adjustable Weight Bench for Home Gym punches above its price — 32 buyers rated it 4.5 stars. I would buy it again.
7. Implement the Fire Hydrant Pulse Variation

If you really want to torture yourself, implement the pulse variation. This is brutal. At the top of your lift, instead of just lowering your leg, perform four to five small, quick pulses upward. It’s a tiny movement. Maybe one or two inches. This drastically increases your time under tension. It completely fatigues the gluteus medius. I tried this for the first time after watching a fitness video. I thought it looked easy. I was horribly mistaken. By the sixth repetition, my glute was shaking uncontrollably. I actually had to drop to the floor and stretch for five minutes. Aim for six to eight repetitions of these pulses per leg. That’s it. You don’t need high volume with this variation. The burn is immediate. I use my Apple Watch (the Series 8, which set me back $399) to time my rest periods between sets. You will need a full sixty seconds of rest after pulsing. The lactic acid buildup is intense. Make sure you don’t lose your core stability during the pulses. It’s easy to let your lower back sag when the pain kicks in. Keep your belly button pulled in tight. If the pain is sharp instead of a dull burn, stop immediately.
8. Try the Standing Fire Hydrant for Advanced Stability

For a massive challenge to your balance, try the standing variation. This engages your core and glute stabilizers intensely. You have to maintain a slight mini-squat on your standing leg while lifting the other leg out to the side. It sounds simple. It’s not. The first time I tried this, I fell over sideways and crashed into my coffee table. I spilled my $4.50 iced latte everywhere. It was a disaster. You need solid footwear for this. I wear my Nike Metcon 8 shoes. They cost $130, but they have a wide, flat heel that anchors you to the floor. Don’t try this in squishy running shoes. Your ankles will wobble all over the place. Stand near a wall or grab a sturdy chair for balance when you first start. I still keep one finger on the wall just in case. The burn in your standing leg will actually be worse than the lifting leg. That’s because the static leg is working overtime to keep you from falling over. Keep your chest tall. Squeeze the glute of your standing leg as hard as you can. I usually do three sets of twelve reps per side. By the end, both of my glutes are completely numb. It’s a fantastic way to build functional hip stability.
9. Focus on the Mind-Muscle Connection

Actively thinking about your muscles might sound like nonsense, but it’s critical. You need to focus on the mind-muscle connection during your workouts. Don’t just go through the motions. Actively think about squeezing your glute muscles as you lift your leg. Sandy Brockman, a well-known CPT, calls glute activation the absolute most important factor for glute growth. This conscious engagement helps reinforce neural pathways. It ensures the target muscles are actually doing the work. I used to just swing my leg and think about what I was going to eat for dinner. I got zero results. Now, I literally poke my own glute with my thumb while I lift my leg. It looks weird, but feeling the muscle contract under my finger forces my brain to connect with it. I started doing this last winter. I was at Walmart buying a $4.99 bag of Dr. Teal’s epsom salts for a bath. My hips were aching from bad form. I realized I wasn’t actually using my glutes at all. If you don’t actively squeeze the glute, other muscles will steal the load. Close your eyes. Visualize the muscle fibers shortening. It takes immense concentration. I can’t listen to podcasts when I do this. I have to listen to heavy instrumental music so I can focus purely on the contraction.

FitinOne Adjustable Folding Weight Bench for Home Gym
FitinOne Adjustable Folding Weight Bench for Home Gym has been one of the most consistently praised picks in this category. 744 reviewers averaged 4.5/5.
10. Integrate Fire Hydrants into Your Warm-Up Routine

You should absolutely integrate this movement into your warm-up routine. Perform one or two sets of fifteen to twenty repetitions per side. Do this before you touch a barbell. It acts as a glute activation drill before heavy compound lifts like squats or deadlifts. It literally wakes up the glutes. It improves their engagement when you start moving real weight. I learned this lesson after a terrible squat session. My knees were caving inward on every rep. My lower back felt tight. I realized my glutes were completely dormant. Now, I never skip my activation drills. I usually drink a scoop of Cellucor C4 pre-workout (it costs about $29.99 for 30 servings). While I wait for the beta-alanine tingles to kick in, I get on the floor and do my hydrants. I did this yesterday at my local gym. The air smelled like chalk dust and stale sweat. I banged out twenty reps per leg. When I finally got under the squat bar, the difference was night and day. My hips felt open. My knees tracked perfectly over my toes. My glutes fired powerfully out of the hole. It felt amazing. Skip the lazy warm-ups. A five-minute jog on the treadmill doesn’t prepare your hips for heavy lifting. You need targeted activation. Keep the reps high and the weight low.
11. Incorporate Fire Hydrants as a Finisher

To completely exhaust your lower body, use this movement as a brutal finisher. After your main workout is over, perform three to five sets of high repetitions. I’m talking twenty to thirty reps per side. Focus purely on muscle endurance. This contributes heavily to hypertrophy and overall glute development. By the time you reach the end of your workout, your glutes are already tired. Hitting them with high-volume isolation work pushes them over the edge. I do this every single leg day. It’s pure agony. Last week, I finished a heavy deadlift session. I was exhausted. I dropped to the floor and did four sets of thirty reps per leg. My legs were shaking so violently I couldn’t even stand up afterward. I had to crawl to my gym bag to grab my recovery drink. I always drink a Fairlife Core Power shake. The 26g protein one costs $3.49 at Target. It tastes like melted ice cream. I sat on the locker room bench for ten minutes just waiting for my legs to stop trembling. That’s the level of intensity you need for a finisher. Don’t use any bands or weights for this. Just use your body weight. The accumulated fatigue is more than enough resistance. Keep your rest periods extremely short. Thirty seconds maximum between sets. If you can walk down the stairs normally after doing this finisher, you didn’t go hard enough. Push through the burn.
Building strong glutes isn’t about fancy machines or lifting massive amounts of weight right away. It’s about mastering the basics. The fire hydrant is a perfect example of a simple movement that delivers incredible results if you actually do it right. I’ve spent years tweaking my form, testing different bands, and making every mistake possible so you don’t have to. Start with your body weight, focus on that deep muscle contraction, and be patient. Trust me on this, your hips and lower back will thank you. If you found this breakdown helpful, I’d highly recommend saving this page. Pin it to your fitness boards on Pinterest so you can pull it up during your next gym session. Now get on the floor and get to work.
Frequently Asked Questions
What muscles does the fire hydrant workout target?
The fire hydrant workout primarily targets the gluteus medius and gluteus minimus. It also heavily engages your core for stability and works your hip abductors, which are crucial for overall lower body strength and mobility.
Why does my lower back hurt during fire hydrants?
Lower back pain during this exercise usually happens because your core isn’t engaged or you’re lifting your leg too high. Arching your back shifts the tension away from your glutes and directly into your lumbar spine.
Should I use resistance bands or ankle weights?
Start with body weight until your form is perfect. Then, progress to fabric resistance bands for better muscle activation. Once you master bands, you can introduce adjustable ankle weights for precise progressive overload.
How many reps should I do for fire hydrants?
For warm-ups, aim for 1-2 sets of 15-20 reps per side. If you’re using them as a burnout finisher at the end of your workout, push for 3-5 sets of 20-30 reps to maximize muscle endurance.
