What’s Inside
- Ditch the Kit Lens for a Fast Prime in Gym Men Photography
- Master the Diagonal “Hollywood” Light Setup
- Dial in Your Shutter Speed for Real Action
- Hack the Muscle Sheen with Cooking Spray
- Use a Telephoto Zoom to Stay Out of the Way
- Force Authentic Movement with Actual Weights
- Bring in Off-Camera Flashes for Serious Definition
- Clean Up Messy Backgrounds with AI Tools
- Cue the Side Chest Pose Correctly for Gym Men Photography
- Bounce the Light When You Can’t Use Flashes
- Capture the Gritty Details Between Sets
- Lock Down a Consistent Editing Preset
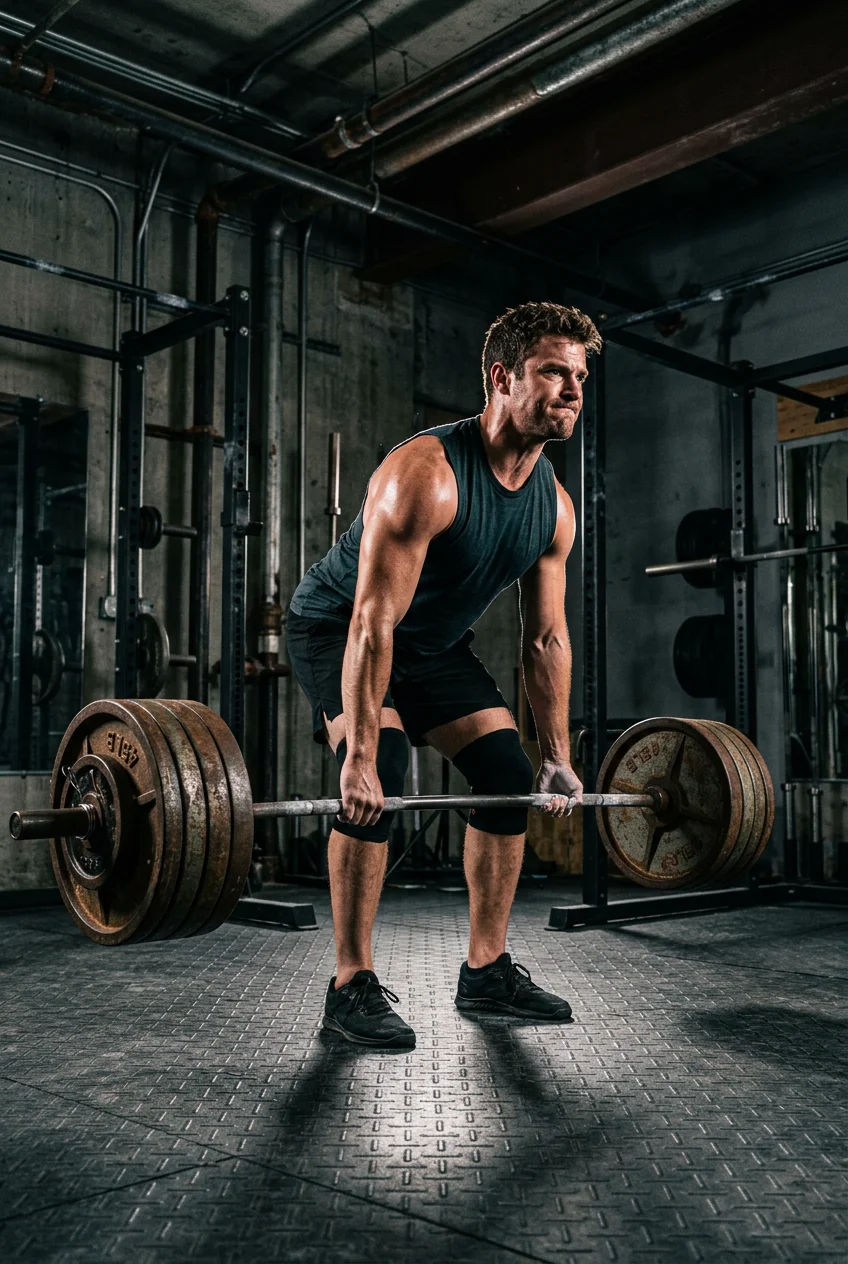
Last Tuesday at the local YMCA, I tried taking some promotional shots for a buddy who just launched his personal training business. It was a complete disaster. The overhead fluorescent lights made him look like a tired accountant instead of a guy who deadlifts 500 pounds, and the yellow walls completely washed out his skin tone. Getting good gym men photography requires a highly specific approach because fitness centers are notoriously awful environments for cameras. Between the mismatched light bulbs, the cluttered backgrounds filled with stray bumper plates, and the fast movement of the exercises, you’re fighting an uphill battle from the moment you walk through the doors.
I’ve spent years taking flat, blurry photos before figuring out how to actually capture muscle definition and real sweat. I tried to fix everything in editing, which only resulted in unnatural, plastic-looking skin. You can’t just point a phone camera at a guy doing bicep curls and expect it to look like a magazine cover. You have to control the light, direct the movement, and know exactly how to frame the shot to emphasize the physique. Let’s break down exactly how to shoot fitness content that actually looks professional, using techniques I learned the hard way after ruining countless photo sessions.
1. Ditch the Kit Lens for a Fast Prime in Gym Men Photography

Most people get this wrong right out of the gate by using the standard zoom lens that came in their camera box. Those lenses usually have a maximum aperture of f/4 or f/5.6, which simply won’t let enough light into the sensor when you’re shooting in a dimly lit basement gym. I struggled with grainy, dark photos for months until I finally bought a Canon 50mm f/1.8 lens. You can usually find these used on eBay or at a local camera shop for around $100, and the f/1.8 aperture completely solves the low-light problem. Trust me on this.
If you have a higher budget, a Sigma 35mm 1.4 Art series lens (around $799) is exceptional for this. Opening your aperture up to f/1.8 or f/1.4 allows significantly more light into the camera, which is crucial when you can’t control the overhead fixtures. More importantly, it creates a shallow depth of field. This gives you that pleasing, blurred background (bokeh) that isolates your subject. When you’re shooting in a crowded gym filled with distracting cable machines and neon signs, blurring out that background clutter is the fastest way to make your subject pop. Just be careful with your focus point. At f/1.4, if you focus on the nose, the eyes might be soft. I always set a single autofocus point directly on the model’s lead eye to ensure the most important part of the face stays razor sharp.
2. Master the Diagonal “Hollywood” Light Setup

If you shoot a fitness model with a light pointed directly at their face, you’re going to erase every single muscle contour they have. Flat lighting destroys definition. I learned this after buying a cheap $35 ring light from Amazon, setting it right in front of my subject, and wondering why his abs completely disappeared in the photo. To sculpt the male physique and create dramatic effects, you need to employ diagonal lighting. Beth Bischoff, a well-known photographer for Men’s Health, frequently uses this technique, often referring to it as “Hollywood light.”
You want to position your primary light source diagonally—from above and to one side—rather than directly facing the model. This angle casts shadows across the muscle bellies, adding deep dimension and highlighting the natural contours of the body. The contrast between the bright highlights on the peak of the muscle and the dark shadows underneath is what makes the physique look three-dimensional on a two-dimensional screen. When I set this up, I usually place the light about 45 degrees to the right of the subject and angle it down at a 45-degree tilt. It takes some tweaking depending on the height of the model, but once you find that sweet spot, the muscle definition practically jumps out of the camera.
3. Dial in Your Shutter Speed for Real Action

There is nothing worse than reviewing your photos after a grueling hour-long shoot only to realize every single action shot is slightly blurry. I ruined an entire batch of kettlebell swing photos last year because my shutter speed was resting at 1/200th of a second. For dynamic action shots that freeze movement—like a heavy deadlift lockout or a box jump—you need to set your camera’s shutter speed to at least 1/500th of a second or faster.
Because you’re forcing the shutter to open and close so quickly, less light hits the sensor. You have to compensate for this. Combine that fast shutter speed with a wide aperture like f/2.8 or f/4 to isolate the subject, and then push your ISO up. Don’t be afraid of high ISO numbers. I regularly adjust my ISO between 800 and 3200 depending on the gym’s lighting. Modern camera sensors handle noise incredibly well, and a slightly grainy photo that is perfectly sharp is always better than a noise-free photo where the subject’s hands are a blurry mess. Pro tip: switch your camera to continuous autofocus (AF-C on Sony/Nikon, AI Servo on Canon) so the lens tracks the subject as they move through the exercise.

FLYBIRD WB3 Weight Bench Fits up to 6’5”
A dependable everyday pick — FLYBIRD WB3 Weight Bench Fits up to 6’5” pulls in 16 ratings at 4.5 stars. Not flashy, just solid.
4. Hack the Muscle Sheen with Cooking Spray

This sounds completely ridiculous, but it’s a staple trick in the fitness industry. Dry skin absorbs light, making muscles look flat and chalky under studio strobes. To get that enhanced, stage-ready muscle definition, you need a healthy sheen that catches the highlights. I used to buy expensive body oils until a bodybuilder friend told me to just use cooking spray. Last week, I grabbed a can of Trader Joe’s Extra Virgin Olive Oil Spray for exactly $3.99, and it works better than the $40 specialty posing oils. You might also like: 20 Lovely Aesthetic Home Morning Workout Routine to Inspire Your Next Project
You just lightly mist the model’s shoulders, chest, and arms before they step into the light. It creates a micro-layer of oil that reflects your light source perfectly, accentuating every single muscle contour. The negative side? It’s sticky, it smells vaguely like a salad dressing, and you absolutely can’t get it on the gym equipment because it creates a slipping hazard. I always make the model stand on a towel while applying it, and I bring a pack of heavy-duty wet wipes to clean their hands before they grip any barbells. Skip the butter-flavored sprays—they leave a weird yellow tint on the skin. Stick to pure olive oil or coconut oil spray. You might also like: 10 Gym Motivation Wallpaper for Every Budget
5. Use a Telephoto Zoom to Stay Out of the Way

When I first started shooting in commercial gyms, I used a 35mm lens for everything. The problem with wide lenses is that you have to stand uncomfortably close to your subject to fill the frame. This not only makes the model feel crowded, but it also distorts their proportions, making their head look massive and their legs look tiny. I eventually saved up and bought a Tamron 70-200mm f/2.8 G Master lens (around $1,199), and it completely changed my workflow. You might also like: 20 Inspiring Outfit Home Workout Ideas That Changed Everything
A 70-200mm telephoto lens is highly recommended for fitness work. It allows you to step back 15 or 20 feet away from the action. This gives the model breathing room to actually perform their sets without a camera shoved in their face. Furthermore, telephoto lenses create a phenomenon called lens compression. They pull the background closer to the subject while completely blurring it out into a smooth wash of color. You can shoot from across the gym floor, isolate your subject through a gap in the squat racks, and completely obscure the guy doing awkward stretches in the background. It’s heavy to carry around for two hours, but the optical quality is unmatched.
6. Force Authentic Movement with Actual Weights

Fake workouts look like fake workouts. If you hand a guy a 10-pound dumbbell and tell him to pretend he’s straining, the photos will look like cheap stock images. The human body reacts differently under actual tension. The veins pop, the neck muscles strain, and the facial expressions tighten organically. I once tried to shoot a core workout using a deflated, lightweight Target medicine ball ($24.99) just for the aesthetic, and the model looked completely bored in every single frame.
Integrate real gym equipment—heavy dumbbells, kettlebells, medicine balls, or loaded barbells—into your shots. Encourage the model to actively engage with the props during genuine exercises. I usually have them do a real set of 10 to 12 reps, and I just hold the shutter down during the last three reps when the fatigue actually sets in. This captures real sweat, focused expressions, and natural body mechanics. Avoid asking for forced smiles. An intense, determined, or even grimacing facial expression almost always works better for extreme workout poses. If they aren’t actually working hard, your camera will expose the lie.

KETTLE GRYP – The Original
If you want something that just works, KETTLE GRYP – The Original – As Seen on SHARK TANK! Converts Your Dumb is a safe bet (13 reviews, 4.5 stars).
7. Bring in Off-Camera Flashes for Serious Definition

Relying solely on whatever fluorescent tubes the gym installed in 2004 is a recipe for muddy, uninspiring photos. To get that gritty, high-contrast look you see in supplement ads, you need to introduce your own light. I currently use a multi-light setup with specific modifiers to control where the light falls. My main workhorse is a Flashpoint Xplor 400 PRO II (which runs about $649). It’s battery-powered, so I don’t have to string extension cords across the gym floor and trip people.
I pair that strobe with a Westcott Apollo Strip Box ($149). A strip box is a long, narrow softbox that restricts the light, creating a tight beam that perfectly highlights the edge of a bicep or the line of a jaw without spilling light all over the messy gym background. A great advanced setup involves using that key light diagonally in front, complemented by two bare rim lights positioned behind the subject on either side. This creates strong white highlights along the edges of the shoulders and traps, physically separating the model from the dark background. The gear is heavy to haul in from the parking lot, but the professional result is undeniable.
8. Clean Up Messy Backgrounds with AI Tools

Commercial gyms are visually chaotic. There are brightly colored foam rollers, warning signs taped to mirrors, and random gym bags thrown on the floor. I used to spend hours in Photoshop manually cloning out water bottles and stray towels. Now, the trending approach involves using AI tools within editing software to selectively remove distractions. Adobe Photoshop’s Generative Fill has completely streamlined my post-processing workflow.
Last month, I had a great shot of a guy doing pull-ups, but there was a dude in a neon green shirt doing tricep extensions right behind him. The neon green completely pulled the viewer’s eye away from my subject. Instead of scrapping the photo, I just lassoed the background guy, typed “remove person and match gym wall” into the AI prompt, and 10 seconds later, he was gone. The AI seamlessly rebuilt the brick wall behind him. You shouldn’t rely on this to fix terrible framing, but using AI to selectively clean up cluttered racks or remove distracting exit signs maintains focus on your subject without requiring a tedious, full background extraction.
9. Cue the Side Chest Pose Correctly for Gym Men Photography

You can have the best lighting and the most expensive camera in the world, but if your subject doesn’t know how to pose, the photo will look awkward. Most guys naturally just stand flat-footed and flex their arms, which actually makes their waist look wide and their shoulders look narrow. Before the photoshoot starts, ensure the model practices key angles like the “Front Double Bicep” or the “Side Chest” in front of a mirror.
The side chest pose requires specific, mechanical cues to look right on camera. I always tell the model to plant their feet, rotate their torso slightly toward the lens, and keep their front elbow tucked tightly into their waist. If the elbow flares out, you lose the line of the obliques. Tell them to pull their shoulders back to expand the chest, and to flex the front bicep at approximately a 90-degree angle to maximize the muscle peak. I learned this the hard way after letting a client pose however he wanted; his arms were fully bent past 90 degrees, which completely flattened out his bicep peak. Give clear, verbal directions for every single limb.
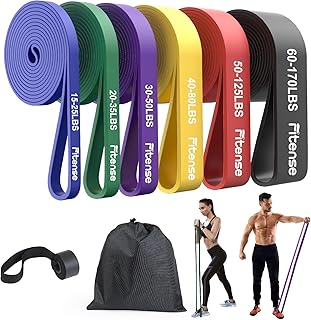
Fitense Resistance Bands Set – Pull Up Bands for Men Women
Honestly, Fitense Resistance Bands Set – Pull Up Bands for Men Women surprised me — sturdier than it looks in the photos, and over 16 buyers gave it 4.5 stars.
10. Bounce the Light When You Can’t Use Flashes

Not every gym will allow you to bring in massive light stands and flashing strobes. Sometimes you have to work with natural light coming through a garage door or a dirty window. In these situations, your biggest enemy is harsh, directional shadows that make the model’s face look hollow. Direct on-camera flash is even worse; it flattens the muscles and creates an ugly, hard shadow on the wall right behind the subject.
Instead, use a large reflector to bounce the available light back onto the model’s unlit side. You don’t even need expensive gear for this. I frequently use a large white foam core board from Walmart (they cost exactly $4.50 in the craft aisle) or even a plain white bed sheet. You just position the white surface out of the frame on the shadow side of the model. It catches the window light and softly bounces it back to fill in the dark shadows under the chin and chest. It creates a much more even and flattering illumination, and the foam board weighs absolutely nothing, making it incredibly easy to carry around a crowded gym floor.
11. Capture the Gritty Details Between Sets

If your entire gallery is just wide shots of a guy holding weights, the final product is going to feel repetitive. You need to build a visual narrative, and that means capturing the small, gritty details that happen between the heavy lifts. After capturing the main poses, I dedicate at least 20 minutes specifically to close-up detail shots. This adds texture and variety to the final album.
I focus my macro lens on chalked hands wrapping around a knurled barbell. I buy bulk blocks of lifting chalk from Sprouts or Costco (usually around $19.99 for a massive box) and have the model heavily dust their hands just for these detail shots. I look for sweat droplets on the forehead, the tight grip on a worn leather weight belt, or the frayed texture of a heavy battle rope. These tight, abstract shots are excellent filler content for Instagram carousels or website backgrounds. They help tell a more complete and engaging story of the workout rather than just showing the physical results of it. Don’t pack up your camera while the model is resting—that’s often when you get the most authentic, exhausted details.
12. Lock Down a Consistent Editing Preset

Your editing style is your digital signature. If you edit one photo with moody, dark shadows and the next photo with bright, airy, over-saturated colors, your portfolio will look like an absolute mess. Inconsistent visual styles damage your credibility as a professional. I spend a lot of time sitting at the Whole Foods coffee bar with my laptop, applying a consistent Lightroom preset across all images from a single shoot to maintain a cohesive brand identity.
When editing gym skin tones, the biggest mistake is pushing the saturation and contrast too high. I see beginners do this constantly to try and force the muscles to look harder. It almost always leads to a terrible “Oompa Loompa” appearance where the skin turns glowing orange. Focus on subtle adjustments. I drop the highlights to recover detail in the sweaty skin, slightly boost the clarity slider (never past +15 or it looks deep-fried), and cool down the color temperature to neutralize those awful yellow gym lights. You want the skin to look natural, just slightly more contrasted than real life. Once you find a balance that works, save it as a preset and apply it as your baseline for every gym shoot moving forward.
Shooting in a gym environment is always going to test your patience. The lighting is terrible, the space is cramped, and you’re constantly dodging people carrying heavy iron. But if you control your lighting, direct the posing with intention, and use the right lenses, you can produce incredible, magazine-quality images in even the dingiest basement gyms. I highly recommend renting a fast prime lens for your next session if you aren’t ready to buy one yet—it will immediately improve your results. Save this guide to your phone or pin it to your photography mood board so you can reference these exact settings and cues during your next fitness shoot.

Trideer Exercise Ball for Yoga, Pilates & Fitness
A dependable everyday pick — Trideer Exercise Ball for Yoga pulls in 529 ratings at 4.5 stars. Not flashy, just solid.
Frequently Asked Questions
What is the best camera lens for gym men photography?
A fast prime lens like a 50mm f/1.8 or a 35mm f/1.4 is ideal. These wide apertures let in crucial light in dim gyms and create a blurred background to hide distracting clutter.
How do you light a male fitness model to show muscle?
Use diagonal, off-camera lighting positioned 45 degrees above and to the side of the subject. This “Hollywood light” casts shadows across muscle bellies, emphasizing depth and definition rather than flattening the physique.
What shutter speed should I use for workout action shots?
Set your shutter speed to at least 1/500th of a second to freeze fast movements like kettlebell swings or box jumps. You’ll need to increase your ISO to compensate for the fast shutter.
How do fitness models get that shiny skin look?
Photographers often use a light mist of standard cooking spray, like olive oil or coconut oil, on the skin. It catches overhead highlights and accentuates muscle contours much cheaper than specialized posing oils.
