What’s Inside
- Nail Down The Right Size For Your Gym Shed Backyard
- Skip The Foam And Get Real Rubber Flooring
- Don’t Suffocate In A Box: Insulation And Airflow
- Integrating Smart Fitness Tech Without Wasting Space
- Strategic Zoning Keeps You Out Of The ER
- Powering Your Gym Shed Backyard Safely
- Consolidate Your Heavy Metal With Multi-Functional Gear
- Build A Dedicated Recovery And Wellness Corner
- Vertical Storage Stops The Clutter And Hazards
- Maintain Your Air Quality And Cleanliness
Three winters ago, I tried deadlifting 405 pounds in my unheated garage while wearing three layers of bulky Costco sweatshirts. The barbell was freezing, the concrete floor was covered in sawdust, and my breath plumed in the frigid air. The bar slipped from my numb hands, I tweaked my lower back, and I realized a freezing, cluttered space wasn’t cutting it. That’s when I decided to build a dedicated gym shed in my backyard. Creating a functional gym shed isn’t just about slapping some cheap foam mats on a sheet of plywood and dragging a rusty bench inside. I learned that the hard way after wasting money on flimsy gear, terrible flooring, and bad electrical layouts that kept tripping my breakers. You’re building a specialized space that needs to handle dropped iron, sweaty summer afternoons, and freezing January mornings. It requires planning, heavy-duty materials, and a smart layout.
I’m Ryan, and I test fitness gear for a living. I’ve spent the last two years perfecting my 12×20 outdoor training sanctuary. I’ve made the expensive mistakes so you don’t have to. Here is exactly how to do it right, down to the subpanels, insulation boards, and floor mats you need to create a professional-grade training environment steps from your back door.
1. Nail Down The Right Size For Your Gym Shed Backyard

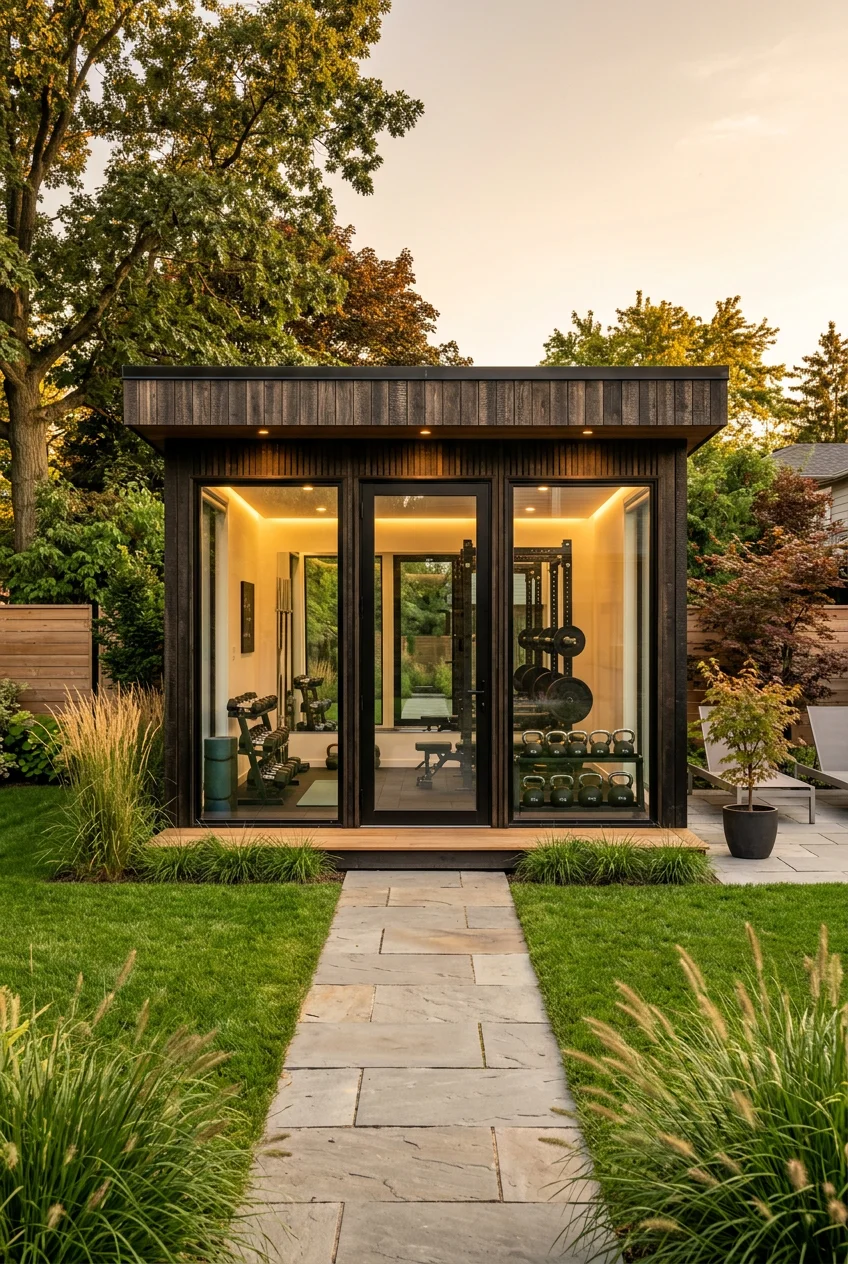
Start with the gravel base. I spent a whole weekend in July digging out a 14×22 foot rectangle in my yard to fit a 12×20 shed. I bought a truckload of crushed stone and rented a compactor from Home Depot for $85 a day. A 12×20 foot shed is exactly the size you want. It gives you 240 square feet, enough for a power rack, a cardio machine, and a small strip for dumbbell work. If you build it yourself, framing it 16-inches on center, materials like treated lumber, siding, paint, and caulk will run you about $7,500. I priced out a pre-built model from Tuff Shed, and they wanted $15,000 for the exact same footprint. I decided to keep that extra $7,500 for equipment.
Expert renovator Jennifer Gizzi points out that a space you actually want to spend time in dictates your consistency. I used a free web tool called Homestyler to map my floor plan before framing the walls. You need a minimum 36-inch pathway between your heavy equipment and the door. I didn’t do this in my first garage setup, and I constantly banged my shins on the bench press uprights just trying to get to the light switch. Plan your footprint around that 36-inch rule. You also need exactly a 4-inch gravel base to ensure proper drainage. If water pools under the floor joists, the wood rots, and your $2,000 treadmill falls straight through the floorboards.
2. Skip The Foam And Get Real Rubber Flooring

I tried cheaping out on flooring when I first started training at home. I bought those interlocking foam puzzle mats from Walmart for $20 a pack. That was a massive mistake. The second I stepped on them with a loaded barbell, the foam compressed straight down to the concrete, and my foot slipped. Foam is useless for lifting. For a hybrid space where you lift and do cardio, you need 8mm thick rubber flooring rolls. The 8mm thickness is about 3/8 of an inch, which provides enough impact absorption for kettlebell swings without feeling squishy under a heavy squat.
I went to Tractor Supply and bought their 4×6 foot horse stall mats. They cost exactly $2.38 per square foot, and they’re indestructible. They have a subtle pebble texture on top that provides excellent grip even when you’re dripping sweat. They do smell strongly of vulcanized rubber for the first month, so leave the doors open. If you want something that doesn’t smell like a tire factory, the Rogue Regupol flooring costs about $5 per square foot and has zero odor right out of the box. If you plan on dropping heavy deadlifts frequently, you need to upgrade your drop zones. I built a dedicated lifting platform using 3/4-inch thick rubber stall mats and a sheet of sanded oak plywood. Hard surfaces like tile or standard hardwood will destroy your joints during high-impact plyometrics, and a dropped 45-pound iron plate will shatter a ceramic tile instantly.
3. Don’t Suffocate In A Box: Insulation And Airflow

Most people build a shed, throw a cheap space heater inside, and call it a day. I did this during my first winter in Ohio, and the walls literally dripped with condensation from my sweat. You have to manage climate control properly. I insulated my walls and floor joists using high-performance PIR boards from Celotex. I bought the 2-inch thick rigid foam boards at Lowe’s for $35 a sheet. For the ceiling, I used Rockwool batts. Rockwool is highly dense and provides excellent soundproofing, which keeps my neighbors happy when I have the stereo cranked at 6 AM. You might also like: 8 Leg Workout Gym for Every Budget
The biggest mistake you can make is insulating without ventilation. If you seal the room entirely, you trap moisture, which leads to toxic black mold and a permanent wet-dog smell. I installed two small mesh wall vents high up on opposite walls to force cross-ventilation. You also need to maintain a 2-inch air gap between your roof insulation and the roof felt to stop rot from forming on the trusses. For actual temperature control, a mini-split heat pump is the only logical choice. I paid an HVAC tech $1,200 to install a 9,000 BTU Pioneer mini-split. Walking into a crisp 68-degree room in August makes me actually want to train. It’s quiet, efficient, and pulls massive amounts of moisture out of the air. You might also like: 15 Beautiful Photoshoot Home Workout Ideas to Steal Right Now
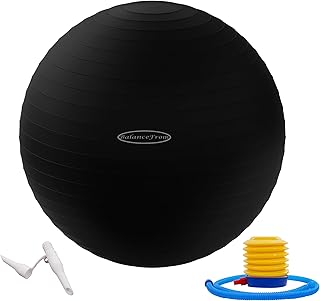
Fitvids Exercise Ball for Fitness, Yoga
Honestly, Fitvids Exercise Ball for Fitness surprised me — sturdier than it looks in the photos, and over 321 buyers gave it 4.5 stars.
4. Integrating Smart Fitness Tech Without Wasting Space

The smart fitness market is exploding, and it makes perfect sense for a small footprint. When you only have 240 square feet, you can’t fit a full line of commercial machines. I tested the Tonal 2 Smart Home Gym last October, and it solves the space issue completely. The unit costs $3,995, and it mounts directly to the wall studs. It uses electromagnetic resistance to provide up to 200 pounds of digital weight. The magnetic resistance feels significantly heavier than standard iron because there’s no momentum at the top of the lift. You might also like: 20 Creative Men Home Workout Ideas You’ll Want to Bookmark
Speediance is another brand making moves in this space with their all-in-one smart concepts. The Speediance Gym Monster runs about $2,699 and doesn’t require wall mounting, which is helpful if you aren’t confident in your shed’s framing. The screen is massive, and the cable ratio feels buttery smooth. These machines track your rep speed, power output, and range of motion automatically. I used to keep a spiral notebook to track my progressive overload, but the AI handles all of that now. The 2026 trend is moving away from bulky single-use machines and toward these adaptive resistance engines. If you buy a Tonal, make sure you reinforce the wall studs during your initial shed build. I had to rip down a sheet of drywall to add horizontal blocking after the fact, which wasted an entire Sunday and fifty bucks in patching supplies.
5. Strategic Zoning Keeps You Out Of The ER

You have to separate your movements into distinct zones. I learned this last Tuesday when I tripped over a foam roller while backing out of a heavy squat. Expert designers recommend dividing your floor plan into three rigid areas: strength, cardio, and mobility. You need a bare minimum of 6-7 feet of lateral space for any barbell movements. A standard Olympic barbell is 7.2 feet long. If you place your power rack too close to a side wall, you won’t be able to slide the 45-pound plates onto the sleeves.
I recommend dedicating 100 to 150 square feet entirely to your power rack and deadlift platform. This gives you room to fail a lift safely. Your cardio equipment should sit near the door or a window for fresh air. Your mobility zone only needs about 60 to 100 square feet. This is where you put your adjustable bench and dumbbells. Keep the free-weight area far away from any inward-swinging doors. A buddy of mine had his dumbbell rack right next to the entrance. His wife opened the door aggressively, the doorknob smashed into a 50-pound hex dumbbell, and it punched a hole straight through the solid wood door. Tape out your zones on the bare plywood floor using blue painter’s tape and walk through the motions empty-handed before you install the heavy rubber mats.
6. Powering Your Gym Shed Backyard Safely

Running an extension cord across the lawn is a massive fire hazard. You’re going to pull serious amperage if you run a treadmill, a mini-split, and lights simultaneously. I hired a licensed electrician to trench a line from my main house panel to the shed using 6-gauge THHN wire. We installed a 60A subpanel, which cost me $850 in labor and materials. If you plan to add a traditional steam sauna later, you should upgrade to a 90A subpanel immediately. Any 240V circuits for heavy heaters must use GFCI breakers.
I run a NordicTrack Commercial 1750 treadmill, which costs $2,499. It has a massive 3.5 CHP motor that will trip a standard shared 15-amp breaker if the air conditioner kicks on at the exact same time. Put the cardio equipment on its own dedicated 20-amp circuit. Lighting is just as critical for safety. You want ambient lighting levels between 300 and 500 lux. I installed six flush-mount tunable LED wafers in the ceiling. I keep them set to 3500K or 4000K, which mimics bright daylight and keeps me alert during heavy sets. I also added a secondary dimmer switch with softer 2700K bulbs directly over the stretching mats. Glaring blue light in your eyes while you do floor stretches at 9 PM will ruin your sleep schedule.
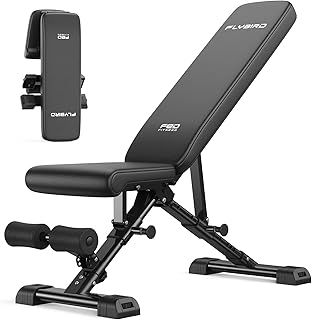
FLYBIRD WB5 Weight Bench
FLYBIRD WB5 Weight Bench punches above its price — 259 buyers rated it 4.5 stars. I would buy it again.
7. Consolidate Your Heavy Metal With Multi-Functional Gear

Space is your most valuable commodity. You can’t fit a standalone leg press, a cable crossover, and a lat pulldown in a backyard structure. You need multi-functional equipment. I replaced three separate machines with the Mikolo M4 2.0 Smith Machine and Functional Trainer combo. It costs $1,299 and occupies just a 6×6 foot footprint. It gives you dual adjustable cable pulleys with a 2:1 ratio, a Smith machine for safe solo lifting, and a multi-grip pull-up bar. The steel is heavy-duty 14-gauge, which feels remarkably stable during heavy lat pull-downs.
For free weights, a massive rack of fixed dumbbells is a terrible idea. A standard 5 to 50-pound dumbbell set requires a 4-foot rack and wastes precious wall space. I bought the REP x Pepin Fast Series adjustable dumbbells instead. They cost $1,000 for the 85-pound set. The knurling on the handles feels exactly like a premium barbell, and the magnetic pin system lets you change weights in three seconds. They sit on two small pedestals, taking up roughly two square feet total. I previously used a cheap set of dial-adjustable dumbbells from Target, but the plastic gears jammed constantly, and the bulky square shape made bicep curls feel awkward. The REP dumbbells feel like traditional round iron weights but save you an entire wall of storage.
8. Build A Dedicated Recovery And Wellness Corner

The 2026 fitness trend heavily emphasizes recovery spaces over pure heavy lifting environments. I used to finish a workout, drink a shake, and immediately go sit at my desk. My hips were permanently locked up. I eventually designated the back left corner of my setup strictly for recovery. I bought a small, one-person infrared sauna for $1,500 online. It runs on a standard 120V outlet and takes up just a 3×3 foot square. Sitting in the red glow of the 140-degree heat for twenty minutes post-workout forces my muscles to relax and drastically reduces next-day soreness.
If you have the budget, products like the Technogym Reform machine are incredible for posture and core strength. The Reform costs $3,450 and brings clinical-level pilates and mobility work into your home. I keep a stack of clean, rolled-up white towels from Costco on a small wooden shelf next to the sauna. I also keep a large glass jar filled with unscented Epsom salts that I buy in bulk from Whole Foods for $6.99 a bag. Having the recovery tools visible and easily accessible means I actually use them. I used to keep my foam rollers buried in a closet, and I never touched them. Now, the dedicated stretching mat and massage gun sit out in the open, forcing me to cool down properly. Trust me on this.
9. Vertical Storage Stops The Clutter And Hazards

A cluttered floor is dangerous. Two years ago, I left a 25-pound iron plate leaning against the wall. I stepped backward with a heavy kettlebell, my heel clipped the plate, and I rolled my ankle so badly I couldn’t squat for a month. You have to utilize vertical wall space for storage. I bought four heavy-duty wall-mounted plate pegs from Titan Fitness for $25 each. I drilled them directly into the wall studs using 3-inch lag screws. The pegs are spaced exactly 18 inches apart, which holds all my bumper plates off the floor, freeing up the perimeter of the room.
For small accessories like resistance bands, jump ropes, and wrist wraps, I use clear plastic storage bins. I grabbed a set of four stackable bins from Target for $14.99. I labeled them with a label maker so I never have to dig around looking for my lifting chalk. I also installed a heavy-duty steel pegboard above my workbench. It holds my collars, fractional plates, and cable attachments. Don’t use standard MDF pegboards from the hardware store. The humidity in an outdoor building will cause the MDF to swell and warp, and the pegs will rip right out of the holes when you hang a heavy lat pulldown bar on them. Stick to powder-coated steel panels.

kisnbld Small Exercise Ball, 9 Inch Mini Pilates Ball
If you want something that just works, kisnbld Small Exercise Ball is a safe bet (22 reviews, 4.5 stars).
10. Maintain Your Air Quality And Cleanliness

Your outdoor gym is exposed to pollen, dust, and dramatic humidity shifts. If you don’t maintain the air quality, the space will smell like a high school locker room within a month. I run a 35-pint GE dehumidifier constantly from May through September. It costs $189 at Walmart, and I ran a continuous drain hose straight through the floor so I never have to empty the bucket. I just pull the filter out and rinse it in the sink every three weeks. Keeping the humidity below 50 percent stops rust from forming on your expensive barbells and prevents mildew on your rubber mats.
I also wipe down all my vinyl benches and cardio screens after every single session. I refuse to use harsh chemical cleaners because the fumes get trapped in the small room. Instead, I make my own cleaning spray using a 50/50 mix of distilled water and white vinegar that I buy for $3.29 a gallon at Kroger. I add ten drops of tea tree essential oil from Sprouts to cut the vinegar smell. It costs about $9.99 for a small bottle, but it lasts a year. I spray this on a microfiber cloth and wipe down the treadmill belt, the dumbbell handles, and the power rack uprights. This simple two-minute habit keeps the room smelling fresh and stops the knurling on my barbells from getting packed with dead skin and chalk.
Building this space completely shifted how I train. I don’t waste twenty minutes driving to a commercial club, I don’t wait for the squat rack, and I don’t deal with broken cable machines. The upfront cost and labor require a serious commitment, but having a private, climate-controlled facility twenty feet from your kitchen is worth every penny. If you plan your electrical capacity correctly, invest in thick rubber flooring, and utilize smart storage, this building will serve you for decades. Don’t rush the foundation or the insulation. Take your time, buy the heavy-duty materials, and build it right the first time. Pin this guide or bookmark it for your planning phase, and start measuring out your yard this weekend.
Frequently Asked Questions
What is the best size for a backyard gym shed?
A 12×20 foot shed is optimal for most home gyms. It provides 240 square feet, giving you enough room for a power rack, a cardio machine, and a dedicated 36-inch walkway so you aren’t tripping over equipment.
Do I need a permit to build a gym shed backyard?
It depends on your local municipality. Many cities allow sheds under 120 or 200 square feet without a permit, but running a 60A electrical trench for your treadmill and mini-split almost always requires an electrical permit and inspection.
What flooring should I use for heavy weightlifting?
Skip foam puzzle mats entirely. You need at least 8mm thick rubber rolls for general fitness, or 3/4-inch vulcanized rubber horse stall mats for heavy deadlifts. This protects your concrete foundation from cracking when you drop iron plates.
How do I control the temperature in an outdoor gym?
You need rigid PIR foam board insulation in the walls, Rockwool in the ceiling, and proper cross-ventilation vents to prevent mold. Pair this with a 9,000 BTU mini-split heat pump to efficiently manage extreme summer heat and winter freezing.
